Canon PowerShot SD770 IS Silver PowerShot SD770 IS / DIGITAL IXUS 85 IS Camera - Page 20
Printing
 |
View all Canon PowerShot SD770 IS Silver manuals
Add to My Manuals
Save this manual to your list of manuals |
Page 20 highlights
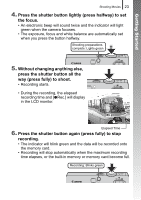
Getting Started 18 Printing Printing Power Button / Buttons Button Mode Switch AV OUT and DIGITAL Terminal Interface Cable 1. Connect the camera to a direct print compatible printer. • Hook your fingernail or the wrist strap toggle under the bottom edge of the camera's terminal cover to open it, then insert the interface cable all the way into the connector. • See the printer's user guide for connection instructions. • Printing is also possible using a non-Canon-brand printer provided the printer is PictBridge compliant. Refer to the Direct Print User Guide for details. 2. Turn on the printer. 3. Set the camera's mode switch to (Playback) and turn on the power. • The button will light blue. 4. Use the or button to select an image to print and press the button. • The button will blink blue and printing will start. • After you finish printing, turn off the camera and the printer and disconnect the interface cable.
-
 1
1 -
2
-
3
-
4
-
5
-
6
-
7
-
8
-
9
-
10
-
11
-
12
-
13
-
14
-
 15
15 -
 16
16 -
 17
17 -
 18
18 -
 19
19 -
 20
20 -
 21
21 -
 22
22 -
 23
23 -
 24
24 -
 25
25 -
26
-
27
-
28
-
29
-
30
-
31
-
32
-
33
-
34
-
35
-
36
-
37
-
38
-
39
-
40
-
41
-
42
-
43
-
44
-
45
-
46
-
47
-
48
-
49
-
50
-
51
-
52
-
53
-
54
-
55
-
56
-
57
-
58
-
59
-
60
-
61
-
62
-
63
-
64
-
65
-
66
-
67
-
68
-
69
-
70
-
71
-
72
-
73
-
74
-
75
-
76
-
77
-
78
-
79
-
80
-
81
-
82
-
83
-
84
-
85
-
86
-
87
-
88
-
89
-
90
-
91
-
92
-
93
-
94
-
95
-
96
-
97
-
98
-
99
-
100
-
101
-
102
-
103
-
104
-
105
-
106
-
107
-
108
-
109
-
110
-
111
-
112
-
113
-
114
-
115
-
116
-
117
-
118
-
119
-
120
-
121
-
122
-
123
-
124
-
125
-
126
-
127
-
128
-
129
-
130
-
131
-
132
-
133
-
134
-
135
-
136
-
137
-
138
-
139
-
140
-
141
-
142
-
143
-
144
-
145
-
146
-
147
-
148
-
149
-
150
-
151
-
152
-
153
-
154
-
155
-
156
-
157
-
158
-
159
-
160
-
161
-
162
-
163
-
164
-
165
-
166
-
167
-
168
-
169
-
170
-
171
-
172
-
173
-
174
-
175
-
176
-
177
-
178
-
179
-
180
-
181
-
182
-
183
-
184
-
185
-
186
-
187
-
188
-
189
-
190
-
191
-
192
-
193
-
194
-
195
-
196
-
197
-
198
-
199
-
200
-
201
-
202
-
203
-
204
-
205
-
206
-
207
-
208
-
209
-
210
-
211
-
212
-
213
-
214
-
215
-
216
-
217
-
218
-
219
-
220
-
221
-
222
-
223
-
224
-
225
-
226
-
227
 |
 |
