Canon PowerShot SD780 IS PowerShot SD780 IS / DIGITAL IXUS 100 IS Camera User - Page 74
Changing the Tone of an Image My Colors - black
 |
View all Canon PowerShot SD780 IS manuals
Add to My Manuals
Save this manual to your list of manuals |
Page 74 highlights
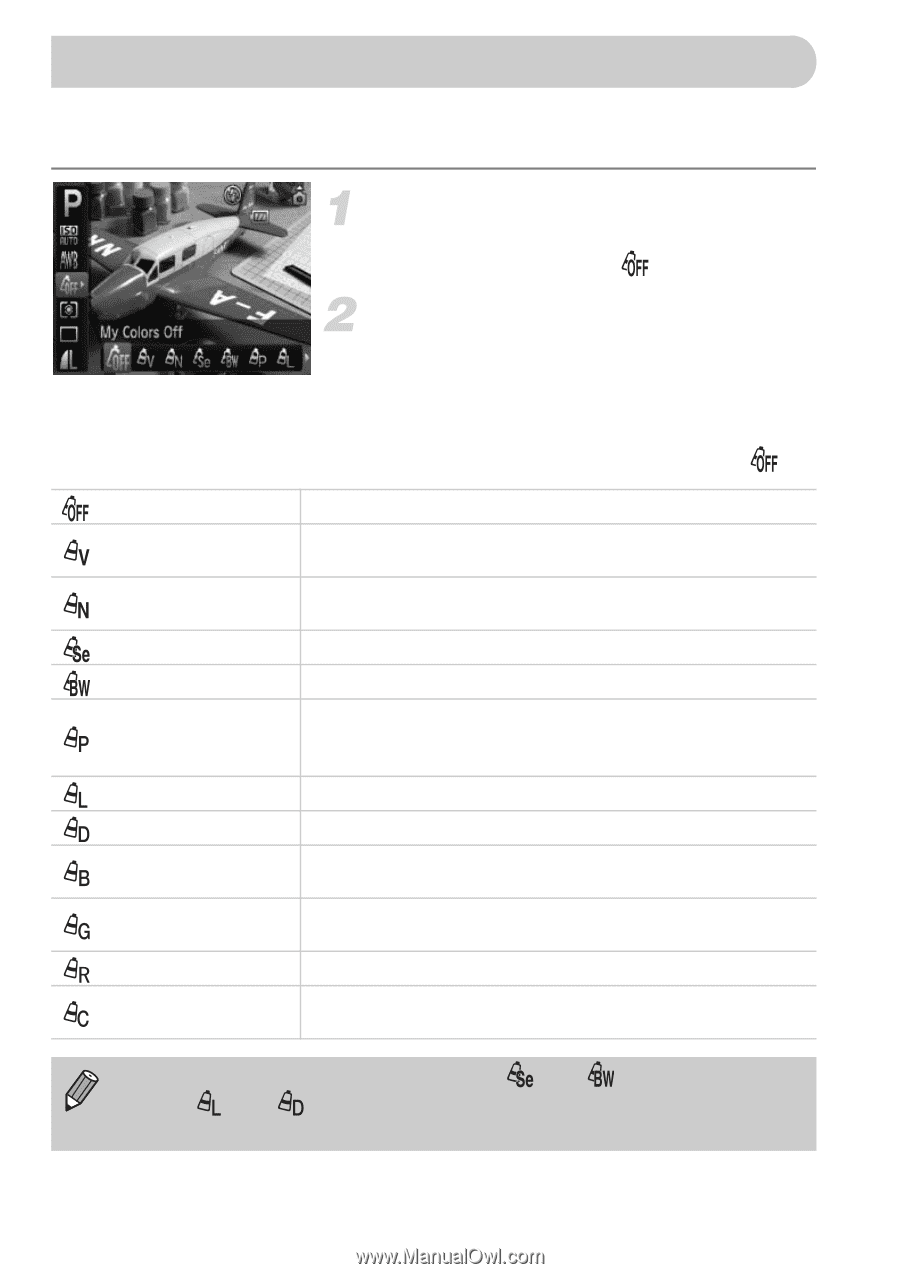
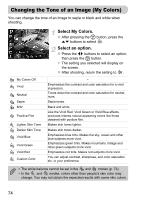
Changing the Tone of an Image (My Colors) You can change the tone of an image to sepia or black and white when shooting. My Colors Off Vivid Neutral Sepia B/W Positive Film Lighter Skin Tone Darker Skin Tone Vivid Blue Vivid Green Vivid Red Custom Color Select My Colors. ● After pressing the m button, press the op buttons to select . Select an option. ● Press the qr buttons to select an option, then press the m button. The setting you selected will display on the screen. ● After shooting, return the setting to . - Emphasizes the contrast and color saturation for a vivid impression. Tones down the contrast and color saturation for neutral hues. Sepia tones. Black and white. Like the Vivid Red, Vivid Green or Vivid Blue effects, produces intense natural appearing colors like those obtained with positive film. Makes skin tones lighter. Makes skin tones darker. Emphasizes blue tints. Makes the sky, ocean and other blue subjects more vivid. Emphasizes green tints. Makes mountains, foliage and other green subjects more vivid. Emphasizes red tints. Makes red subjects more vivid. You can adjust contrast, sharpness, and color saturation etc. to your preference. • The white balance cannot be set in the and modes (p. 73). • In the and modes, colors other than people's skin color may change. You may not obtain the expected results with some skin colors. 74
-
 1
1 -
2
-
3
-
4
-
5
-
6
-
7
-
8
-
9
-
10
-
11
-
12
-
13
-
14
-
15
-
16
-
17
-
18
-
19
-
20
-
21
-
22
-
23
-
24
-
25
-
26
-
27
-
28
-
29
-
30
-
31
-
32
-
33
-
34
-
35
-
36
-
37
-
38
-
39
-
40
-
41
-
42
-
43
-
44
-
45
-
46
-
47
-
48
-
49
-
50
-
51
-
52
-
53
-
54
-
55
-
56
-
57
-
58
-
59
-
60
-
61
-
62
-
63
-
64
-
65
-
66
-
67
-
68
-
 69
69 -
 70
70 -
 71
71 -
 72
72 -
 73
73 -
 74
74 -
 75
75 -
 76
76 -
 77
77 -
 78
78 -
 79
79 -
80
-
81
-
82
-
83
-
84
-
85
-
86
-
87
-
88
-
89
-
90
-
91
-
92
-
93
-
94
-
95
-
96
-
97
-
98
-
99
-
100
-
101
-
102
-
103
-
104
-
105
-
106
-
107
-
108
-
109
-
110
-
111
-
112
-
113
-
114
-
115
-
116
-
117
-
118
-
119
-
120
-
121
-
122
-
123
-
124
-
125
-
126
-
127
-
128
-
129
-
130
-
131
-
132
-
133
-
134
-
135
-
136
-
137
-
138
-
139
-
140
-
141
-
142
-
143
-
144
-
145
-
146
-
147
-
148
-
149
-
150
-
151
-
152
-
153
-
154
-
155
-
156
-
157
-
158
-
159
-
160
-
161
-
162
-
163
-
164
 |
 |