Canon imageCLASS MF7480 imageCLASS MF7400 Series Reference Guide - Page 246
Startup Time Settings
 |
View all Canon imageCLASS MF7480 manuals
Add to My Manuals
Save this manual to your list of manuals |
Page 246 highlights
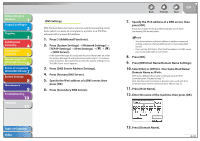
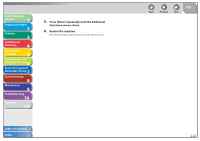
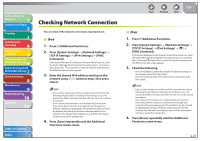
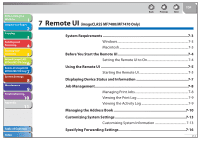
Before Using the Machine 1 Original and Paper 2 Copying 3 Sending and Receiving 4 Printing and Scanning 5 Network (imageCLASS 6 MF7480/MF7470 Only) Remote UI (imageCLASS 7 MF7480/MF7470 Only) System Settings 8 Maintenance 9 Troubleshooting 10 Appendix 11 Table of Contents Index 6. On the IP Address Range Settings screen, select the IP address, the range of IP addresses, or prefix address that is to be permitted or rejected, then press [Permit/Reject]. [Permit]: Allows the access to the machine from the selected IP address, the range of IP addresses, or prefix address. [Reject]: Rejects the access to the machine from the selected IP address, the range of IP addresses, or prefix address. - If you want to delete an IPv6 address or IPv6 address range, select the address or address range on the IP Address Settings screen, press [Erase], then press [Yes] to delete. - If you want to edit an IPv6 address or IPv6 address range, select the address or address range on the IP Address Settings screen, press [Edit], edit the address or address range in the same manner as to register them, then press [OK]. 7. Press [OK]. 8. Press [Done] repeatedly until the Additional Functions screen closes. 9. Restart the machine. Turn off the machine, wait at least 10 seconds, then turn it on. HTTP Settings You can restrict the use of Remote UI. For the setting procedure, see "HTTP Settings," on p. 6-38. Back Previous Next TOP Port Number Settings Depending on your network environment, you can change the port number for each protocol. For the setting procedure, see "Port Number Settings," on p. 6-38. ˙ Startup Time Settings If you connect the machine to a switching hub, it may not be able to connect to a network even though your network settings are set correctly. This occurs because the spanning tree process performed between switching hubs prevents them from communicating with each other immediately after the machine connects to a switching hub. In this case, use the following procedure to delay the startup of network communication. 1. Press (Additional Functions). 2. Press [System Settings] → [Network Settings] → [˝] → [Startup Time Settings]. If the System Manager ID and System Password have been set, enter the System Manager ID and System Password using - (numeric keys), then press (Log In/Out) to enter the System Settings menu. The Startup Time Settings screen appears. 3. Set the time period (0 to 300 seconds) required to delay the startup of network communications for the machine. Press [-], [+] or - (numeric keys) to set the time period. You can enter the value from 0 to 300 (seconds). 4. Press [OK]. 6-45
-
 1
1 -
2
-
3
-
4
-
5
-
6
-
7
-
8
-
9
-
10
-
11
-
12
-
13
-
14
-
15
-
16
-
17
-
18
-
19
-
20
-
21
-
22
-
23
-
24
-
25
-
26
-
27
-
28
-
29
-
30
-
31
-
32
-
33
-
34
-
35
-
36
-
37
-
38
-
39
-
40
-
41
-
42
-
43
-
44
-
45
-
46
-
47
-
48
-
49
-
50
-
51
-
52
-
53
-
54
-
55
-
56
-
57
-
58
-
59
-
60
-
61
-
62
-
63
-
64
-
65
-
66
-
67
-
68
-
69
-
70
-
71
-
72
-
73
-
74
-
75
-
76
-
77
-
78
-
79
-
80
-
81
-
82
-
83
-
84
-
85
-
86
-
87
-
88
-
89
-
90
-
91
-
92
-
93
-
94
-
95
-
96
-
97
-
98
-
99
-
100
-
101
-
102
-
103
-
104
-
105
-
106
-
107
-
108
-
109
-
110
-
111
-
112
-
113
-
114
-
115
-
116
-
117
-
118
-
119
-
120
-
121
-
122
-
123
-
124
-
125
-
126
-
127
-
128
-
129
-
130
-
131
-
132
-
133
-
134
-
135
-
136
-
137
-
138
-
139
-
140
-
141
-
142
-
143
-
144
-
145
-
146
-
147
-
148
-
149
-
150
-
151
-
152
-
153
-
154
-
155
-
156
-
157
-
158
-
159
-
160
-
161
-
162
-
163
-
164
-
165
-
166
-
167
-
168
-
169
-
170
-
171
-
172
-
173
-
174
-
175
-
176
-
177
-
178
-
179
-
180
-
181
-
182
-
183
-
184
-
185
-
186
-
187
-
188
-
189
-
190
-
191
-
192
-
193
-
194
-
195
-
196
-
197
-
198
-
199
-
200
-
201
-
202
-
203
-
204
-
205
-
206
-
207
-
208
-
209
-
210
-
211
-
212
-
213
-
214
-
215
-
216
-
217
-
218
-
219
-
220
-
221
-
222
-
223
-
224
-
225
-
226
-
227
-
228
-
229
-
230
-
231
-
232
-
233
-
234
-
235
-
236
-
237
-
238
-
239
-
240
-
 241
241 -
 242
242 -
 243
243 -
 244
244 -
 245
245 -
 246
246 -
 247
247 -
 248
248 -
 249
249 -
 250
250 -
 251
251 -
252
-
253
-
254
-
255
-
256
-
257
-
258
-
259
-
260
-
261
-
262
-
263
-
264
-
265
-
266
-
267
-
268
-
269
-
270
-
271
-
272
-
273
-
274
-
275
-
276
-
277
-
278
-
279
-
280
-
281
-
282
-
283
-
284
-
285
-
286
-
287
-
288
-
289
-
290
-
291
-
292
-
293
-
294
-
295
-
296
-
297
-
298
-
299
-
300
-
301
-
302
-
303
-
304
-
305
-
306
-
307
-
308
-
309
-
310
-
311
-
312
-
313
-
314
-
315
-
316
-
317
-
318
-
319
-
320
-
321
-
322
-
323
-
324
-
325
-
326
-
327
-
328
-
329
-
330
-
331
-
332
-
333
-
334
-
335
-
336
-
337
-
338
-
339
-
340
-
341
-
342
-
343
-
344
-
345
-
346
-
347
-
348
-
349
-
350
-
351
-
352
-
353
-
354
-
355
-
356
-
357
-
358
-
359
-
360
-
361
-
362
-
363
-
364
-
365
-
366
-
367
-
368
-
369
-
370
-
371
-
372
-
373
-
374
-
375
-
376
-
377
-
378
-
379
-
380
-
381
-
382
-
383
-
384
-
385
-
386
-
387
-
388
-
389
-
390
-
391
-
392
-
393
-
394
-
395
-
396
-
397
-
398
-
399
-
400
-
401
-
402
-
403
-
404
-
405
-
406
-
407
-
408
-
409
-
410
-
411
-
412
-
413
-
414
-
415
-
416
-
417
-
418
-
419
-
420
-
421
-
422
-
423
-
424
-
425
-
426
-
427
-
428
-
429
-
430
-
431
-
432
-
433
-
434
-
435
-
436
-
437
-
438
-
439
-
440
-
441
-
442
-
443
-
444
-
445
-
446
-
447
-
448
-
449
-
450
-
451
-
452
-
453
-
454
-
455
-
456
-
457
-
458
-
459
-
460
-
461
-
462
-
463
-
464
-
465
-
466
-
467
-
468
-
469
-
470
-
471
-
472
-
473
-
474
-
475
-
476
-
477
-
478
-
479
-
480
-
481
-
482
-
483
-
484
 |
 |