Cisco 5510 Getting Started Guide - Page 26
Rack-Mounting the Chassis
 |
UPC - 882658094767
View all Cisco 5510 manuals
Add to My Manuals
Save this manual to your list of manuals |
Page 26 highlights
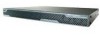
Installing the Chassis Chapter 3 Installing the ASA 5550 Rack-Mounting the Chassis To rack-mount the chassis, perform the following steps: Note You can use the mounting brackets to mount the chassis to the front or the back of the rack, with the front panel or the rear panel of the chassis facing outward. Step 1 Attach the rack-mount brackets to the chassis using the supplied screws. Attach the brackets to the holes as shown in Figure 3-2. After the brackets are secured to the chassis, you can rack-mount it. Figure 3-2 Installing the Right and Left Brackets LNK 3 2 1 153216 Step 2 Attach the chassis to the rack using the supplied screws, as shown in Figure 3-3. Cisco ASA 5500 Series Getting Started Guide 3-4 78-19186-01
-
 1
1 -
2
-
3
-
4
-
5
-
6
-
7
-
8
-
9
-
10
-
11
-
12
-
13
-
14
-
15
-
16
-
17
-
18
-
19
-
20
-
 21
21 -
 22
22 -
 23
23 -
 24
24 -
 25
25 -
 26
26 -
 27
27 -
 28
28 -
 29
29 -
 30
30 -
 31
31 -
32
-
33
-
34
-
35
-
36
-
37
-
38
-
39
-
40
-
41
-
42
-
43
-
44
-
45
-
46
-
47
-
48
-
49
-
50
-
51
-
52
-
53
-
54
-
55
-
56
-
57
-
58
-
59
-
60
-
61
-
62
-
63
-
64
-
65
-
66
-
67
-
68
-
69
-
70
-
71
-
72
-
73
-
74
-
75
-
76
-
77
-
78
-
79
-
80
-
81
-
82
-
83
-
84
-
85
-
86
-
87
-
88
-
89
-
90
-
91
-
92
-
93
-
94
-
95
-
96
-
97
-
98
-
99
-
100
-
101
-
102
-
103
-
104
-
105
-
106
-
107
-
108
-
109
-
110
-
111
-
112
-
113
-
114
-
115
-
116
-
117
-
118
-
119
-
120
-
121
-
122
-
123
-
124
-
125
-
126
-
127
-
128
-
129
-
130
-
131
-
132
-
133
-
134
-
135
-
136
-
137
-
138
-
139
-
140
-
141
-
142
-
143
-
144
-
145
-
146
-
147
-
148
-
149
-
150
-
151
-
152
-
153
-
154
-
155
-
156
-
157
-
158
-
159
-
160
-
161
-
162
-
163
-
164
-
165
-
166
-
167
-
168
-
169
-
170
-
171
-
172
-
173
-
174
-
175
-
176
-
177
-
178
-
179
-
180
-
181
-
182
-
183
-
184
-
185
-
186
-
187
-
188
-
189
-
190
-
191
-
192
-
193
-
194
-
195
-
196
-
197
-
198
-
199
-
200
-
201
-
202
-
203
-
204
-
205
-
206
-
207
-
208
 |
 |

Chapter 3
Installing the ASA 5550
Installing the Chassis
3-4
Cisco ASA 5500 Series Getting Started Guide
78-19186-01
Rack-Mounting the Chassis
To rack-mount the chassis, perform the following steps:
Note
You can use the mounting brackets to mount the chassis to the front or the back
of the rack, with the front panel or the rear panel of the chassis facing outward.
Step 1
Attach the rack-mount brackets to the chassis using the supplied screws. Attach
the brackets to the holes as shown in
Figure 3-2
. After the brackets are secured to
the chassis, you can rack-mount it.
Figure 3-2
Installing the Right and Left Brackets
Step 2
Attach the chassis to the rack using the supplied screws, as shown in
Figure 3-3
.
153216
LNK
1
2
3