Cisco 5510 Getting Started Guide - Page 61
Installing an SSM
 |
UPC - 882658094767
View all Cisco 5510 manuals
Add to My Manuals
Save this manual to your list of manuals |
Page 61 highlights
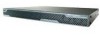
Chapter 5 Installing Optional SSMs Cisco AIP SSM and CSC SSM Figure 5-5 SSM LEDs LINK/ACT SPEED PWR STATUS 119644 12 34 Table 5-5 describes the SSM LEDs. Table 5-5 SSM LEDs LED Color State Description 1 PWR Green On The system has power. 2 STATUS Green Flashing The system is booting. Solid The system has passed power-up diagnostics. 3 LINK/ACT Green Solid There is an Ethernet link. Flashing There is Ethernet activity. 4 SPEED Green 100 MB There is network activity. Amber 1000 MB (GigE) There is network activity. Installing an SSM To install a new SSM, perform the following steps: Step 1 Step 2 Step 3 Power off the adaptive security appliance. Locate the grounding strap from the accessory kit and fasten it to your wrist so that it contacts your bare skin. Attach the other end to the chassis. Remove the two screws (as shown in Figure 5-6) at the left rear end of the chassis, and remove the slot cover. 78-19186-01 Cisco ASA 5500 Series Getting Started Guide 5-9
-
 1
1 -
2
-
3
-
4
-
5
-
6
-
7
-
8
-
9
-
10
-
11
-
12
-
13
-
14
-
15
-
16
-
17
-
18
-
19
-
20
-
21
-
22
-
23
-
24
-
25
-
26
-
27
-
28
-
29
-
30
-
31
-
32
-
33
-
34
-
35
-
36
-
37
-
38
-
39
-
40
-
41
-
42
-
43
-
44
-
45
-
46
-
47
-
48
-
49
-
50
-
51
-
52
-
53
-
54
-
55
-
 56
56 -
 57
57 -
 58
58 -
 59
59 -
 60
60 -
 61
61 -
 62
62 -
 63
63 -
 64
64 -
 65
65 -
 66
66 -
67
-
68
-
69
-
70
-
71
-
72
-
73
-
74
-
75
-
76
-
77
-
78
-
79
-
80
-
81
-
82
-
83
-
84
-
85
-
86
-
87
-
88
-
89
-
90
-
91
-
92
-
93
-
94
-
95
-
96
-
97
-
98
-
99
-
100
-
101
-
102
-
103
-
104
-
105
-
106
-
107
-
108
-
109
-
110
-
111
-
112
-
113
-
114
-
115
-
116
-
117
-
118
-
119
-
120
-
121
-
122
-
123
-
124
-
125
-
126
-
127
-
128
-
129
-
130
-
131
-
132
-
133
-
134
-
135
-
136
-
137
-
138
-
139
-
140
-
141
-
142
-
143
-
144
-
145
-
146
-
147
-
148
-
149
-
150
-
151
-
152
-
153
-
154
-
155
-
156
-
157
-
158
-
159
-
160
-
161
-
162
-
163
-
164
-
165
-
166
-
167
-
168
-
169
-
170
-
171
-
172
-
173
-
174
-
175
-
176
-
177
-
178
-
179
-
180
-
181
-
182
-
183
-
184
-
185
-
186
-
187
-
188
-
189
-
190
-
191
-
192
-
193
-
194
-
195
-
196
-
197
-
198
-
199
-
200
-
201
-
202
-
203
-
204
-
205
-
206
-
207
-
208
 |
 |
