Cisco AIR-AP1210 Hardware Installation Guide - Page 35
Obtaining and Assigning an IP Address, Connecting to the Access Point Locally
 |
UPC - 746320804330
View all Cisco AIR-AP1210 manuals
Add to My Manuals
Save this manual to your list of manuals |
Page 35 highlights
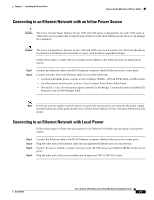
Chapter 3 Configuring the Access Point for the First Time Obtaining and Assigning an IP Address Obtaining and Assigning an IP Address To browse to the access point's Express Setup page, you must either obtain or assign the access point's IP address using one of the following methods: • Connect to the access point console port and assign a static IP address. Follow the steps in the "Connecting to the Access Point Locally" section on page 3-3 to connect to the console port. • Use a DHCP server (if available) to automatically assign an IP address. You can find out the DHCP-assigned IP address using one of the following methods: - Connect to the access point console port and use the show ip interface brief command to display the IP address. Follow the steps in the "Connecting to the Access Point Locally" section on page 3-3 to connect to the console port. - Provide your organization's network administrator with your access point's Media Access Control (MAC) address. Your network administrator will query the DHCP server using the MAC address to identify the IP address. The access point's MAC address is on label attached to the bottom of the access point. - Use the Cisco IP Setup Utility (IPSU) to identify the assigned address. You can also use IPSU to assign an IP address to the access point if it did not receive an IP address from the DHCP server. IPSU runs on most Microsoft Windows operating systems: Windows 9x, 2000, Me, NT, and XP. For information on IPSU, refer to "Using the IP Setup Utility" section on page 3-9. Connecting to the Access Point Locally If you need to configure the access point locally (without connecting the access point to a wired LAN), you can connect a PC to its console port using a DB-9 to RJ-45 serial cable. Follow these steps to open the CLI by connecting to the access point console port: Step 1 Connect a nine-pin, female DB-9 to RJ-45 serial cable to the RJ-45 serial port on the access point and to the COM port on a computer. Figure 3-1 shows the serial port connection. Figure 3-1 Connecting the Serial Cable 74005 DB-9 to RJ-45 serial cable RJ-45 serial connector OL-4310-01 Cisco Aironet 1200 Series Access Point Hardware Installation Guide 3-3
-
 1
1 -
2
-
3
-
4
-
5
-
6
-
7
-
8
-
9
-
10
-
11
-
12
-
13
-
14
-
15
-
16
-
17
-
18
-
19
-
20
-
21
-
22
-
23
-
24
-
25
-
26
-
27
-
28
-
29
-
 30
30 -
 31
31 -
 32
32 -
 33
33 -
 34
34 -
 35
35 -
 36
36 -
 37
37 -
 38
38 -
 39
39 -
 40
40 -
41
-
42
-
43
-
44
-
45
-
46
-
47
-
48
-
49
-
50
-
51
-
52
-
53
-
54
-
55
-
56
-
57
-
58
-
59
-
60
-
61
-
62
-
63
-
64
-
65
-
66
-
67
-
68
-
69
-
70
-
71
-
72
-
73
-
74
-
75
-
76
-
77
-
78
-
79
-
80
-
81
-
82
-
83
-
84
-
85
-
86
-
87
-
88
-
89
-
90
-
91
-
92
-
93
-
94
-
95
-
96
-
97
-
98
-
99
-
100
-
101
-
102
-
103
-
104
-
105
-
106
-
107
-
108
-
109
-
110
-
111
-
112
-
113
-
114
-
115
-
116
-
117
-
118
-
119
-
120
-
121
-
122
-
123
-
124
-
125
-
126
-
127
-
128
 |
 |
