Cisco WBPN User Guide - Page 12
Installing the WBPN Wireless-N Bridge for Phone Adapters, Windows 7 IPv4 - default ip
 |
View all Cisco WBPN manuals
Add to My Manuals
Save this manual to your list of manuals |
Page 12 highlights
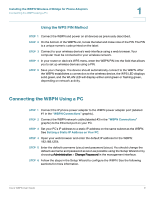
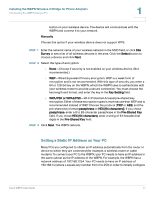
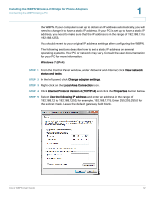
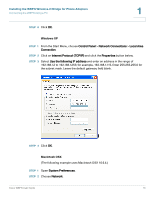
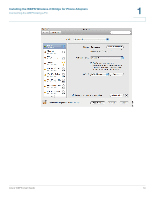
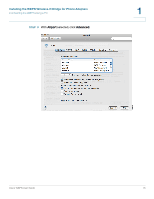
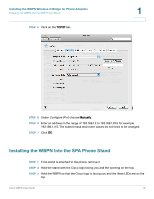
Installing the WBPN Wireless-N Bridge for Phone Adapters Connecting the WBPN Using a PC 1 the WBPN. If your computer is set up to obtain an IP address automatically, you will need to change it to have a static IP address. If your PC is set up to have a static IP address, you need to make sure that the IP address is in the range of 192.168.1.1 to 192.168.1.253. You should revert to your original IP address settings after configuring the WBPN. The following sections describe how to set a static IP address on several operating systems. Your PC or network may vary. Consult the user documentation for your PC for more information. Windows 7 (IPv4) STEP 1 From the Control Panel window, under Network and Internet, click View network status and tasks. STEP 2 In the left panel, click Change adapter settings. STEP 3 Right-click on the Local Area Connection icon. STEP 4 Click Internet Protocol Version 4 (TCP/IPv4) and click the Properties button below. STEP 5 Select Use the following IP address and enter an address in the range of 192.168.1.2 to 192.168.1.253; for example, 192.168.1.115. Enter 255.255.255.0 for the subnet mask. Leave the default gateway field blank. Cisco WBPN User Guide 12
-
 1
1 -
2
-
3
-
4
-
5
-
6
-
 7
7 -
 8
8 -
 9
9 -
 10
10 -
 11
11 -
 12
12 -
 13
13 -
 14
14 -
 15
15 -
 16
16 -
 17
17 -
18
-
19
-
20
-
21
-
22
-
23
-
24
-
25
-
26
-
27
-
28
-
29
-
30
-
31
-
32
-
33
 |
 |