Cisco WBPN User Guide - Page 8
Connecting the WBPN Using WPS, Using the WPS Push Button Method - wireless n bridge
 |
View all Cisco WBPN manuals
Add to My Manuals
Save this manual to your list of manuals |
Page 8 highlights
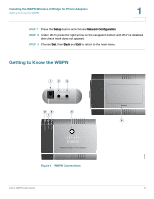
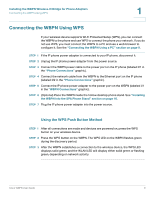
Installing the WBPN Wireless-N Bridge for Phone Adapters Connecting the WBPN Using WPS 1 Connecting the WBPN Using WPS If your wireless device supports Wi-Fi Protected Setup (WPS), you can connect the WBPN to the phone and use WPS to connect the phone your network. If you do not use WPS, you must connect the WBPN to a PC and use a web browser to configure it. See the "Connecting the WBPN Using a PC" section on page 9. STEP 1 If the IP phone power adapter is connected to your IP phone, disconnect it. STEP 2 Unplug the IP phone power adapter from the power source. STEP 3 Connect the WBPN power cable to the power port on the IP phone (labeled #1 in the "Phone Connections" graphic). STEP 4 Connect the network cable from the WBPN to the Ethernet port on the IP phone (labeled #2 in the "Phone Connections" graphic). STEP 5 Connect the IP phone power adapter to the power port on the WBPN (labeled #1 in the "WBPN Connections" graphic). STEP 6 (Optional) Place the WBPN inside the hollow desktop phone stand. See "Installing the WBPN Into the SPA Phone Stand" section on page 16. STEP 7 Plug the IP phone power adapter into the power source. Using the WPS Push Button Method STEP 1 After all connections are made and devices are powered on, press the WPS button on your wireless device. STEP 2 Press the WPS button on the WBPN. The WPS LED on the WBPN flashes green during the discovery period. STEP 3 After the WBPN establishes a connection to the wireless device, the WPS LED displays solid green, and the WLAN LED will display either solid green or flashing green, depending on network activity. Cisco WBPN User Guide 8
-
 1
1 -
2
-
 3
3 -
 4
4 -
 5
5 -
 6
6 -
 7
7 -
 8
8 -
 9
9 -
 10
10 -
 11
11 -
 12
12 -
 13
13 -
14
-
15
-
16
-
17
-
18
-
19
-
20
-
21
-
22
-
23
-
24
-
25
-
26
-
27
-
28
-
29
-
30
-
31
-
32
-
33
 |
 |