Cisco WRV200 User Guide - Page 17
Setup > Advanced Routing, Gateway, Router, Enabled, Delete This, Entry, LAN & Wireless, Internet - wireless router
 |
UPC - 745883570577
View all Cisco WRV200 manuals
Add to My Manuals
Save this manual to your list of manuals |
Page 17 highlights
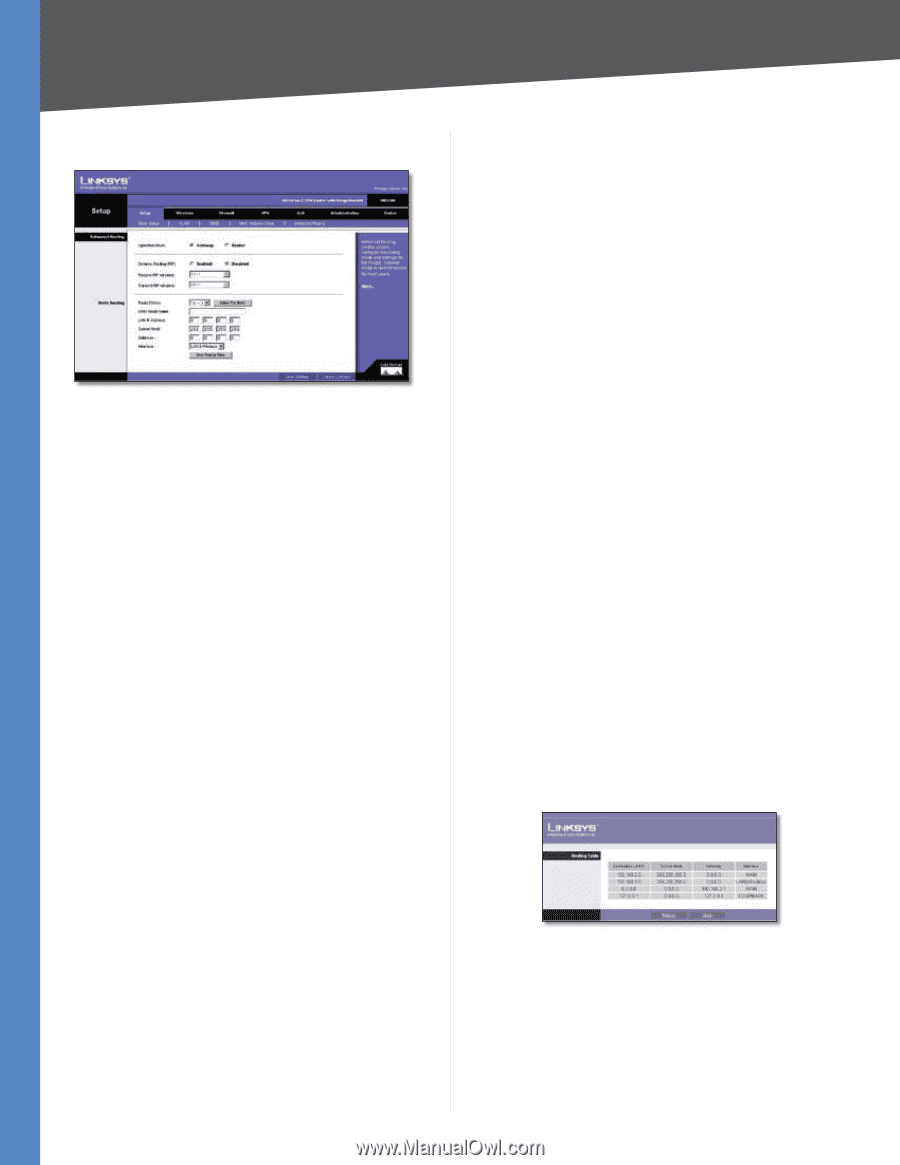
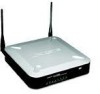
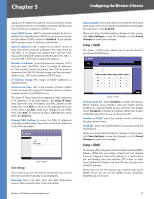
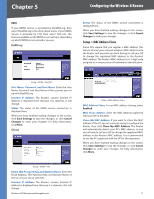
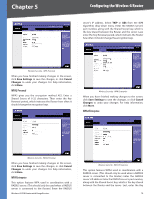
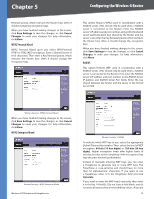
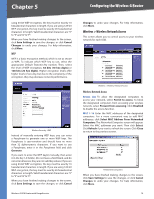
Chapter 5 Configuring the Wireless-G Router Setup > Advanced Routing Setup > Advanced Routing The Setup > Advanced Routing screen allows you to configure the dynamic and static routing settings. Operation Mode Select Gateway or Router from the drop-down menu. If this Router is hosting your network's connection to the Internet, keep the default, Gateway, which will also enable NAT. If you have a different router hosting your Internet connection, then select Router. Dynamic Routing With Dynamic Routing you can enable the Router to automatically adjust to physical changes in the network's layout. The Router, using the RIP protocol, determines the network packets' route based on the fewest number of hops between the source and the destination. The RIP protocol regularly broadcasts routing information to other routers on the network. Dynamic Routing (RIP) To use dynamic routing, click the Enabled radio button. Receive RIP Versions To use dynamic routing for reception of network data, select the protocol you want: RIPv1 or RIPv2. Transmit RIP Versions To use dynamic routing for transmission of network data, select the protocol you want: RIPv1 or RIPv2. Static Routing If the Router is connected to more than one network, you can configure static routes to direct packets to the destination network (A static route is a pre-determined pathway that a packet must travel to reach a specific host or network.) To create a static route, change the following settings: Route Entries Select the number of the static route from the drop-down menu. The Router supports up to 5 static route entries. Wireless-G VPN Router with RangeBooster Delete This Entry If you need to delete a route, select its number from the drop-down menu, and click Delete This Entry. Enter Router Name Enter the name of your Router. LAN IP Address The LAN IP Address is the address of the remote network or host to which you want to assign a static route. Enter the IP address of the host for which you wish to create a static route. If you are building a route to an entire network, be sure that the network portion of the IP address is set to 0. For example, the Router's standard IP address is 192.168.1.1. Based on this address, the address of the routed network is 192.168.1, with the last digit determining the Router's place on the network. Therefore you would enter the IP address 192.168.1.0 if you wanted to route to the Router's entire network, rather than just to the Router. Subnet Mask The Subnet Mask (also known as the Network Mask) determines which portion of an IP address is the network portion, and which portion is the host portion. Take, for example, a network in which the Subnet Mask is 255.255.255.0. This determines (by using the values 255) that the first three numbers of a network IP address identify this particular network, while the last digit (from 1 to 254) identifies the specific host. Gateway Enter the IP address of the gateway device that allows for contact between the Router and the remote network or host. Interface Select LAN & Wireless or Internet, depending on the location of the static route's final destination. Show Routing Table Click the Show Routing Table button to open a screen displaying how packets are routed through your local network. For each route, the Destination LAN IP address, Subnet Mask, Gateway, and Interface are displayed. Click Refresh to update the information. Click Close to exit this screen. Setup > Advanced Routing When you have finished making changes to the screen, click Save Settings to save the changes, or click Cancel Changes to undo your changes. For help information, click More. 12
-
 1
1 -
2
-
3
-
4
-
5
-
6
-
7
-
8
-
9
-
10
-
11
-
 12
12 -
 13
13 -
 14
14 -
 15
15 -
 16
16 -
 17
17 -
 18
18 -
 19
19 -
 20
20 -
 21
21 -
 22
22 -
23
-
24
-
25
-
26
-
27
-
28
-
29
-
30
-
31
-
32
-
33
-
34
-
35
-
36
-
37
-
38
-
39
-
40
-
41
-
42
-
43
-
44
-
45
-
46
-
47
-
48
-
49
-
50
-
51
-
52
-
53
-
54
-
55
-
56
-
57
-
58
-
59
-
60
-
61
-
62
-
63
-
64
-
65
-
66
-
67
-
68
-
69
-
70
-
71
-
72
 |
 |