Cisco WVC80N User Guide - Page 24
Appendix A: Troubleshooting, Common Problems and Solutions
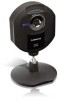 |
View all Cisco WVC80N manuals
Add to My Manuals
Save this manual to your list of manuals |
Page 24 highlights
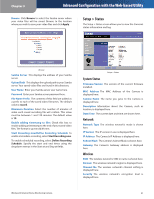
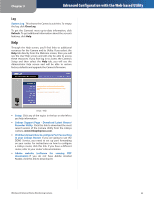
Appendix A Appendix A: Troubleshooting This appendix consists of two parts: "Common Problems and Solutions" and "Frequently Asked Questions." This appendix provides solutions to problems that may occur during the installation and operation of the Wireless-N Internet Home Monitoring Camera. Read the description below to solve your problems. If you can't find an answer here, check the Linksys website at www.linksysbycisco.com. Common Problems and Solutions I can't view the Camera's video using Internet Explorer. Make sure the OCX plug-in was correctly installed. If you're not sure, re-install the plug-in by following these instructions •• On the Welcome screen of the Camera's Webbased Utility, click View Video. •• A screen mentioning a security warning about an OCX plug-in will appear. Click Yes to allow the plug-in to be installed. •• You should then be able to view the Camera's streaming video. If you still cannot view the video, make sure you have the rights to install the plug-in in your PC's Internet Explorer. If not, log into your computer as an administrator and install the plug-in. Then you can check if the OCX plug-in has been installed. Follow these instructions: •• From Internet Explorer, go to Tools and Internet Options. •• On the General screen, click Settings under Temporary Internet files. •• Click View Objects. You should see a file named NetCamPlayerWeb Control installed. The OCX plug-in is installed in Internet Explorer, but I cannot view any video. Make sure Microsoft Internet Explorer 5.5 or higher is installed. Then delete the OCX plug-in by following these instructions: •• From Internet Explorer, go to Tools and Internet Options. •• On the General screen, click Settings under Temporary Internet files. •• Click View Objects. •• You should see a file named NetCamPlayerWeb Control installed. Delete this file from the list. Wireless-N Internet Home Monitoring Camera Troubleshooting •• The next time you click View Video from the web browser, you will be prompted to re-install the OCX plug-in. When powering on the Camera, I can't immediately access the Camera from my computer. Make sure the Camera's LED is continuously lit. When it is flashing, the Camera is initializing. I'm not able to play my recording video files. Make sure you have Microsoft Windows Media Player 7 or higher. If you don't, you can download the latest version from www.microsoft.com. I have two Cameras and see two WVC80Ns listed in my Camera Utility. When I click to view both Cameras, I see the video of only one Camera. Make sure that the Cameras have different camera or device names. You can change this by using the Webbased Utility or running the Setup Wizard. If you use the Web-based Utility, log in and click the Setup tab. Then on the Basic screen, change the Camera Name. When I view video remotely via the Internet, the video is very slow. Video performance is greatly affected by your Internet connection speed. You can lower the Camera's image quality to speed up the video. Through the Camera's Web-based Utility, click the Setup and Image tabs, and then lower the image quality on the Image screen. I cannot access the Setup tab of the Camera's Web-based Utility. Make sure you have administrator rights. Only an administrator can change the Camera's settings. I want to access the Camera when I'm away from home, but somehow I can't connect. If your network uses a dynamic IP address supplied by your ISP, then the IP address you use to reach the Camera will change as well. You need to use the TZO DDNS Service, so you can access the Camera using its domain name while the service keeps track of the IP address changes. To set up a Dynamic Domain Name Service (DDNS) account, click the Setup tab of the Camera's Web-based Utility, then click the Options tab. Then configure the settings in the DDNS section of the screen. Important: To allow remote access to the Camera, you will also have to use the port forwarding feature on your network router. 23
-
 1
1 -
2
-
3
-
4
-
5
-
6
-
7
-
8
-
9
-
10
-
11
-
12
-
13
-
14
-
15
-
16
-
17
-
18
-
 19
19 -
 20
20 -
 21
21 -
 22
22 -
 23
23 -
 24
24 -
 25
25 -
 26
26 -
 27
27 -
 28
28 -
 29
29 -
30
-
31
-
32
-
33
-
34
-
35
-
36
-
37
-
38
-
39
-
40
-
41
-
42
-
43
-
44
-
45
-
46
-
47
-
48
-
49
-
50
-
51
-
52
-
53
-
54
-
55
-
56
-
57
-
58
-
59
-
60
-
61
-
62
-
63
-
64
-
65
-
66
 |
 |