Cisco WVC80N User Guide - Page 5
Product Overview, Front Panel, Bottom Panel, Back Panel - password
 |
View all Cisco WVC80N manuals
Add to My Manuals
Save this manual to your list of manuals |
Page 5 highlights
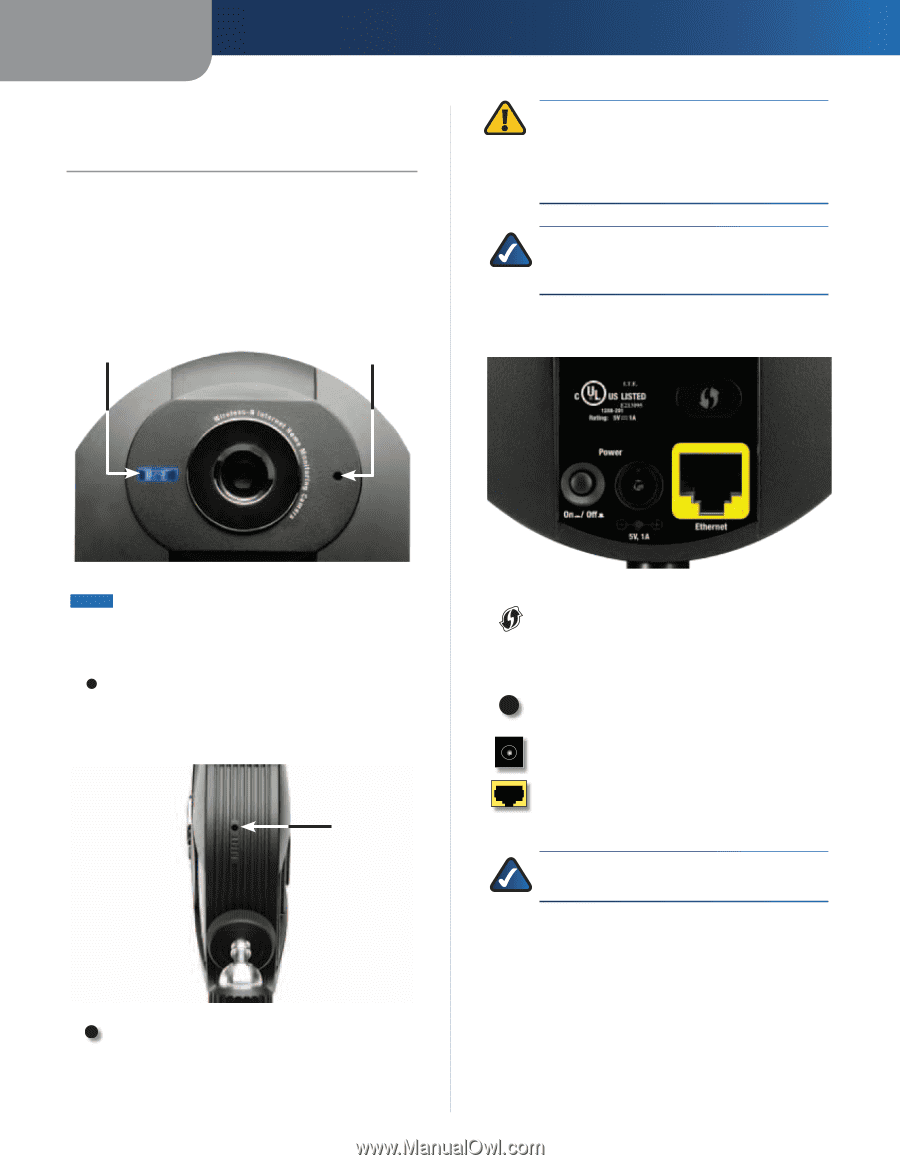
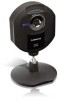
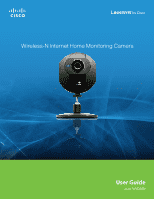
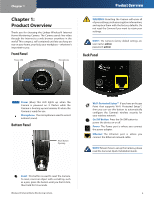
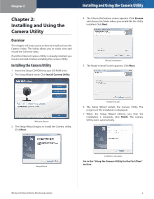
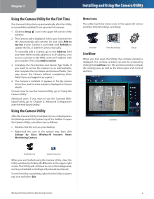
Chapter 1 Chapter 1: Product Overview Thank you for choosing the Linksys Wireless-N Internet Home Monitoring Camera. The Camera sends live video through the Internet to a web browser anywhere in the world! This compact, self-contained unit lets you keep an eye on your home, your kids, your workplace-whatever's important to you. Front Panel Power LED Microphone Product Overview WARNING: Resetting the Camera will erase all of your settings, such as encryption information, and replace them with the factory defaults. Do not reset the Camera if you want to retain your settings. NOTE: The Camera's factory default settings are. user name: admin password: admin Back Panel Power (Blue) This LED lights up when the Camera is powered on. It flashes while the Camera is booting up and remains lit when the Camera is ready for use. Microphone The microphone is used to record ambient sound. Bottom Panel Reset Button Opening Wi-Fi Protected Setup™ If you have an Access Point that supports Wi-Fi Protected Setup™, then you can use this button to automatically configure the Camera's wireless security for your wireless network. On/Off Button Press the On/Off button to power the device on or off. Power The Power port is where you connect the power adapter. Ethernet The Ethernet port is where you connect the Ethernet network cable. NOTE: To learn how to set up the Camera, please read the Camera's Quick Installation Guide. Reset This button is used to reset the Camera. To reset, insert an object with a small tip, such as a pen, press the button until you feel it click, then hold for 10 seconds. Wireless-N Internet Home Monitoring Camera 4
-
 1
1 -
 2
2 -
 3
3 -
 4
4 -
 5
5 -
 6
6 -
 7
7 -
 8
8 -
 9
9 -
 10
10 -
 11
11 -
12
-
13
-
14
-
15
-
16
-
17
-
18
-
19
-
20
-
21
-
22
-
23
-
24
-
25
-
26
-
27
-
28
-
29
-
30
-
31
-
32
-
33
-
34
-
35
-
36
-
37
-
38
-
39
-
40
-
41
-
42
-
43
-
44
-
45
-
46
-
47
-
48
-
49
-
50
-
51
-
52
-
53
-
54
-
55
-
56
-
57
-
58
-
59
-
60
-
61
-
62
-
63
-
64
-
65
-
66
 |
 |