Cisco WVC80N User Guide - Page 7
Using the Camera Utility for the First Time, Using the Camera Utility, LiveView - windows 7
 |
View all Cisco WVC80N manuals
Add to My Manuals
Save this manual to your list of manuals |
Page 7 highlights
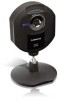
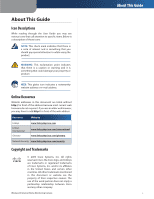
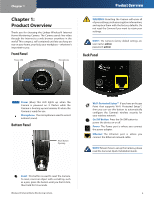
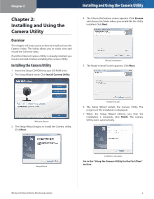
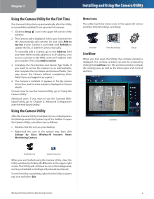
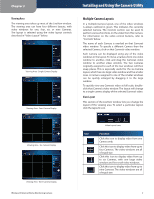
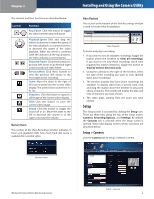
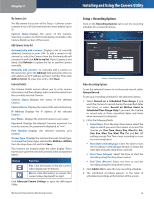
Chapter 2 Using the Camera Utility for the First Time The Camera Utility starts up automatically after the Utility is successfully installed. To set up your first camera: 1. Click the Setup icon in the upper left corner of the window. 2. The Cameras tab is displayed. Select your Camera from the Automatically add cameras list and click Add to my list. If your Camera is not listed, click Refresh to update the list, or add the Camera manually. To manually add a Camera, go to the Address field and enter either its web address or its IP address, or to access a camera on the WAN, enter its IP address with port number. Then click Add to my list. 3. Complete the Port Number and Stream Type fields. If you want to access the Camera as an administrator, also complete the User Name and Password fields. (You may access the Camera without completing these fields if you are logged in as a guest.) 4. The Camera is installed. It appears in the My camera list section, and its video output is displayed in Camera details. To learn how to use the Camera Utility, go to "Using the Camera Utility." Advanced users: If you want to use the Camera's Webbased Utility, go to "Chapter 3: Advanced Configuration with the Web-Based Utility." Using the Camera Utility After the Camera Utility is installed, its icon is displayed on the Desktop and in the System Tray of the Taskbar. To open the Camera Utility, use either icon as follows: •• Double-click the icon on your desktop •• Right-click the icon in the system tray, then click Linksys by Cisco Wireless-N Internet Home Monitoring Camera. Installing and Using the Camera Utility Menu Icons The utility has three menu icons in the upper left corner: LiveView, View Recordings, and Setup. LiveView View Recordings Setup LiveView When you first open the Utility, the LiveView window is displayed. The LiveView window can also be accessed by clicking the LiveView icon. The LiveView window contains the viewing area, as well as the View Layout and Controls sections. LiveView Desktop Icon System Tray Icon When you are finished using the Camera Utility, close the Utility window by clicking the X button in the upper-right corner. The Utility will continue to run in the background, and any scheduled recordings will proceed as planned. To exit the Utility completely, right-click the Utility's system tray icon and select Exit. Wireless-N Internet Home Monitoring Camera 6
-
 1
1 -
 2
2 -
 3
3 -
 4
4 -
 5
5 -
 6
6 -
 7
7 -
 8
8 -
 9
9 -
 10
10 -
 11
11 -
 12
12 -
13
-
14
-
15
-
16
-
17
-
18
-
19
-
20
-
21
-
22
-
23
-
24
-
25
-
26
-
27
-
28
-
29
-
30
-
31
-
32
-
33
-
34
-
35
-
36
-
37
-
38
-
39
-
40
-
41
-
42
-
43
-
44
-
45
-
46
-
47
-
48
-
49
-
50
-
51
-
52
-
53
-
54
-
55
-
56
-
57
-
58
-
59
-
60
-
61
-
62
-
63
-
64
-
65
-
66
 |
 |