Compaq Armada e500 Compaq Armada E500 Series Reference Guide - Page 110
Removing a Memory Expansion Board
 |
View all Compaq Armada e500 manuals
Add to My Manuals
Save this manual to your list of manuals |
Page 110 highlights
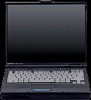
Removing a Memory Expansion Board 1. Shut down and turn off the computer. Disconnect any external cables. 2. Remove the security screw from the bottom of the computer. 1 3. Release the keyboard by successively inserting a paper clip or similar instrument into the four keyboard releases . ! WARNING: To reduce the risk of personal injury from hot surfaces, allow the internal system components to cool before touching them. 2 4. Lift the keyboard . ! WARNING: To reduce the risk of electrical shock, fire, or damage to the equipment, do not turn on the computer or reconnect any external cables during this procedure. 11-4 Upgrading the Computer
-
 1
1 -
2
-
3
-
4
-
5
-
6
-
7
-
8
-
9
-
10
-
11
-
12
-
13
-
14
-
15
-
16
-
17
-
18
-
19
-
20
-
21
-
22
-
23
-
24
-
25
-
26
-
27
-
28
-
29
-
30
-
31
-
32
-
33
-
34
-
35
-
36
-
37
-
38
-
39
-
40
-
41
-
42
-
43
-
44
-
45
-
46
-
47
-
48
-
49
-
50
-
51
-
52
-
53
-
54
-
55
-
56
-
57
-
58
-
59
-
60
-
61
-
62
-
63
-
64
-
65
-
66
-
67
-
68
-
69
-
70
-
71
-
72
-
73
-
74
-
75
-
76
-
77
-
78
-
79
-
80
-
81
-
82
-
83
-
84
-
85
-
86
-
87
-
88
-
89
-
90
-
91
-
92
-
93
-
94
-
95
-
96
-
97
-
98
-
99
-
100
-
101
-
102
-
103
-
104
-
 105
105 -
 106
106 -
 107
107 -
 108
108 -
 109
109 -
 110
110 -
 111
111 -
 112
112 -
 113
113 -
 114
114 -
 115
115 -
116
-
117
-
118
-
119
-
120
-
121
-
122
-
123
-
124
-
125
-
126
-
127
-
128
-
129
-
130
-
131
-
132
-
133
-
134
-
135
-
136
-
137
-
138
-
139
-
140
-
141
-
142
-
143
-
144
-
145
-
146
-
147
-
148
-
149
-
150
-
151
-
152
-
153
-
154
-
155
-
156
-
157
-
158
-
159
-
160
-
161
-
162
-
163
-
164
-
165
-
166
-
167
-
168
-
169
-
170
-
171
-
172
-
173
-
174
-
175
-
176
-
177
-
178
-
179
-
180
-
181
-
182
-
183
-
184
-
185
-
186
-
187
-
188
-
189
-
190
-
191
-
192
-
193
-
194
-
195
-
196
-
197
-
198
-
199
-
200
-
201
-
202
-
203
-
204
-
205
 |
 |

11-4
Upgrading the Computer
Removing a Memory Expansion Board
1. Shut down and turn off the computer. Disconnect any external
cables.
2.
Remove the security screw from the bottom of the
computer.
3. Release the keyboard by successively inserting a paper clip or
similar instrument into the four keyboard releases
.
!
WARNING:
To reduce the risk of personal injury from hot surfaces,
allow the internal system components to cool before touching them.
4. Lift the keyboard
.
!
WARNING:
To reduce the risk of electrical shock, fire, or damage to
the equipment, do not turn on the computer or reconnect any
external cables during this procedure.