Craftsman 24838 Operation Manual - Page 27
Howto, Stop Your, Snow Thrower
 |
View all Craftsman 24838 manuals
Add to My Manuals
Save this manual to your list of manuals |
Page 27 highlights
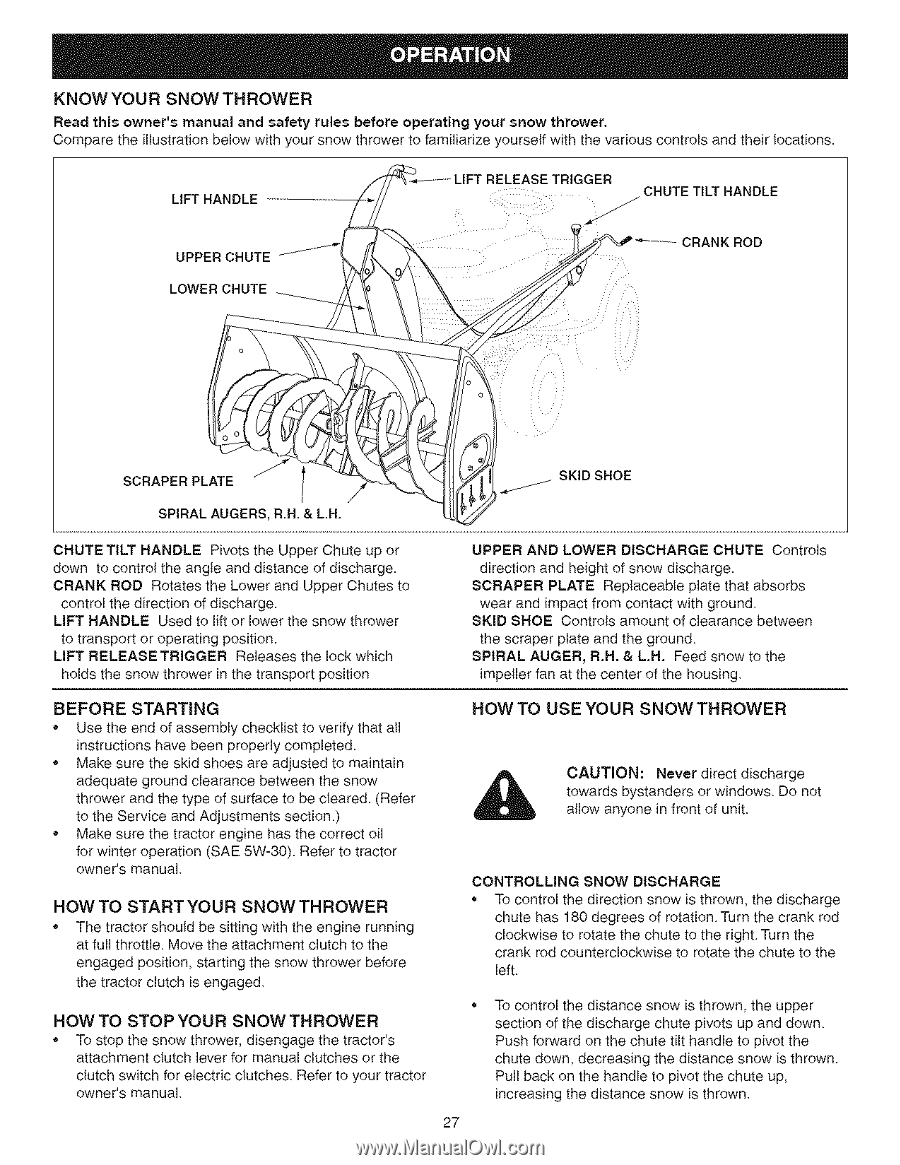
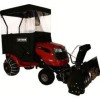
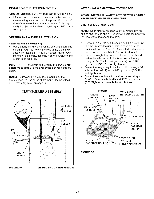
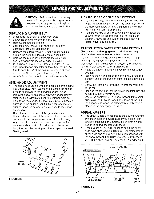
KNOW YOUR SNOW THROWER Read this owner's manual and safety rules before operating your snow thrower. Compare the illustration below with your snow thrower to familiarize yourself with the various controls and their locations. LIFT HANDLE UPPER CHUTE _f'_" LOWERCHUTE _ -- LIFT RELEASE TRIGGER CHUTE TILT HANDLE 3RANK ROD f SCRAPER PLATE /j SPIRAL AUGERS, R.H.& L.H. SKID SHOE CHUTETILT HANDLE Pivots the Upper Chute up or down to control the angle and distance of discharge. CRANK ROD Rotates the Lower and Upper Chutes to control the direction of discharge. LiFT HANDLE Used to lift or lower the snow thrower to transport or operating position. LIFT RELEASETRIGGER Releases the lock which holds the snow thrower in the transport position UPPER AND LOWER DISCHARGE CHUTE Controls direction and height of snow discharge. SCRAPER PLATE Replaceable plate that absorbs wear and impact from contact with ground SKID SHOE Controls amount of clearance between the scraper plate and the ground SPIRAL AUGER, R.H. & L.H. Feed snow to the impeller fan at the center of the housing BEFORE STARTING * Use the end of assembly checklist to verify that all instructions have been properly completed. Make sure the skid shoes are adjusted to maintain adequate ground clearance between the snow thrower and the type of surface to be cleared. (Refer to the Service and Adjustments section ) * Make sure the tractor engine has the correct oil for winter operation (SAE 5W-30). Refer to tractor owneCs manual HOWTO STARTYOUR SNOWTHROWER * The tractor should be sitting with the engine running at full throttle Move the attachment dutch to the engaged position, starting the snow thrower before the tractor clutch is engaged HOWTO STOP YOUR SNOW THROWER * To stop the snow thrower, disengage the tractor's attachment cEutch ]ever for manual clutches or the clutch switch for electdc clutches Refer to your tractor owner's manual HOW TO USE YOUR SNOW THROWER CAUTION: Never direct discharge towards bystanders or windows Do not allow anyone in front of unit. CONTROLLING SNOW DISCHARGE To control the direction snow is thrown, the discharge chute has 180 degrees of rotation Turn the crank rod clockwise to rotate the chute to the right Turn the crank md counterclockwise to rotate the chute to the left. To control the distance snow is thrown, the upper section of the discharge chute pivots up and down Push forward on the chute tilt handle to pivot the chute down, decreasing the distance snow is thrown. Pull back on the handle to pivot the chute up, increasing the distance snow is thrown 27
-
 1
1 -
2
-
3
-
4
-
5
-
6
-
7
-
8
-
9
-
10
-
11
-
12
-
13
-
14
-
15
-
16
-
17
-
18
-
19
-
20
-
21
-
 22
22 -
 23
23 -
 24
24 -
 25
25 -
 26
26 -
 27
27 -
 28
28 -
 29
29 -
 30
30 -
 31
31 -
 32
32 -
33
-
34
-
35
-
36
-
37
-
38
-
39
-
40
 |
 |