D-Link DI-804 Product Manual - Page 10
Hardware Installation
 |
UPC - 790069250361
View all D-Link DI-804 manuals
Add to My Manuals
Save this manual to your list of manuals |
Page 10 highlights
Instructions for Use of Stacking Brackets First, make sure you have one pair of stacking brackets for each device. Next, slide one bracket onto each end of the device as shown in the diagram below. Be sure each bracket is positioned correctly. Note when clicking each bracket into place, the round feet on the bottom of the device will line up with the round holes on the bracket. The brackets are designed to fit snuggly in place. Please do not force them. The brackets are now ready for stacking devices. See the diagram below. Hardware Installation Placement The Broadband Router should be placed in a safe and secure location. To ensure proper operation, please keep the unit away from water and other damaging elements. 10
-
 1
1 -
2
-
3
-
4
-
 5
5 -
 6
6 -
 7
7 -
 8
8 -
 9
9 -
 10
10 -
 11
11 -
 12
12 -
 13
13 -
 14
14 -
 15
15 -
16
-
17
-
18
-
19
-
20
-
21
-
22
-
23
-
24
-
25
-
26
-
27
-
28
-
29
-
30
-
31
-
32
-
33
-
34
-
35
-
36
-
37
-
38
-
39
-
40
-
41
-
42
-
43
-
44
-
45
-
46
-
47
-
48
-
49
-
50
-
51
-
52
-
53
-
54
-
55
-
56
-
57
-
58
-
59
 |
 |
10
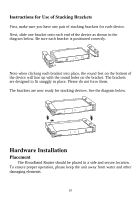
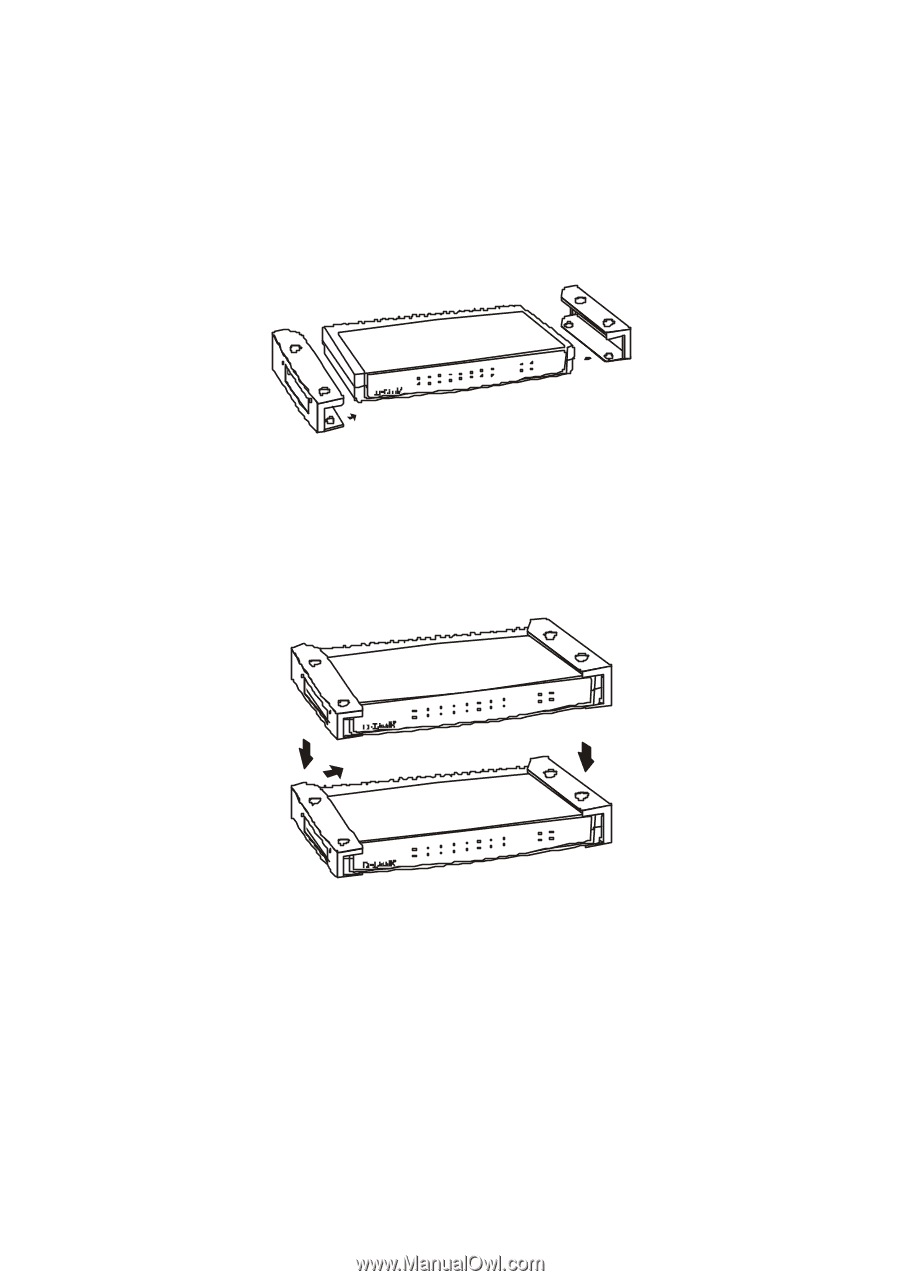
Instructions for Use of Stacking Brackets
First, make sure you have one pair of stacking brackets for each device.
Next, slide one bracket onto each end of the device as shown in the
diagram below. Be sure each bracket is positioned correctly.
Note when clicking each bracket into place, the round feet on the bottom of
the device will line up with the round holes on the bracket. The brackets
are designed to fit snuggly in place. Please do not force them.
The brackets are now ready for stacking devices. See the diagram below.
Hardware Installation
Placement
The Broadband Router should be placed in a safe and secure location.
To ensure proper operation, please keep the unit away from water and other
damaging elements.