D-Link DWL-3600AP Users Manual - Page 19
Installing the UAP
 |
View all D-Link DWL-3600AP manuals
Add to My Manuals
Save this manual to your list of manuals |
Page 19 highlights
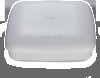
Unified Access Point Administrator's Guide Installing the UAP Installing the UAP To access the Administration Web UI, you enter the IP address of the AP into a Web browser. You can use the default IP address of the AP (10.90.90.91) to log on to the AP and assign a static IP address, or you can use a DHCP server on you network to assign network information to the AP. The DHCP client on the AP is enabled by default. To install the UAP, use the following steps: 1. Connect the AP to an administrative PC by using a LAN connection or a direct‐cable connection. • To use a LAN connection, connect one end of an Ethernet cable to the network port on the access point and the other end to the same hub where your PC is connected, as shown in the following figure. The hub or switch you use must permit broadcast signals from the access point to reach all other devices on the network. • To use a direct‐cable connection, connect one end of an Ethernet straight‐through or crossover cable to the network port on the access point and the other end of the cable to the Ethernet port on the PC, as shown in the following figure. You can also use a serial cable to connect the serial port on the AP to a serial port on the administrative computer. For initial configuration with a direct Ethernet connection and no DHCP server, be sure to set your PC to a static IP address in the same subnet as the default IP address on the access point. (The default IP address for the access point is 10.90.90.91.) If you use this method, you will need to reconfigure the cabling for subsequent startup and deployment of the access point so that the access point is no longer connected directly to the PC but instead is connected to the LAN (either by using a hub or directly). D-Link November 2011 Unified Access Point Administrator's Guide Page 19
-
 1
1 -
2
-
3
-
4
-
5
-
6
-
7
-
8
-
9
-
10
-
11
-
12
-
13
-
 14
14 -
 15
15 -
 16
16 -
 17
17 -
 18
18 -
 19
19 -
 20
20 -
 21
21 -
 22
22 -
 23
23 -
 24
24 -
25
-
26
-
27
-
28
-
29
-
30
-
31
-
32
-
33
-
34
-
35
-
36
-
37
-
38
-
39
-
40
-
41
-
42
-
43
-
44
-
45
-
46
-
47
-
48
-
49
-
50
-
51
-
52
-
53
-
54
-
55
-
56
-
57
-
58
-
59
-
60
-
61
-
62
-
63
-
64
-
65
-
66
-
67
-
68
-
69
-
70
-
71
-
72
-
73
-
74
-
75
-
76
-
77
-
78
-
79
-
80
-
81
-
82
-
83
-
84
-
85
-
86
-
87
-
88
-
89
-
90
-
91
-
92
-
93
-
94
-
95
-
96
-
97
-
98
-
99
-
100
-
101
-
102
-
103
-
104
-
105
-
106
-
107
-
108
-
109
-
110
-
111
-
112
-
113
-
114
-
115
-
116
-
117
-
118
-
119
-
120
-
121
-
122
-
123
-
124
-
125
-
126
-
127
-
128
-
129
-
130
-
131
-
132
-
133
-
134
-
135
-
136
-
137
-
138
-
139
-
140
-
141
-
142
-
143
-
144
-
145
-
146
-
147
-
148
-
149
-
150
-
151
-
152
-
153
-
154
-
155
-
156
-
157
-
158
-
159
-
160
-
161
-
162
-
163
-
164
-
165
-
166
-
167
-
168
-
169
-
170
-
171
-
172
-
173
-
174
-
175
-
176
-
177
-
178
-
179
-
180
-
181
-
182
-
183
 |
 |
