Dell 962 All In One Photo Printer Dell™ Photo Printer 540 Owner's Ma - Page 26
Printing From a Computer, USB connector, to PC - driver
 |
View all Dell 962 All In One Photo Printer manuals
Add to My Manuals
Save this manual to your list of manuals |
Page 26 highlights
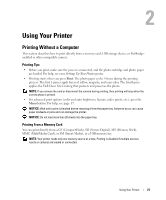
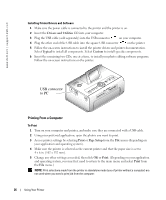
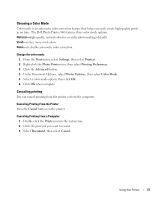
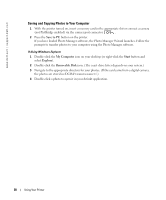
www.dell.com | support.dell.com Installing Printer Drivers and Software 1 Make sure the power cable is connected to the printer and the printer is on. 2 Insert the Drivers and Utilities CD into your computer. 3 Plug the USB cable (sold separately) into the USB connector on your computer. 4 Plug the other end of the USB cable into the square USB connector on the printer. 5 Follow the on-screen instructions to install the printer drivers and printer documentation. Select Typical to install all components. Select Custom to install specific components. 6 Insert the remaining two CDs, one at a time, to install your photo editing software programs. Follow the on-screen instructions on the printer. USB connector to PC Printing From a Computer To Print 1 Turn on your computer and printer, and make sure they are connected with a USB cable. 2 Using your preferred application, open the photos you want to print. 3 Access printer settings by selecting Print or Page Setup from the File menu (depending on your application and operating system). 4 Make sure the printer is selected as the current printer and that the paper size is set to 4 x 6 in. (102 x 152 mm). 5 Change any other settings as needed, then click OK or Print. (Depending on your application and operating system, you may first need to return to the main menu and select Print from the File menu.) NOTE: Print selections made from the printer in standalone mode (use of printer without a computer) are not used when you send a print job from the computer. 26 Using Your Printer
-
 1
1 -
2
-
3
-
4
-
5
-
6
-
7
-
8
-
9
-
10
-
11
-
12
-
13
-
14
-
15
-
16
-
17
-
18
-
19
-
20
-
 21
21 -
 22
22 -
 23
23 -
 24
24 -
 25
25 -
 26
26 -
 27
27 -
 28
28 -
 29
29 -
 30
30 -
 31
31 -
32
-
33
-
34
-
35
-
36
-
37
-
38
-
39
-
40
-
41
-
42
-
43
-
44
-
45
-
46
-
47
-
48
-
49
-
50
-
51
-
52
-
53
-
54
-
55
-
56
-
57
-
58
-
59
-
60
-
61
-
62
-
63
-
64
-
65
-
66
-
67
-
68
-
69
-
70
-
71
-
72
-
73
-
74
-
75
-
76
 |
 |