Dell Dimension 4100 Dell Dimension 4100 System Solutions Guide - Page 54
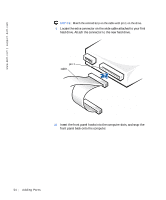
Insert the front panel hooks into the computer slots, and snap
 |
View all Dell Dimension 4100 manuals
Add to My Manuals
Save this manual to your list of manuals |
Page 54 highlights
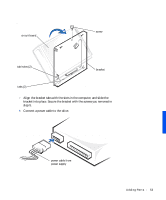
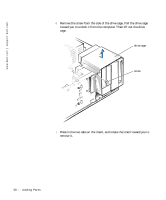
www.dell.com | support.dell.com NOTICE: Match the colored strip on the cable with pin 1 on the drive. 9 Locate the extra connector on the wide cable attached to your first hard drive. Attach the connector to the new hard drive. pin 1 cable 10 Insert the front panel hooks into the computer slots, and snap the front panel back onto the computer. 54 Adding Parts
-
 1
1 -
2
-
3
-
4
-
5
-
6
-
7
-
8
-
9
-
10
-
11
-
12
-
13
-
14
-
15
-
16
-
17
-
18
-
19
-
20
-
21
-
22
-
23
-
24
-
25
-
26
-
27
-
28
-
29
-
30
-
31
-
32
-
33
-
34
-
35
-
36
-
37
-
38
-
39
-
40
-
41
-
42
-
43
-
44
-
45
-
46
-
47
-
48
-
 49
49 -
 50
50 -
 51
51 -
 52
52 -
 53
53 -
 54
54 -
 55
55 -
 56
56 -
 57
57 -
 58
58 -
 59
59 -
60
-
61
-
62
-
63
-
64
-
65
-
66
-
67
-
68
-
69
-
70
-
71
-
72
-
73
-
74
-
75
-
76
-
77
-
78
-
79
-
80
-
81
-
82
-
83
-
84
-
85
-
86
-
87
-
88
-
89
-
90
-
91
-
92
-
93
-
94
-
95
-
96
-
97
-
98
-
99
-
100
-
101
-
102
 |
 |

54
Adding Parts
www.dell.com | support.dell.com
NOTICE:
Match the colored strip on the cable with pin 1 on the drive.
9
Locate the extra connector on the wide cable attached to your first
hard drive. Attach the connector to the new hard drive.
10
Insert the front panel hooks into the computer slots, and snap the
front panel back onto the computer.
cable
pin 1