Dell Dimension XPS P60 MT Desktop Manual - Page 43
into place., Connect the power and data cables if applicable.
 |
View all Dell Dimension XPS P60 MT manuals
Add to My Manuals
Save this manual to your list of manuals |
Page 43 highlights
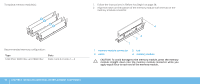
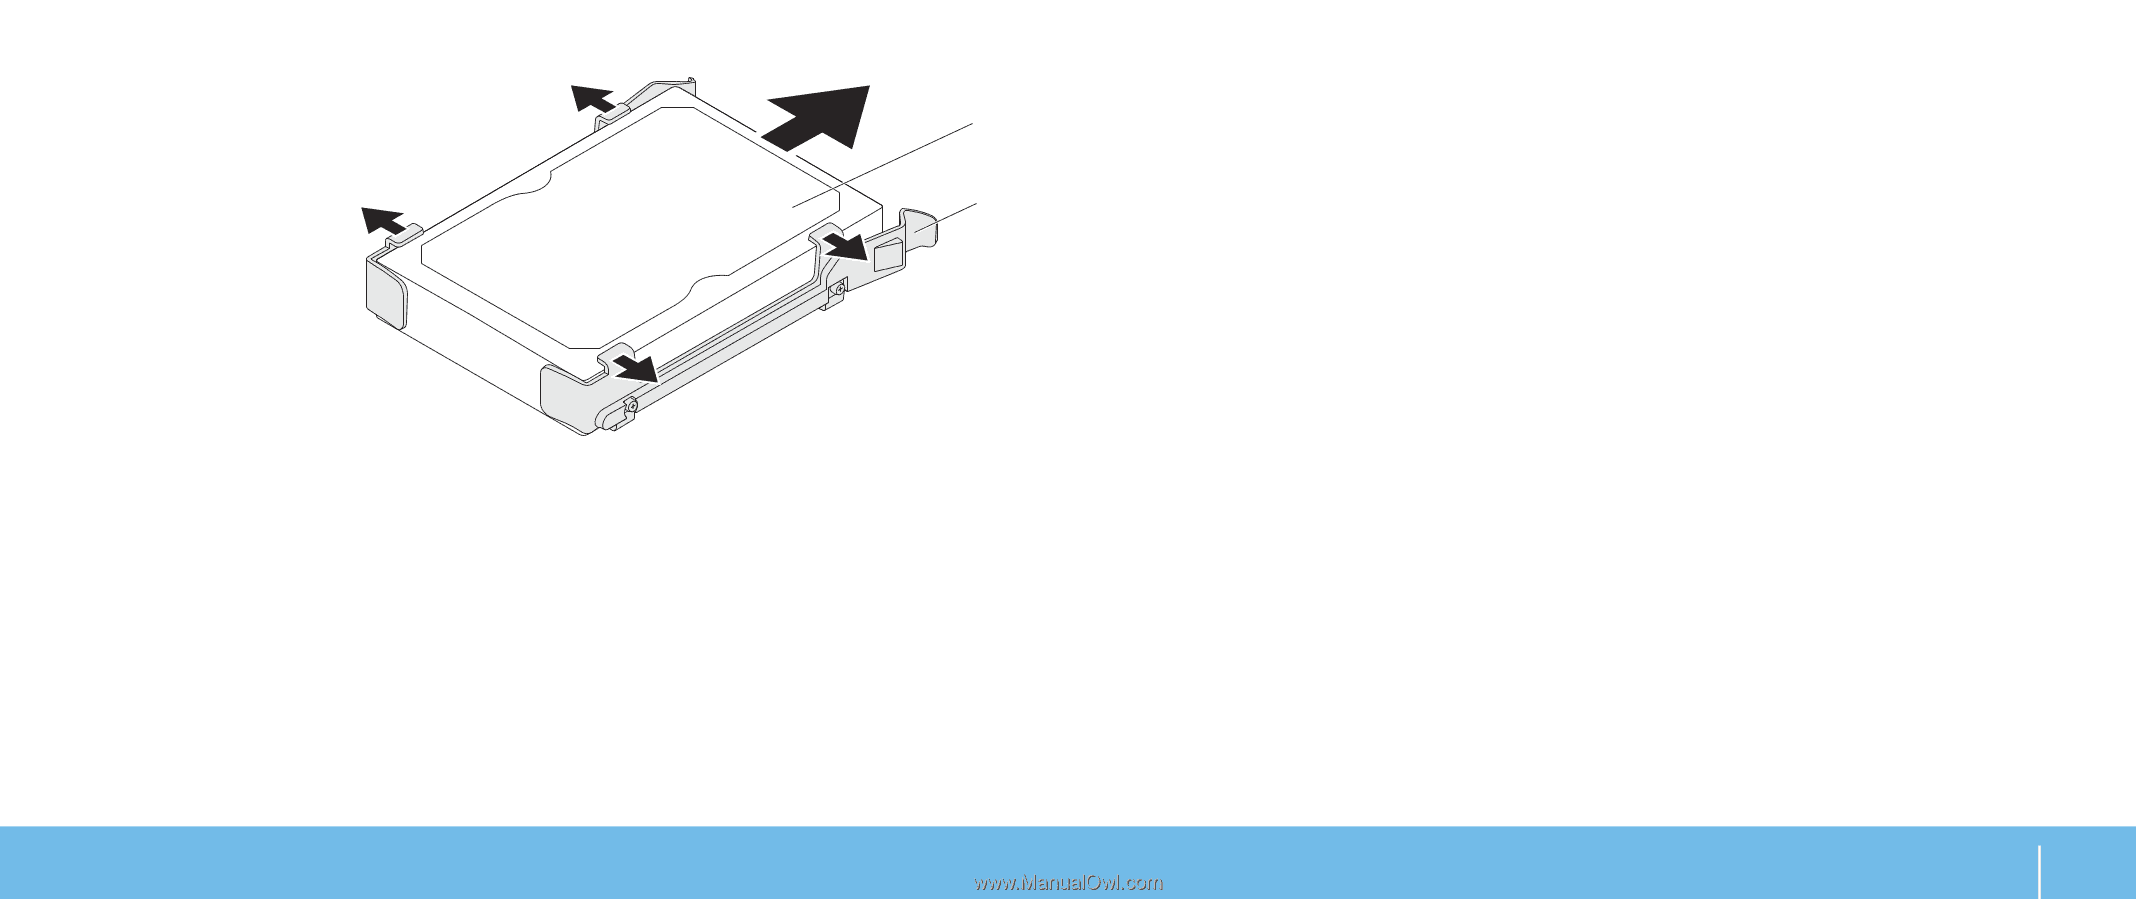
To replace a hard drive: 1. Follow the instructions in "Before You Begin" on page 34. 1 2. See the documentation that shipped with your new hard drive to verify that it is configured for your computer. 2 3. Snap the new hard-drive bracket on to the new hard drive (if applicable). 4. Slide the new hard drive into the hard-drive cage until the release tabs snap into place. 5. Connect the power and data cables (if applicable). 6. Replace the side panel (see "Removing and Replacing the Side Panel" on page 36). 7. Reconnect the power cable, and all the external peripherals to the computer. 8. Turn on the computer. 1 hard drive 2 hard-drive bracket CHAPTER 4: INSTALLING ADDITIONAL OR REPLACEMENT COMPONENTS 41
-
 1
1 -
2
-
3
-
4
-
5
-
6
-
7
-
8
-
9
-
10
-
11
-
12
-
13
-
14
-
15
-
16
-
17
-
18
-
19
-
20
-
21
-
22
-
23
-
24
-
25
-
26
-
27
-
28
-
29
-
30
-
31
-
32
-
33
-
34
-
35
-
36
-
37
-
 38
38 -
 39
39 -
 40
40 -
 41
41 -
 42
42 -
 43
43 -
 44
44 -
 45
45 -
 46
46 -
 47
47 -
 48
48 -
49
-
50
-
51
-
52
-
53
-
54
-
55
-
56
-
57
-
58
-
59
-
60
-
61
-
62
-
63
-
64
-
65
-
66
-
67
-
68
-
69
-
70
 |
 |
41
CHAPTER 4: INSTALLING ADDITIONAL OR REPLACEMENT COMPONENTS
To replace a hard drive:
Follow the instructions in “Before You Begin” on page
1.
34.
See the documentation that shipped with your new hard drive to verify that
2.
it is configured for your computer.
Snap the new hard-drive bracket on to the new hard drive (if applicable).
3.
Slide the new hard drive into the hard-drive cage until the release tabs snap
4.
into place.
Connect the power and data cables (if applicable).
5.
Replace the side panel (see “Removing and Replacing the Side Panel“ on
6.
page 36).
Reconnect the power cable, and all the external peripherals to the computer.
7.
Turn on the computer.
8.
1
2
1
hard drive
2
hard-drive bracket