Dell Dimension XPS P60 MT Desktop Manual - Page 5

Contents

Page 5 highlights

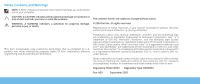
CONTENTS CHAPTER 1: SETTING UP YOUR DESKTOP 7 Before Setting Up Your Desktop 8 Connect the Display 9 Connect the Keyboard and Mouse 10 Connect the Network Cable (Optional 10 Connect the Power Cable 11 Press the Power Button 11 Set Up Microsoft Windows 12 Connect to the Internet (Optional 12 CHAPTER 2: GETTING TO KNOW YOUR DESKTOP 15 Front View Features 16 Back View Features 17 Top View Features 21 CHAPTER 3: USING YOUR DESKTOP 23 Alienware Command Center 24 Working With RAID 24 Optimizing Performance 26 Configuring the BIOS 26 CHAPTER 4: INSTALLING ADDITIONAL OR REPLACEMENT COMPONENTS . . . . 33 Before You Begin 34 Removing and Replacing the Side Panel 36 Inside View of Your Computer 37 Removing and Replacing Memory Module(s 37 Removing and Replacing Hard Drive(s 39 Removing and Replacing Expansion Card(s 42 CHAPTER 5: TROUBLESHOOTING 45 Basic Hints and Tips 46 Backup and General Maintenance 46 Software Diagnostic Tools 47 CHAPTER 6: SYSTEM RECOVERY 55 AlienRespawn 56 Dell DataSafe Online Backup (Optional 57 CHAPTER 7: SPECIFICATIONS 59 APPENDIX A: GENERAL AND ELECTRICAL SAFETY PRECAUTIONS 63 APPENDIX B: CONTACTING ALIENWARE 65 CONTENTS 3

  • 1
  • 2
  • 3
  • 4
  • 5
  • 6
  • 7
  • 8
  • 9
  • 10
  • 11
  • 12
  • 13
  • 14
  • 15
  • 16
  • 17
  • 18
  • 19
  • 20
  • 21
  • 22
  • 23
  • 24
  • 25
  • 26
  • 27
  • 28
  • 29
  • 30
  • 31
  • 32
  • 33
  • 34
  • 35
  • 36
  • 37
  • 38
  • 39
  • 40
  • 41
  • 42
  • 43
  • 44
  • 45
  • 46
  • 47
  • 48
  • 49
  • 50
  • 51
  • 52
  • 53
  • 54
  • 55
  • 56
  • 57
  • 58
  • 59
  • 60
  • 61
  • 62
  • 63
  • 64
  • 65
  • 66
  • 67
  • 68
  • 69
  • 70

3
CONTENTS
CONTENTS
CHAPTER 1: SETTING UP YOUR DESKTOP
...................................
7
Before Setting Up Your Desktop ° ° ° ° ° ° ° ° ° ° ° ° ° ° ° ° ° ° ° ° ° ° ° ° ° ° ° ° ° ° ° ° ° ° ° ° ° ° °8
Connect the Display ° ° ° ° ° ° ° ° ° ° ° ° ° ° ° ° ° ° ° ° ° ° ° ° ° ° ° ° ° ° ° ° ° ° ° ° ° ° ° ° ° ° ° ° ° ° ° ° ° ° 9
Connect the Keyboard and Mouse° ° ° ° ° ° ° ° ° ° ° ° ° ° ° ° ° ° ° ° ° ° ° ° ° ° ° ° ° ° ° ° ° ° ° ° 10
Connect the Network Cable (Optional)° ° ° ° ° ° ° ° ° ° ° ° ° ° ° ° ° ° ° ° ° ° ° ° ° ° ° ° ° ° ° ° 10
Connect the Power Cable ° ° ° ° ° ° ° ° ° ° ° ° ° ° ° ° ° ° ° ° ° ° ° ° ° ° ° ° ° ° ° ° ° ° ° ° ° ° ° ° ° ° ° °
11
Press the Power Button ° ° ° ° ° ° ° ° ° ° ° ° ° ° ° ° ° ° ° ° ° ° ° ° ° ° ° ° ° ° ° ° ° ° ° ° ° ° ° ° ° ° ° ° °
11
Set Up Microsoft Windows ° ° ° ° ° ° ° ° ° ° ° ° ° ° ° ° ° ° ° ° ° ° ° ° ° ° ° ° ° ° ° ° ° ° ° ° ° ° ° ° ° ° ° 12
Connect to the Internet (Optional) ° ° ° ° ° ° ° ° ° ° ° ° ° ° ° ° ° ° ° ° ° ° ° ° ° ° ° ° ° ° ° ° ° ° ° 12
CHAPTER 2: GETTING TO KNOW YOUR DESKTOP
...........................
1
5
Front View Features ° ° ° ° ° ° ° ° ° ° ° ° ° ° ° ° ° ° ° ° ° ° ° ° ° ° ° ° ° ° ° ° ° ° ° ° ° ° ° ° ° ° ° ° ° ° ° ° ° 16
Back View Features° ° ° ° ° ° ° ° ° ° ° ° ° ° ° ° ° ° ° ° ° ° ° ° ° ° ° ° ° ° ° ° ° ° ° ° ° ° ° ° ° ° ° ° ° ° ° ° ° ° 17
Top View Features° ° ° ° ° ° ° ° ° ° ° ° ° ° ° ° ° ° ° ° ° ° ° ° ° ° ° ° ° ° ° ° ° ° ° ° ° ° ° ° ° ° ° ° ° ° ° ° ° ° ° 21
CHAPTER 3: USING YOUR DESKTOP
.......................................
23
Alienware Command Center ° ° ° ° ° ° ° ° ° ° ° ° ° ° ° ° ° ° ° ° ° ° ° ° ° ° ° ° ° ° ° ° ° ° ° ° ° ° ° ° °24
Working With RAID ° ° ° ° ° ° ° ° ° ° ° ° ° ° ° ° ° ° ° ° ° ° ° ° ° ° ° ° ° ° ° ° ° ° ° ° ° ° ° ° ° ° ° ° ° ° ° ° ° °24
Optimizing Performance ° ° ° ° ° ° ° ° ° ° ° ° ° ° ° ° ° ° ° ° ° ° ° ° ° ° ° ° ° ° ° ° ° ° ° ° ° ° ° ° ° ° ° °26
Configuring
the BIOS ° ° ° ° ° ° ° ° ° ° ° ° ° ° ° ° ° ° ° ° ° ° ° ° ° ° ° ° ° ° ° ° ° ° ° ° ° ° ° ° ° ° ° ° ° ° ° °26
CHAPTER 4: INSTALLING ADDITIONAL OR REPLACEMENT COMPONENTS
....
33
Before You Begin° ° ° ° ° ° ° ° ° ° ° ° ° ° ° ° ° ° ° ° ° ° ° ° ° ° ° ° ° ° ° ° ° ° ° ° ° ° ° ° ° ° ° ° ° ° ° ° ° ° °
34
Removing and Replacing the Side Panel ° ° ° ° ° ° ° ° ° ° ° ° ° ° ° ° ° ° ° ° ° ° ° ° ° ° ° ° °
36
Inside View of Your Computer ° ° ° ° ° ° ° ° ° ° ° ° ° ° ° ° ° ° ° ° ° ° ° ° ° ° ° ° ° ° ° ° ° ° ° ° ° ° ° °37
Removing and Replacing Memory Module(s)° ° ° ° ° ° ° ° ° ° ° ° ° ° ° ° ° ° ° ° ° ° ° ° ° ° 37
Removing and Replacing Hard Drive(s) ° ° ° ° ° ° ° ° ° ° ° ° ° ° ° ° ° ° ° ° ° ° ° ° ° ° ° ° ° ° 39
Removing and Replacing Expansion Card(s) ° ° ° ° ° ° ° ° ° ° ° ° ° ° ° ° ° ° ° ° ° ° ° ° ° °42
CHAPTER 5: TROUBLESHOOTING
.........................................
4
5
Basic Hints and Tips° ° ° ° ° ° ° ° ° ° ° ° ° ° ° ° ° ° ° ° ° ° ° ° ° ° ° ° ° ° ° ° ° ° ° ° ° ° ° ° ° ° ° ° ° ° ° °
46
Backup and General Maintenance ° ° ° ° ° ° ° ° ° ° ° ° ° ° ° ° ° ° ° ° ° ° ° ° ° ° ° ° ° ° ° ° ° ° °
46
Software Diagnostic Tools ° ° ° ° ° ° ° ° ° ° ° ° ° ° ° ° ° ° ° ° ° ° ° ° ° ° ° ° ° ° ° ° ° ° ° ° ° ° ° ° ° ° ° 47
CHAPTER 6: SYSTEM RECOVERY
..........................................
55
AlienRespawn ° ° ° ° ° ° ° ° ° ° ° ° ° ° ° ° ° ° ° ° ° ° ° ° ° ° ° ° ° ° ° ° ° ° ° ° ° ° ° ° ° ° ° ° ° ° ° ° ° ° ° ° ° 56
Dell DataSafe Online Backup (Optional) ° ° ° ° ° ° ° ° ° ° ° ° ° ° ° ° ° ° ° ° ° ° ° ° ° ° ° ° ° ° 57
CHAPTER 7: SPECIFICATIONS
.............................................
59
APPENDIX A: GENERAL AND ELECTRICAL SAFETY PRECAUTIONS
............
63
APPENDIX B: CONTACTING ALIENWARE
...................................
6
5