Dell PowerConnect W Clearpass 100 Software Cisco WLC Integration Guide - Page 12
Step 6, Create the new Wireless LAN
 |
View all Dell PowerConnect W Clearpass 100 Software manuals
Add to My Manuals
Save this manual to your list of manuals |
Page 12 highlights
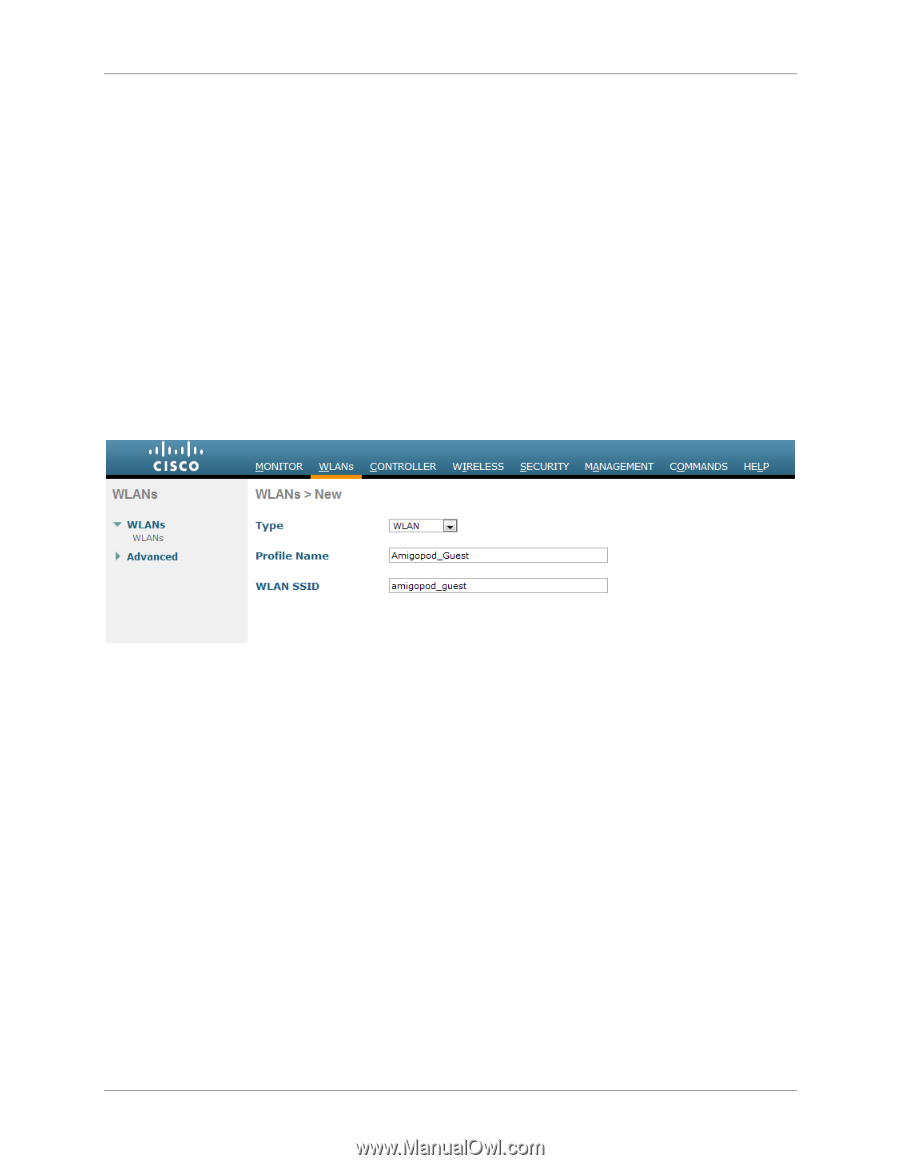
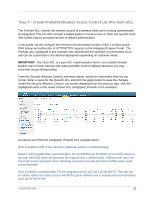
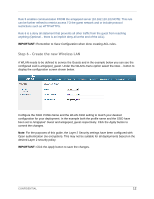
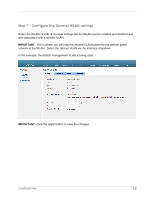
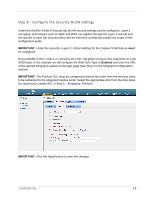
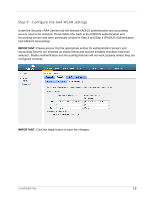
Rule 5 enables communication FROM the amigopod server (10.162.110.13) NOTE: This rule can be further refined to restrict access TO the guest network and or include protocol restrictions such as HTTP/HTTPS. Rule 6 is a deny all statement that prevents all other traffic from the guest from reaching anything (Optional - there is an implicit deny all at the end of the ACL). IMPORTANT: Remember to Save Configuration when done creating ACL rules. Step 6 - Create the new Wireless LAN A WLAN needs to be defined to service the Guests and in the example below you can see the configured ssid is amigopod_guest. Under the WLANs menu option select the New... button to display the configuration screen shown below. Configure the SSID Profile Name and the WLAN SSID setting to match your desired configuration for your deployment. In the example both the profile name and the SSID have been set to Amigopod_Guest and amigopod_guest respectively. Click the Apply button to commit the changes. Note: For the purposes of this guide, the Layer 2 Security settings have been configured with Open authentication (no encryption). This may not be suitable for all deployments based on the desired Layer 2 security policy. IMPORTANT: Click the Apply button to save the changes. CONFIDENTIAL 12
-
 1
1 -
2
-
3
-
4
-
5
-
6
-
 7
7 -
 8
8 -
 9
9 -
 10
10 -
 11
11 -
 12
12 -
 13
13 -
 14
14 -
 15
15 -
 16
16 -
 17
17 -
18
-
19
-
20
-
21
-
22
-
23
-
24
-
25
-
26
-
27
-
28
 |
 |