Dell PowerConnect W Clearpass 100 Software Cisco WLC Integration Guide - Page 8
Step 2, Add IP Addressing to VLAN Optional
 |
View all Dell PowerConnect W Clearpass 100 Software manuals
Add to My Manuals
Save this manual to your list of manuals |
Page 8 highlights
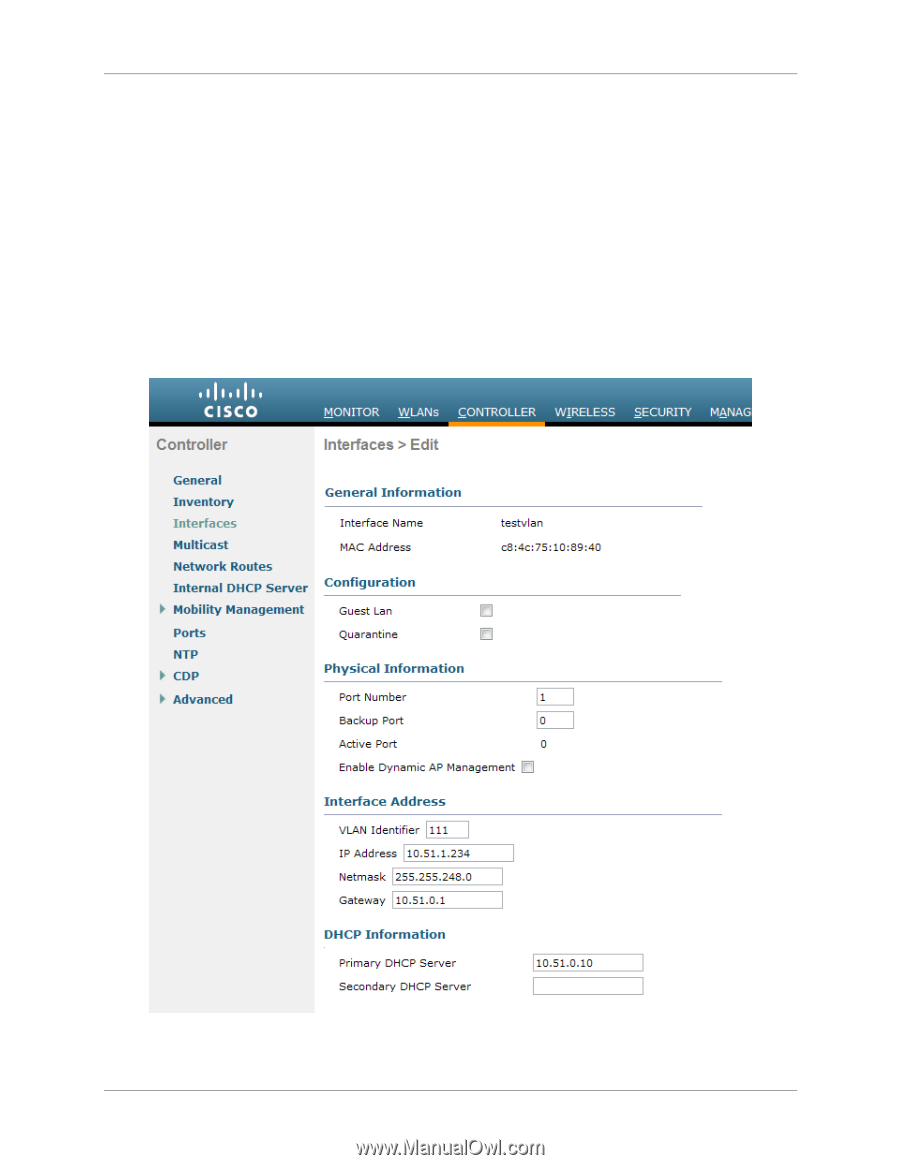
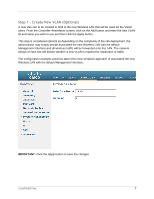
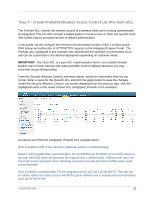
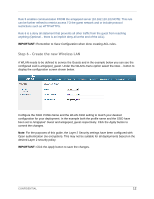
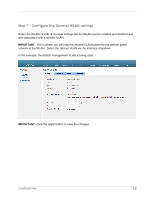
Step 2 - Add IP Addressing to VLAN (Optional) Now the VLAN has been created, an IP address needs to be assigned to the VLAN interface on the controller. This IP Address will not act as the default gateway for all wireless traffic on the Visitor SSID - this will be provided by an upstream router terminating the VLAN defined in the previous step. From the ControllerInterfaces screen, select the Edit button for the newly created VLAN (VLAN 111 in this optional example). Enter the designated IP Address details for the Wireless Visitor network. Make sure to enter the appropriate DHCP server details for the interface so the controller knows where to forward any wireless DHCP requests. Also define which of the front panel interfaces will be connected to this defined VLAN. These front panel interfaces are configured with dot1q trunking enabled by default. IMPORTANT: Click the Apply button to save the changes. CONFIDENTIAL 8
-
 1
1 -
2
-
 3
3 -
 4
4 -
 5
5 -
 6
6 -
 7
7 -
 8
8 -
 9
9 -
 10
10 -
 11
11 -
 12
12 -
 13
13 -
14
-
15
-
16
-
17
-
18
-
19
-
20
-
21
-
22
-
23
-
24
-
25
-
26
-
27
-
28
 |
 |