Dell PowerConnect W Clearpass 100 Software Cisco WLC Integration Guide - Page 21
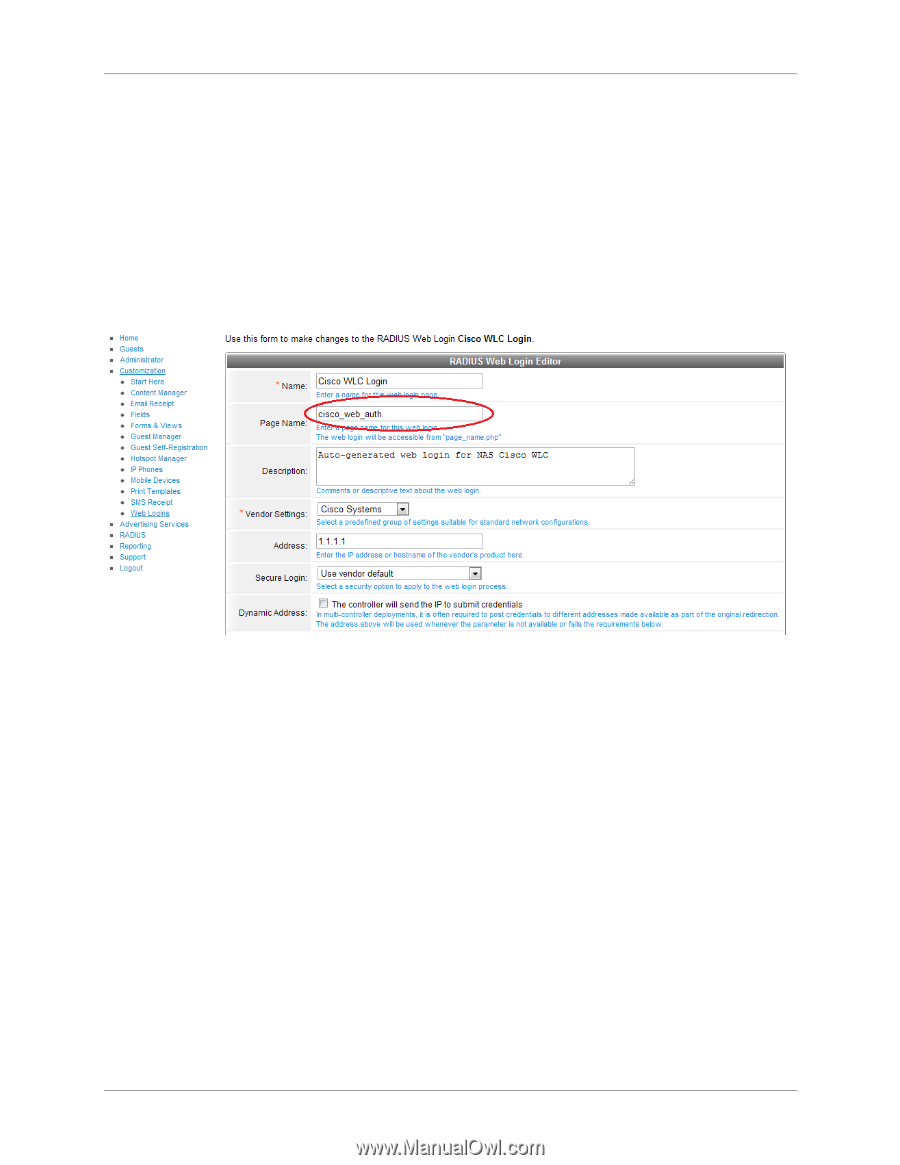
RADIUS Web Login Editor, Step 8 Con the Security WLAN settings, Cisco WLC Configuration,
 |
View all Dell PowerConnect W Clearpass 100 Software manuals
Add to My Manuals
Save this manual to your list of manuals |
Page 21 highlights
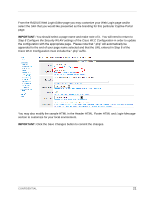
From the RADIUS Web Login Editor page you may customize your Web Login page and/or select the Skin that you would like presented as the branding for this particular Captive Portal page. IMPORTANT: You should select a page name and make note of it. You will need to return to Step 8 Configure the Security WLAN settings of the Cisco WLC Configuration in order to update the configuration with the appropriate page. Please note that ".php" will automatically be appended to the end of your page name selected and that the URL entered in Step 8 of the Cisco WLC Configuration must include the ".php" suffix. You may also modify the sample HTML in the Header HTML, Footer HTML and Login Message section to customize for your local environment. IMPORTANT: Click the Save Changes button to commit the changes. CONFIDENTIAL 21
-
 1
1 -
2
-
3
-
4
-
5
-
6
-
7
-
8
-
9
-
10
-
11
-
12
-
13
-
14
-
15
-
 16
16 -
 17
17 -
 18
18 -
 19
19 -
 20
20 -
 21
21 -
 22
22 -
 23
23 -
 24
24 -
 25
25 -
 26
26 -
27
-
28
 |
 |