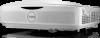
Dell S560P Interactive Projector Users Guide - Page 22
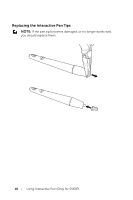
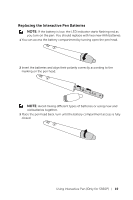
Using Interactive Pen Only for S560P, Touch Area Boundary Fine-tuning
 |
View all Dell S560P manuals
Add to My Manuals
Save this manual to your list of manuals |
Page 22 highlights
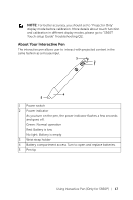
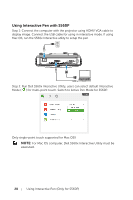
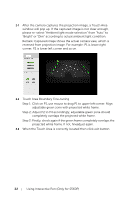
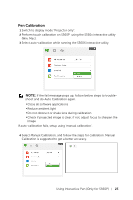
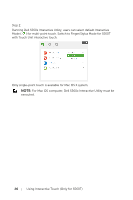
2-1 After the camera captures the projection image, a Touch Area window will pop up. If the captured image is not clear enough, please re-select "Ambient light mode selection" from "Auto" to "Bright" or "Dim" according to actual ambient light condition. Remark: Captured image shows the actual camera view, which is reversed from projection image. For example: P1 is lower right corner, P2 is lower left corner and so on. 2-2 Touch Area Boundary Fine-tuning Step 1: Click on P1, use mouse to drag P1 to upper left corner. Align adjustable green zone with projected white frame. Step 2: Adjust P2 to P4 accordingly; adjustable green zone should completely overlaps the projected white frame. Step 3: Finally, check again if the green frame completely overlaps the projected white frame. If not, fineadjust again. 2-3 When the Touch Area is correctly located then click exit button. 22 Using Interactive Pen (Only for S560P)
-
 1
1 -
2
-
3
-
4
-
5
-
6
-
7
-
8
-
9
-
10
-
11
-
12
-
13
-
14
-
15
-
16
-
 17
17 -
 18
18 -
 19
19 -
 20
20 -
 21
21 -
 22
22 -
 23
23 -
 24
24 -
 25
25 -
 26
26 -
 27
27 -
28
-
29
-
30
-
31
-
32
-
33
-
34
-
35
-
36
-
37
-
38
-
39
-
40
-
41
-
42
-
43
-
44
-
45
-
46
-
47
-
48
 |
 |
