Dell S560P Interactive Projector Users Guide - Page 25
Setting Up Interactive Touch, Using Interactive Touch with S560T
 |
View all Dell S560P manuals
Add to My Manuals
Save this manual to your list of manuals |
Page 25 highlights
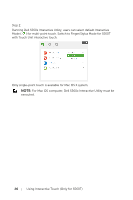
*4 : Mac OS support 1 touch point only NOTE: For better accuracy, you should set to "Projector Only" display mode before calibration. More details about touch function and calibration in different display modes, please go to "S560T Touch setup Guide" Troubleshooting Q2. Setting Up Interactive Touch To setup the interactive function, install the touch unit as described in the 'Touch setup guide'. Using Interactive Touch with S560T Step 1: Connect the computer with the projector using HDMI/ VGA cable to display image. Connect the USB cable for using in interactive mode. If using Mac OS, run the S560x Interactive utility to setup the touch functionality. Using Interactive Touch (Only for S560T) 25 MOLEX MOLEX
-
 1
1 -
2
-
3
-
4
-
5
-
6
-
7
-
8
-
9
-
10
-
11
-
12
-
13
-
14
-
15
-
16
-
17
-
18
-
19
-
 20
20 -
 21
21 -
 22
22 -
 23
23 -
 24
24 -
 25
25 -
 26
26 -
 27
27 -
 28
28 -
 29
29 -
 30
30 -
31
-
32
-
33
-
34
-
35
-
36
-
37
-
38
-
39
-
40
-
41
-
42
-
43
-
44
-
45
-
46
-
47
-
48
 |
 |
Using Interactive Touch (Only for S560T)
25
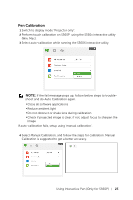
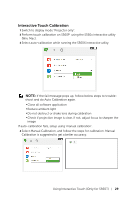
*4 : Mac OS support 1 touch point only
NOTE:
For better accuracy, you should set to "Projector Only"
display mode before calibration. More details about touch function
and calibration in different display modes, please go to "S560T
Touch setup Guide" Troubleshooting Q2.
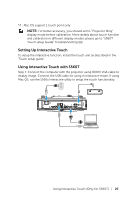
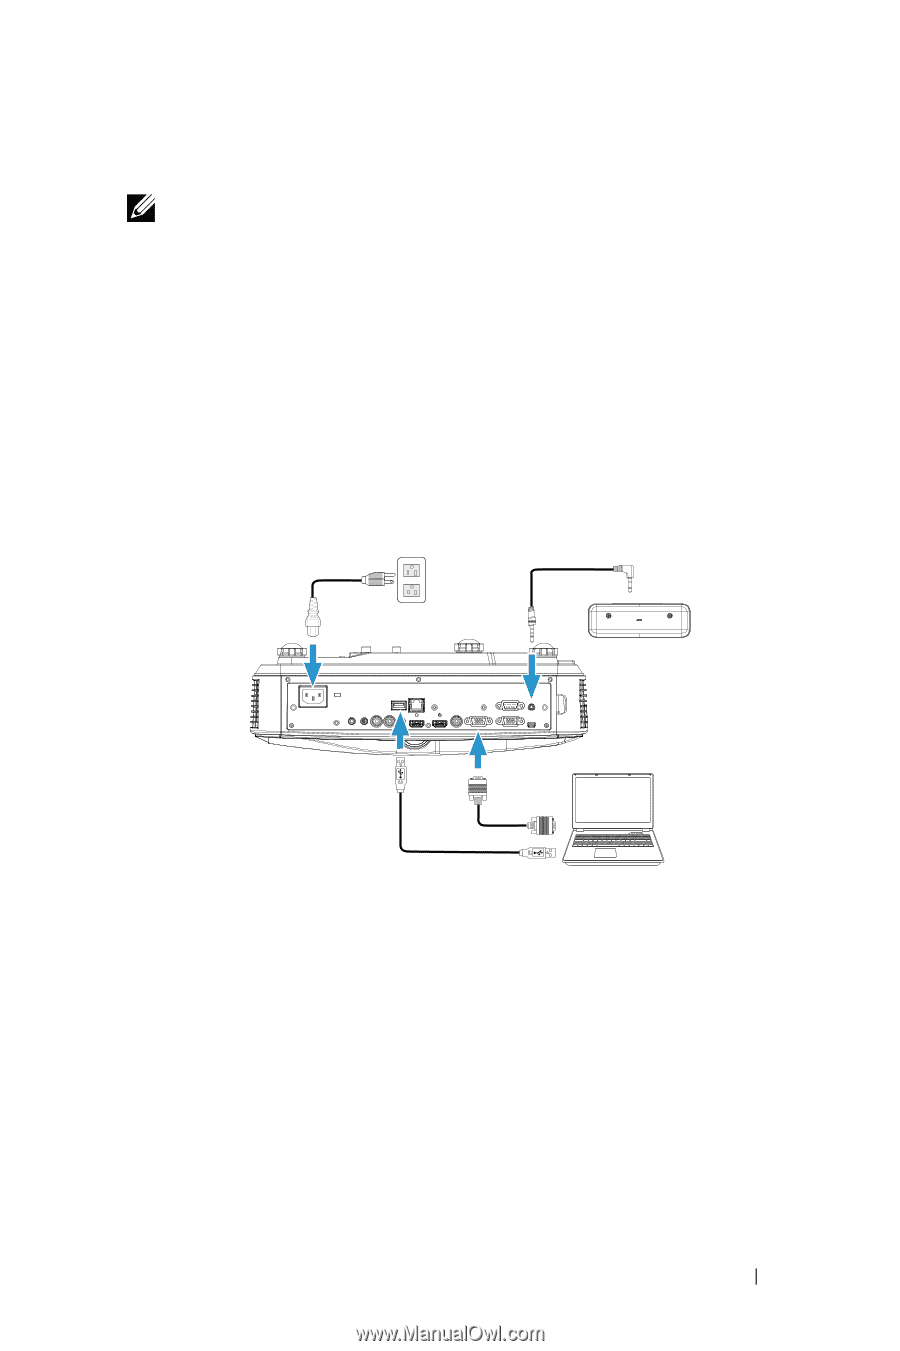
Setting Up Interactive Touch
To setup the interactive function, install the touch unit as described in the
'Touch setup guide'.
Using Interactive Touch with S560T
Step 1: Connect the computer with the projector using HDMI/ VGA cable to
display image. Connect the USB cable for using in interactive mode. If using
Mac OS, run the S560x Interactive utility to setup the touch functionality.