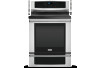
Electrolux EI30IF40LS Complete Owner's Guide (English) - Page 17
Setting the clock, Changing clock display mode
 |
View all Electrolux EI30IF40LS manuals
Add to My Manuals
Save this manual to your list of manuals |
Page 17 highlights
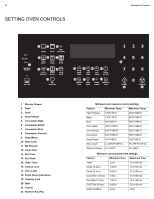
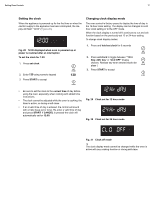
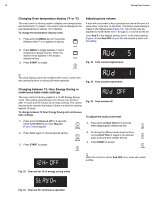
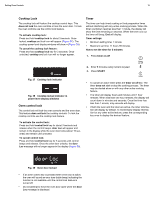
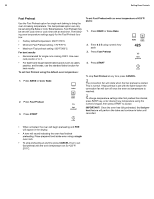
Setting Oven Controls 17 Setting the clock When the appliance is powered up for the first time or when the electric supply to the appliance has been interrupted, the display will flash "12:00" (Figure 28). Changing clock display mode The oven control is factory preset to display the time of day in the 12-hour clock setting. The display can be changed to a 24 hour clock setting or to the OFF mode. When the clock display is turned off it continues to run and will function based on the previously set 12 or 24-hour setting. To change clock display modes: Fig. 28 12:00 displayed when oven is powered up or power is restored after an interruption To set the clock for 1:30: 1. Press set clock 2. Enter 130 using numeric keypad 3. Press START to accept 130 START 1. Press and hold set clock for 6 seconds 2. Press set clock to toggle between "12 hr Day- 24hr day" or "CLO OFF" display choices. Release key when desired mode displays ( 3. Press START to accept START • Be sure to set the clock to the correct time of day before using the oven, especially when cooking with added time instructions. • The clock cannot be adjusted while the oven is cooking, the timer is active, or during a self clean. • If an invalid time of day is entered, the control will sound with a triple beep (error tone). Re-enter a valid time of day and press START. If CANCEL is pressed the clock will automatically set for 12:00. Fig. 29 Clock set for 12 hour mode Fig. 30 Clock set for 24 hour mode Fig. 31 Clock off mode The clock display mode cannot be changed while the oven is active with any cooking function or during self-clean.
-
 1
1 -
2
-
3
-
4
-
5
-
6
-
7
-
8
-
9
-
10
-
11
-
 12
12 -
 13
13 -
 14
14 -
 15
15 -
 16
16 -
 17
17 -
 18
18 -
 19
19 -
 20
20 -
 21
21 -
 22
22 -
23
-
24
-
25
-
26
-
27
-
28
-
29
-
30
-
31
-
32
-
33
-
34
-
35
-
36
-
37
-
38
-
39
-
40
-
41
-
42
-
43
-
44
-
45
-
46
-
47
 |
 |
