Epson 4880 User's Guide - Page 148
OTHERS mark on the paper tray cover. Align the right edge of the paper
 |
UPC - 010343866898
View all Epson 4880 manuals
Add to My Manuals
Save this manual to your list of manuals |
Page 148 highlights
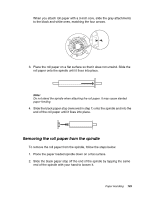
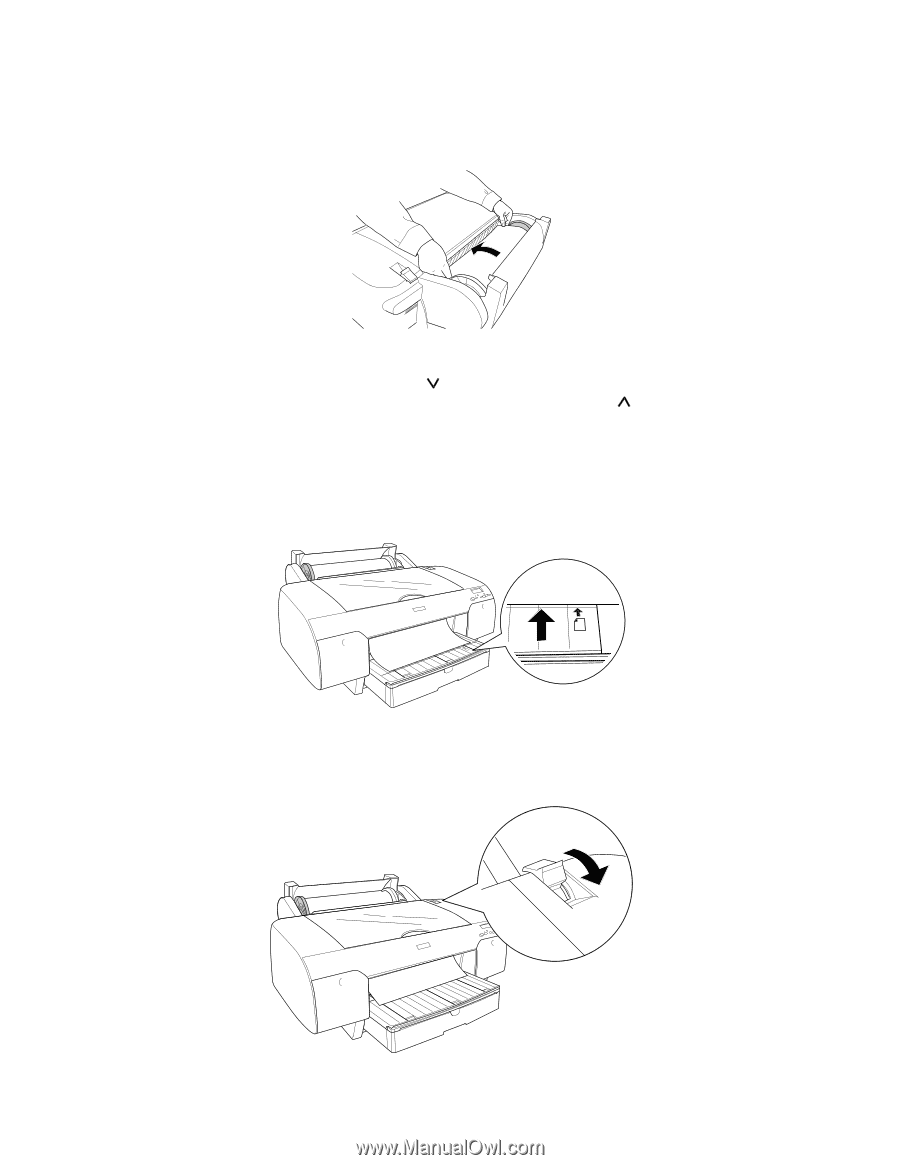
7. Hold both sides of the paper, and then load the paper in the paper insertion slot. Note: If you load thin paper, press the paper feed button to decrease the paper suction value. If you load thick and curled paper, press the paper feed button to increase the paper suction value. 8. Feed the paper all the way through the printer until it is aligned with the OTHERS mark on the paper tray cover. Align the right edge of the paper with the vertical mark of the right side of the paper tray cover. OTHERS 9. Move the paper lever to the secured position. The printer automatically feeds the paper to the printing position. 148 Paper Handling
-
 1
1 -
2
-
3
-
4
-
5
-
6
-
7
-
8
-
9
-
10
-
11
-
12
-
13
-
14
-
15
-
16
-
17
-
18
-
19
-
20
-
21
-
22
-
23
-
24
-
25
-
26
-
27
-
28
-
29
-
30
-
31
-
32
-
33
-
34
-
35
-
36
-
37
-
38
-
39
-
40
-
41
-
42
-
43
-
44
-
45
-
46
-
47
-
48
-
49
-
50
-
51
-
52
-
53
-
54
-
55
-
56
-
57
-
58
-
59
-
60
-
61
-
62
-
63
-
64
-
65
-
66
-
67
-
68
-
69
-
70
-
71
-
72
-
73
-
74
-
75
-
76
-
77
-
78
-
79
-
80
-
81
-
82
-
83
-
84
-
85
-
86
-
87
-
88
-
89
-
90
-
91
-
92
-
93
-
94
-
95
-
96
-
97
-
98
-
99
-
100
-
101
-
102
-
103
-
104
-
105
-
106
-
107
-
108
-
109
-
110
-
111
-
112
-
113
-
114
-
115
-
116
-
117
-
118
-
119
-
120
-
121
-
122
-
123
-
124
-
125
-
126
-
127
-
128
-
129
-
130
-
131
-
132
-
133
-
134
-
135
-
136
-
137
-
138
-
139
-
140
-
141
-
142
-
 143
143 -
 144
144 -
 145
145 -
 146
146 -
 147
147 -
 148
148 -
 149
149 -
 150
150 -
 151
151 -
 152
152 -
 153
153 -
154
-
155
-
156
-
157
-
158
-
159
-
160
-
161
-
162
-
163
-
164
-
165
-
166
-
167
-
168
-
169
-
170
-
171
-
172
-
173
-
174
-
175
-
176
-
177
-
178
-
179
-
180
-
181
-
182
-
183
-
184
-
185
-
186
-
187
-
188
-
189
-
190
-
191
-
192
-
193
-
194
-
195
-
196
-
197
-
198
-
199
-
200
-
201
-
202
-
203
-
204
-
205
-
206
-
207
-
208
-
209
-
210
-
211
-
212
-
213
-
214
-
215
-
216
-
217
-
218
-
219
-
220
-
221
-
222
-
223
-
224
-
225
-
226
-
227
-
228
-
229
-
230
-
231
-
232
-
233
-
234
-
235
-
236
-
237
-
238
-
239
-
240
-
241
-
242
-
243
-
244
-
245
-
246
-
247
-
248
-
249
-
250
-
251
-
252
 |
 |
148
Paper Handling
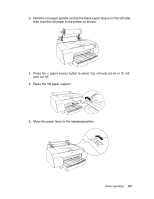
7.
Hold both sides of the paper, and then load the paper in the paper insertion
slot.
Note:
If you load thin paper, press the
paper feed button to decrease the paper
suction value. If you load thick and curled paper, press the
paper feed button
to increase the paper suction value.
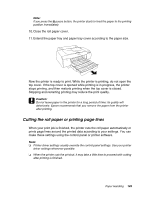
8.
Feed the paper all the way through the printer until it is aligned with the
OTHERS mark on the paper tray cover. Align the right edge of the paper
with the vertical mark of the right side of the paper tray cover.
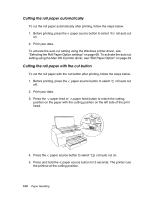
9.
Move the paper lever to the secured position. The printer automatically
feeds the paper to the printing position.
OTHERS