Epson 4880 User's Guide - Page 179
gently pull out the maintenance tank., Insert the new tank.
 |
UPC - 010343866898
View all Epson 4880 manuals
Add to My Manuals
Save this manual to your list of manuals |
Page 179 highlights
3. Remove the new maintenance tank from its package. 4. Place your hand on the handle under the right ink compartment, then gently pull out the maintenance tank. w Warning: If ink gets on your hands, wash them thoroughly with soap and water. If ink gets into your eyes, flush them immediately with water. 5. Place the used maintenance tank in the plastic bag included with the new tank. Note: Do not tilt the used maintenance tank until after it is sealed in the plastic bag. 6. Insert the new tank. 7. If you are using 220 ml ink cartridges, reinstall the removed ink cartridges. Maintenance and Transportation 179
-
 1
1 -
2
-
3
-
4
-
5
-
6
-
7
-
8
-
9
-
10
-
11
-
12
-
13
-
14
-
15
-
16
-
17
-
18
-
19
-
20
-
21
-
22
-
23
-
24
-
25
-
26
-
27
-
28
-
29
-
30
-
31
-
32
-
33
-
34
-
35
-
36
-
37
-
38
-
39
-
40
-
41
-
42
-
43
-
44
-
45
-
46
-
47
-
48
-
49
-
50
-
51
-
52
-
53
-
54
-
55
-
56
-
57
-
58
-
59
-
60
-
61
-
62
-
63
-
64
-
65
-
66
-
67
-
68
-
69
-
70
-
71
-
72
-
73
-
74
-
75
-
76
-
77
-
78
-
79
-
80
-
81
-
82
-
83
-
84
-
85
-
86
-
87
-
88
-
89
-
90
-
91
-
92
-
93
-
94
-
95
-
96
-
97
-
98
-
99
-
100
-
101
-
102
-
103
-
104
-
105
-
106
-
107
-
108
-
109
-
110
-
111
-
112
-
113
-
114
-
115
-
116
-
117
-
118
-
119
-
120
-
121
-
122
-
123
-
124
-
125
-
126
-
127
-
128
-
129
-
130
-
131
-
132
-
133
-
134
-
135
-
136
-
137
-
138
-
139
-
140
-
141
-
142
-
143
-
144
-
145
-
146
-
147
-
148
-
149
-
150
-
151
-
152
-
153
-
154
-
155
-
156
-
157
-
158
-
159
-
160
-
161
-
162
-
163
-
164
-
165
-
166
-
167
-
168
-
169
-
170
-
171
-
172
-
173
-
 174
174 -
 175
175 -
 176
176 -
 177
177 -
 178
178 -
 179
179 -
 180
180 -
 181
181 -
 182
182 -
 183
183 -
 184
184 -
185
-
186
-
187
-
188
-
189
-
190
-
191
-
192
-
193
-
194
-
195
-
196
-
197
-
198
-
199
-
200
-
201
-
202
-
203
-
204
-
205
-
206
-
207
-
208
-
209
-
210
-
211
-
212
-
213
-
214
-
215
-
216
-
217
-
218
-
219
-
220
-
221
-
222
-
223
-
224
-
225
-
226
-
227
-
228
-
229
-
230
-
231
-
232
-
233
-
234
-
235
-
236
-
237
-
238
-
239
-
240
-
241
-
242
-
243
-
244
-
245
-
246
-
247
-
248
-
249
-
250
-
251
-
252
 |
 |
Maintenance and Transportation
179
3.
Remove the new maintenance tank from its package.
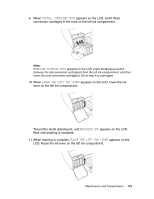
4.
Place your hand on the handle under the right ink compartment, then
gently pull out the maintenance tank.
w
Warning:
If ink gets on your hands, wash them thoroughly with soap and water. If ink
gets into your eyes, flush them immediately with water.
5.
Place the used maintenance tank in the plastic bag included with the new
tank.
Note:
Do not tilt the used maintenance tank until after it is sealed in the plastic bag.
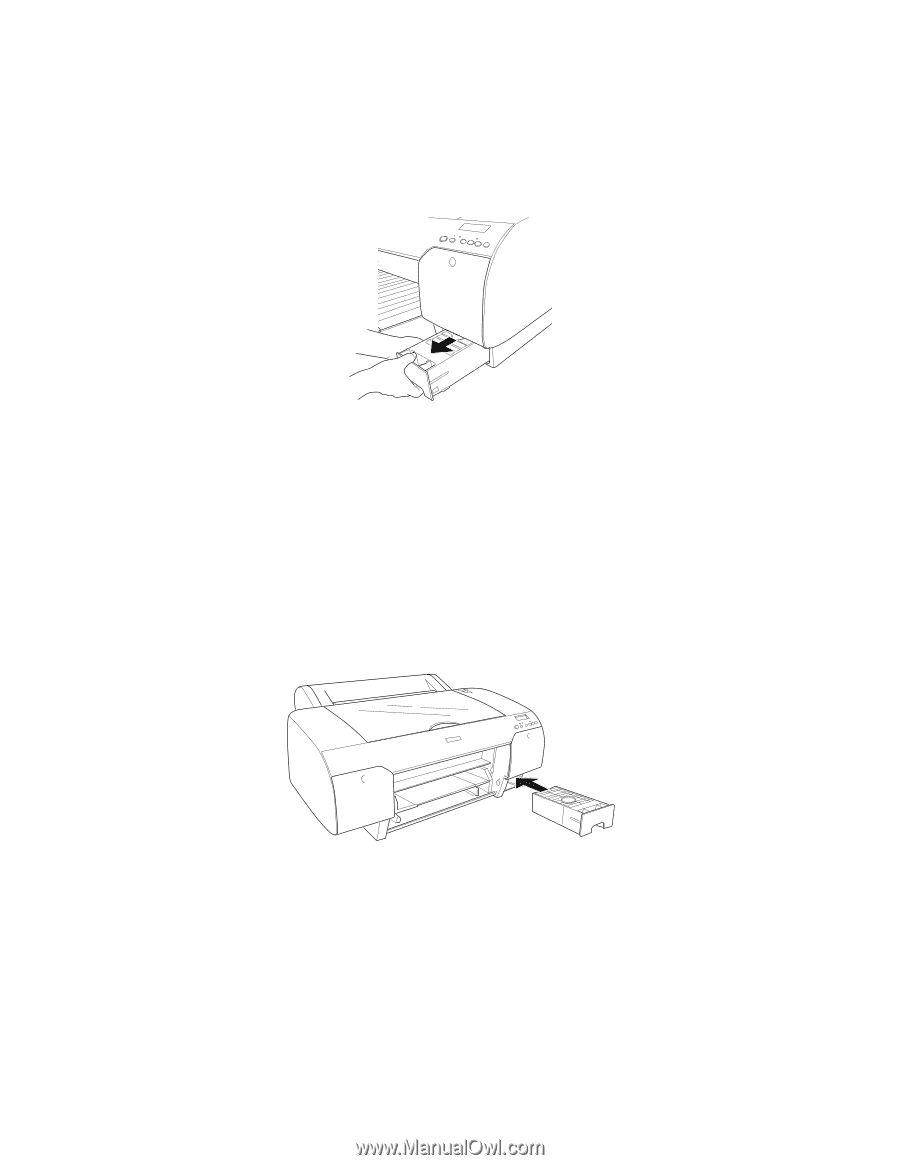
6.
Insert the new tank.
7.
If you are using 220 ml ink cartridges, reinstall the removed ink cartridges.