Epson 4880 User's Guide - Page 41
Aligning the print head, Head Cleaning, Confirmation, Print Head Alignment - power clean
 |
UPC - 010343866898
View all Epson 4880 manuals
Add to My Manuals
Save this manual to your list of manuals |
Page 41 highlights
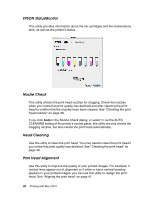
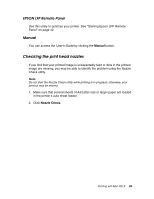
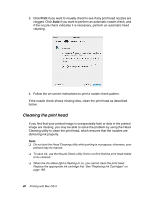
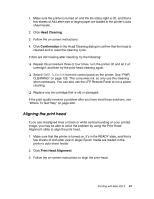
1. Make sure the printer is turned on and the ink status light is off, and that a few sheets of A4/Letter size or larger paper are loaded in the printer's auto sheet feeder. 2. Click Head Cleaning. 3. Follow the on-screen instructions. 4. Click Confirmation in the Head Cleaning dialog to confirm that the head is cleaned and to reset the cleaning cycle. If dots are still missing after cleaning, try the following: ❏ Repeat this procedure three or four times, turn the printer off and let it sit overnight, and then try the print head cleaning again. ❏ Select POWER CLEANING from the control panel on the printer. See "PWR CLEANING" on page 128. This consumes ink, so only use this cleaning when necessary. You can also use the LFP Remote Panel to run a power cleaning. ❏ Replace any ink cartridge that is old or damaged. If the print quality remains a problem after you have tried these solutions, see "Where To Get Help" on page 229. Aligning the print head If you see misaligned lines or black or white vertical banding on your printed image, you may be able to solve the problem by using the Print Head Alignment utility to align the print head. 1. Make sure that the printer is turned on, it's in the READY state, and that a few sheets of A4/Letter size or larger Epson media are loaded in the printer's auto sheet feeder. 2. Click Print Head Alignment. 3. Follow the on-screen instructions to align the print head. Printing with Mac OS X 41
-
 1
1 -
2
-
3
-
4
-
5
-
6
-
7
-
8
-
9
-
10
-
11
-
12
-
13
-
14
-
15
-
16
-
17
-
18
-
19
-
20
-
21
-
22
-
23
-
24
-
25
-
26
-
27
-
28
-
29
-
30
-
31
-
32
-
33
-
34
-
35
-
 36
36 -
 37
37 -
 38
38 -
 39
39 -
 40
40 -
 41
41 -
 42
42 -
 43
43 -
 44
44 -
 45
45 -
 46
46 -
47
-
48
-
49
-
50
-
51
-
52
-
53
-
54
-
55
-
56
-
57
-
58
-
59
-
60
-
61
-
62
-
63
-
64
-
65
-
66
-
67
-
68
-
69
-
70
-
71
-
72
-
73
-
74
-
75
-
76
-
77
-
78
-
79
-
80
-
81
-
82
-
83
-
84
-
85
-
86
-
87
-
88
-
89
-
90
-
91
-
92
-
93
-
94
-
95
-
96
-
97
-
98
-
99
-
100
-
101
-
102
-
103
-
104
-
105
-
106
-
107
-
108
-
109
-
110
-
111
-
112
-
113
-
114
-
115
-
116
-
117
-
118
-
119
-
120
-
121
-
122
-
123
-
124
-
125
-
126
-
127
-
128
-
129
-
130
-
131
-
132
-
133
-
134
-
135
-
136
-
137
-
138
-
139
-
140
-
141
-
142
-
143
-
144
-
145
-
146
-
147
-
148
-
149
-
150
-
151
-
152
-
153
-
154
-
155
-
156
-
157
-
158
-
159
-
160
-
161
-
162
-
163
-
164
-
165
-
166
-
167
-
168
-
169
-
170
-
171
-
172
-
173
-
174
-
175
-
176
-
177
-
178
-
179
-
180
-
181
-
182
-
183
-
184
-
185
-
186
-
187
-
188
-
189
-
190
-
191
-
192
-
193
-
194
-
195
-
196
-
197
-
198
-
199
-
200
-
201
-
202
-
203
-
204
-
205
-
206
-
207
-
208
-
209
-
210
-
211
-
212
-
213
-
214
-
215
-
216
-
217
-
218
-
219
-
220
-
221
-
222
-
223
-
224
-
225
-
226
-
227
-
228
-
229
-
230
-
231
-
232
-
233
-
234
-
235
-
236
-
237
-
238
-
239
-
240
-
241
-
242
-
243
-
244
-
245
-
246
-
247
-
248
-
249
-
250
-
251
-
252
 |
 |