Epson EMP-TW20 User Manual - Page 25
Viewing Images at a Preset Image Quality Memory Function
 |
View all Epson EMP-TW20 manuals
Add to My Manuals
Save this manual to your list of manuals |
Page 25 highlights
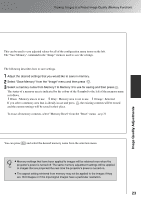
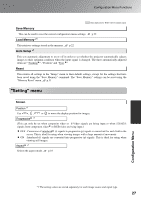
Viewing Images at a Preset Image Quality (Memory Function) The Cinema Color Editor program can also be used to store and retrieve memory settings from a This can becuosuimsnegpduthtteoer.s"AMavecemoamodrpjyuu:tsAetreddcvaavnnacbleue"eusmsfeeondrutaocllommoafmktehaneddec.toanilefidguardajutisotnmemnetsnuanidtetmhessoenatdhjuesltemfte.nts can be stored The "Save Memory" command in the "Image" menu is used to save the settings. The following describes how to save settings. Adjust the desired settings that you would like to save in memory. Select "Save Memory" from the "Image" menu and then press . Select a memory name from Memory1 to Memory 3 to use for saving and then press . The status of a memory area is indicated by the colour of the symbol to the left of the memory name as follows. Green : Memory area is in use Grey : Memory area is not in use Orange : Selected If you select a memory area that is already in use and press , the existing contents will be erased and the current settings will be saved in their place. To erase all memory contents, select "Memory Reset" from the "Reset" menu. p.31 You can press and select the desired memory name from the selection menu. Memory settings that have been applied to images will be retained even when the projector's power is turned off. The same memory adjustment settings will be applied TIP to images that are projected the next time the projector's power is turned on. The aspect setting retrieved from memory may not be applied to the images if they are 16:9 images or if the input signal images have a particular resolution. 23 Image Quality Adjustments
-
 1
1 -
2
-
3
-
4
-
5
-
6
-
7
-
8
-
9
-
10
-
11
-
12
-
13
-
14
-
15
-
16
-
17
-
18
-
19
-
 20
20 -
 21
21 -
 22
22 -
 23
23 -
 24
24 -
 25
25 -
 26
26 -
 27
27 -
 28
28 -
 29
29 -
 30
30 -
31
-
32
-
33
-
34
-
35
-
36
-
37
-
38
-
39
-
40
-
41
-
42
-
43
-
44
-
45
-
46
-
47
-
48
-
49
-
50
-
51
-
52
-
53
-
54
-
55
-
56
 |
 |
