Epson LX-300II Product Information Guide - Page 13
Multipart forms, Labels, Envelopes - printer settings
 |
View all Epson LX-300II manuals
Add to My Manuals
Save this manual to your list of manuals |
Page 13 highlights
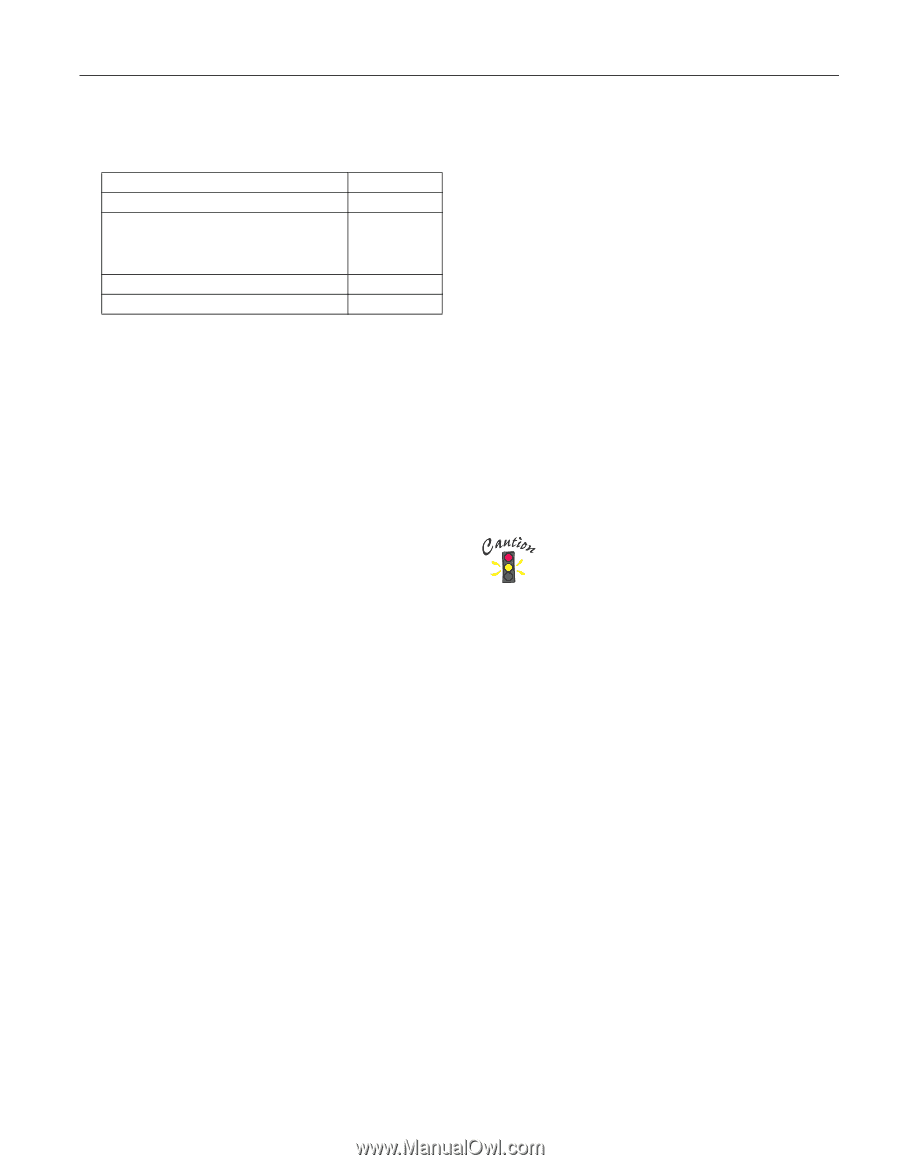
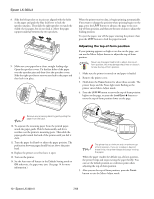
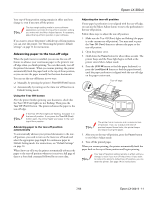
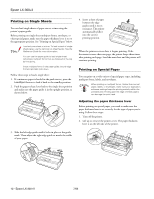
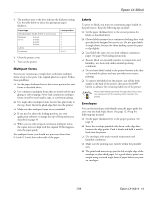
Epson LX-300+II 3. The numbers next to the lever indicate the thickness setting. Use the table below to select the appropriate paper thickness. Paper type Standard paper (single sheets or continuous) Multipart forms 2-sheet 3-sheet 4-sheet 5-sheet Labels Envelopes Lever position 0 0 1 2 3 1 2 or 4 4. Close the printer cover. 5. Turn on the printer. Multipart forms You can use continuous or single-sheet carbonless multipart forms of up to five parts (one original plus four copies). Follow these guidelines: ❏ Set the paper thickness lever to the correct position for your forms as described above. ❏ Use continuous multipart forms that are joined only by spot gluing or side-crimping. Never load continuous multipart forms joined by metal staples, tape, or continuous gluing. ❏ Use single-sheet multipart forms that are line-glued only at the top. Insert the forms glued-edge-first into the printer. ❏ Make sure that multipart forms are not wrinkled. ❏ If you need to adjust the loading position, use your application software or change the top-of-form position as described on page 10. ❏ When you use side-crimped continuous multipart forms, the copies may not align with the original. If this happens, raise the paper guide. For multipart forms, you should not print any closer than 0.5 inch (13 mm) from either side of the paper. Labels To print on labels, you must use continuous paper loaded on the pull tractor. Keep the following tips in mind: ❏ Set the paper thickness lever to the correct position for labels, as described above. ❏ Choose labels mounted on a continuous backing sheet with sprocket holes designed for tractor use. Do not print labels as single sheets, because the shiny backing causes the paper to slip slightly. ❏ Load labels the same way you load ordinary continuous paper. See page 9 for loading instructions. ❏ Because labels are especially sensitive to temperature and humidity, use them only under normal operating conditions. ❏ Do not leave labels loaded in the printer between jobs; they curl around the platen and may jam when you resume printing. ❏ To remove the labels from the printer, tear off the fresh supply at the back of the printer; then press the LF/FF button to advance the remaining labels out of the printer. Never feed labels backward through the printer; they can easily peel off the backing sheet and jam the printer. Envelopes You can feed envelopes individually using the paper guide the same way you load single sheets. (See page 12.) Keep the following tips in mind: ❏ Set the paper thickness lever to the proper position. See page 12. ❏ Insert the envelope printable-side down, wide-edge-first, between the edge guides. Push it firmly and hold it until it feeds into the printer. ❏ Use envelopes only under normal temperature and humidity conditions. ❏ Make sure the printing stays entirely within the printable area. ❏ The print head must not go past the left or right edge of the envelope or other thick paper. It's a good idea to print a test sample using a normal single sheet of paper before you print on envelopes. 7/06 Epson LX-300+II - 13
-
 1
1 -
2
-
3
-
4
-
5
-
6
-
7
-
 8
8 -
 9
9 -
 10
10 -
 11
11 -
 12
12 -
 13
13 -
 14
14 -
 15
15 -
 16
16
 |
 |