Epson LX-300II Product Information Guide - Page 7
Printing on Continuous Paper - installer
 |
View all Epson LX-300II manuals
Add to My Manuals
Save this manual to your list of manuals |
Page 7 highlights
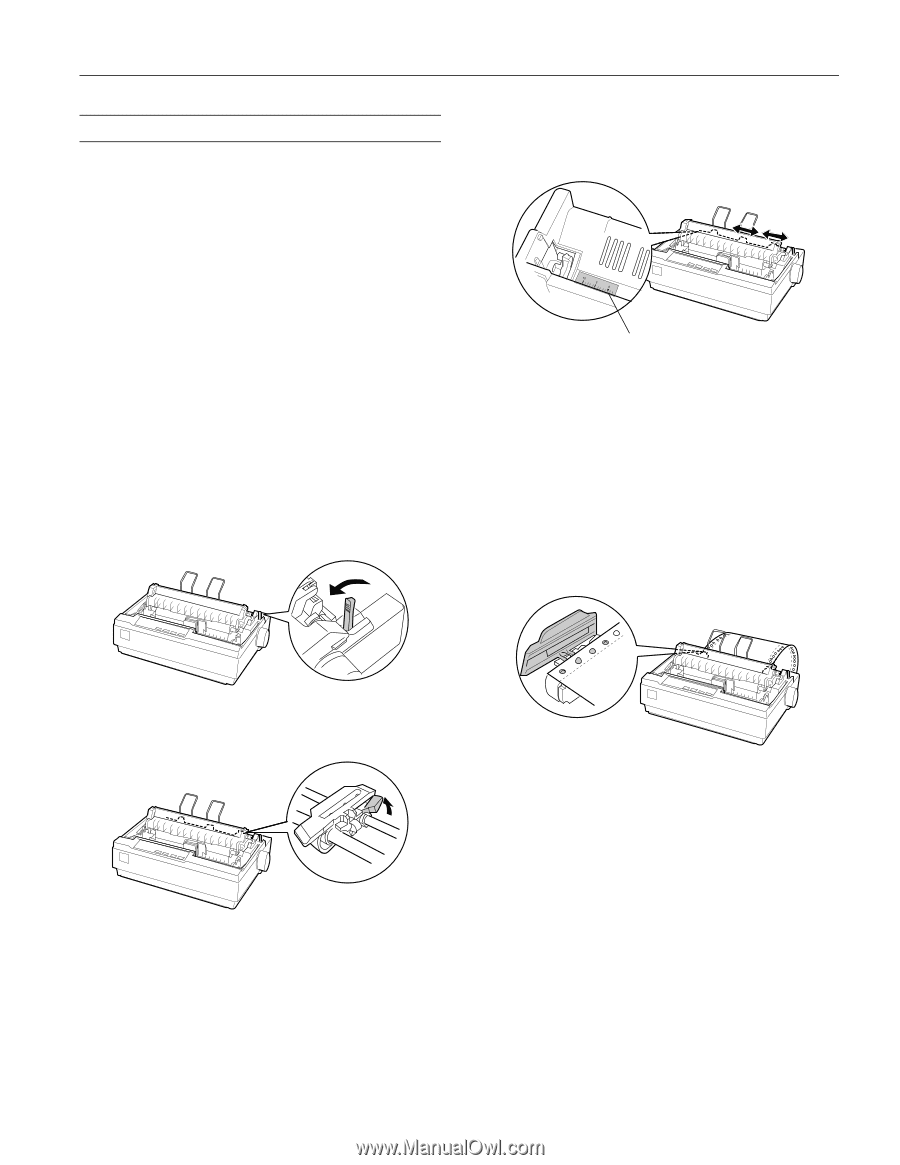
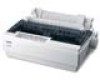
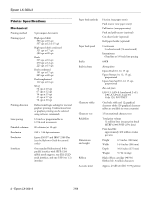
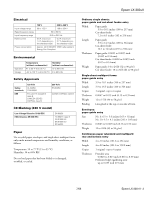
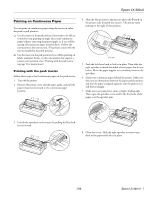
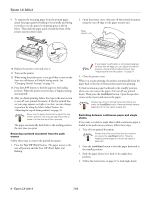
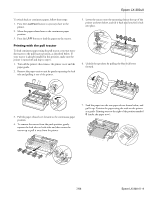
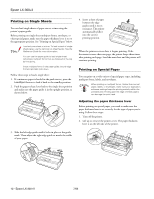
Epson LX-300+II Printing on Continuous Paper You can print on continuous paper using the tractor in either the push or pull position: ❏ Use the tractor in the push position if you want to be able to switch between printing on single sheets and continuous paper without removing the paper supply, or if you will be tearing off continuous paper sheet-by-sheet. (Follow the instructions in the next section.) The printer comes with the tractor installed in the push position. ❏ Use the tractor in the pull position if you will be printing on labels, multipart forms, or other documents that require a precise print position. (See "Printing with the pull tractor" on page 9 for instructions.) Printing with the push tractor Follow these steps to load continuous paper on the push tractor: 1. Turn off the printer. 2. Remove the printer cover and the paper guide, and pull the paper release lever forward to the continuous paper position. 4. Slide the left sprocket so the pins are above the 0 mark on the printer scale (beneath the tractor). The printer starts printing to the right of this position. 0 mark 5. Push the lock lever back to lock it in place. Then slide the right sprocket to match the width of your paper, but do not lock it. Move the paper support so it is midway between the sprockets. 6. Stack your continuous paper behind the printer. Make sure there are no obstructions between the paper and the printer, and that the paper is aligned squarely with the printer so it will feed in straight. 7. Make sure your paper has a clean, straight, leading edge. Then open the sprocket covers and fit the first holes of the paper over the sprocket pins. 3. Unlock the sprockets on the tractor by pulling the blue lock levers forward. 8. Close the covers. Slide the right sprocket to remove any slack in the paper and lock it in place. 7/06 Epson LX-300+II - 7
-
 1
1 -
 2
2 -
 3
3 -
 4
4 -
 5
5 -
 6
6 -
 7
7 -
 8
8 -
 9
9 -
 10
10 -
 11
11 -
 12
12 -
13
-
14
-
15
-
16
 |
 |