Epson Perfection V19 User Manual - Page 101
Scanned Image Colors Do Not Match Original Colors, Scan Area is Not Adjustable in Thumbnail Preview
 |
View all Epson Perfection V19 manuals
Add to My Manuals
Save this manual to your list of manuals |
Page 101 highlights
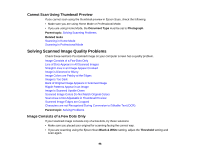
Note: Auto Photo Orientation will not work when you scan newspapers, magazines, documents, illustrations, or line art, or images smaller than 2 inches (5.1 cm) on any side. Parent topic: Solving Scanned Image Quality Problems Scanned Image Colors Do Not Match Original Colors Printed colors can never exactly match the colors on your computer monitor because printers and monitors use different color systems: monitors use RGB (red, green, and blue) and printers typically use CMYK (cyan, magenta, yellow, and black). Check the color matching and color management capabilities of your computer, display adapter, and the software you are using to see if they are affecting the palette of colors you see on your screen. To adjust the colors in your scanned image, adjust these Epson Scan settings (if available) and try scanning again: • Change the Image Type setting and experiment with different combinations of the next settings. • Adjust the Tone Correction setting. • Adjust the Auto Exposure setting. • Click Customize, then select the Color tab and adjust the Display Gamma setting to match your output device (monitor or printer). • Select JPEG (*.jpg) or TIFF (*.tif) as the Type setting on the File Save Settings window. Click Options and select Embed ICC Profile. Parent topic: Solving Scanned Image Quality Problems Related tasks Selecting Scan File Settings Scan Area is Not Adjustable in Thumbnail Preview If you cannot adjust the scan area while viewing a Thumbnail preview in Epson Scan, try these solutions: • Create a scan area by drawing a marquee on your preview image and adjusting it as necessary. • Adjust the thumbnail cropping area using the Thumbnail Cropping Area slider in preview mode. • Switch to Normal preview mode, if available, and preview your image again. Parent topic: Solving Scanned Image Quality Problems 101
-
 1
1 -
2
-
3
-
4
-
5
-
6
-
7
-
8
-
9
-
10
-
11
-
12
-
13
-
14
-
15
-
16
-
17
-
18
-
19
-
20
-
21
-
22
-
23
-
24
-
25
-
26
-
27
-
28
-
29
-
30
-
31
-
32
-
33
-
34
-
35
-
36
-
37
-
38
-
39
-
40
-
41
-
42
-
43
-
44
-
45
-
46
-
47
-
48
-
49
-
50
-
51
-
52
-
53
-
54
-
55
-
56
-
57
-
58
-
59
-
60
-
61
-
62
-
63
-
64
-
65
-
66
-
67
-
68
-
69
-
70
-
71
-
72
-
73
-
74
-
75
-
76
-
77
-
78
-
79
-
80
-
81
-
82
-
83
-
84
-
85
-
86
-
87
-
88
-
89
-
90
-
91
-
92
-
93
-
94
-
95
-
 96
96 -
 97
97 -
 98
98 -
 99
99 -
 100
100 -
 101
101 -
 102
102 -
 103
103 -
 104
104 -
 105
105 -
 106
106 -
107
-
108
-
109
-
110
-
111
-
112
-
113
 |
 |
