Epson Perfection V19 User Manual - Page 80
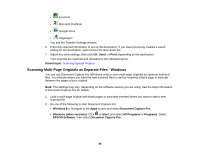
Scanning Multi- Originals as Separate Files - Windows, Print, Parent topic, Windows 8.x
 |
View all Epson Perfection V19 manuals
Add to My Manuals
Save this manual to your list of manuals |
Page 80 highlights
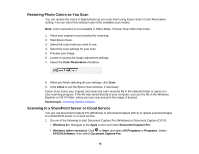
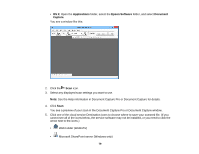
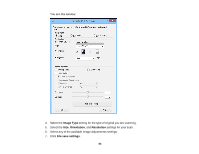
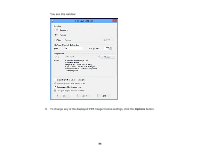
• Evernote • Microsoft OneNote • Google Drive • SugarSync You see the Transfer Settings window. 6. Enter any required information to set up the destination. If you have previously created a saved setting for the destination, select it from the drop-down list. 7. Adjust any save settings, then click OK, Send, or Print, depending on the destination. Your originals are scanned and uploaded to the indicated server. Parent topic: Scanning Special Projects Scanning Multi-Page Originals as Separate Files - Windows You can use Document Capture Pro (Windows only) to scan multi-page originals as separate scanned files. You indicate where you want the new scanned files to start by inserting a blank page or barcode between the pages of your original. Note: The settings may vary, depending on the software version you are using. See the Help information in Document Capture Pro for details. 1. Load a multi-page original with blank pages or barcodes inserted where you want to start a new scanned file. 2. Do one of the following to start Document Capture Pro: • Windows 8.x: Navigate to the Apps screen and select Document Capture Pro. • Windows (other versions): Click or Start, and select All Programs or Programs. Select EPSON Software, then select Document Capture Pro. 80
-
 1
1 -
2
-
3
-
4
-
5
-
6
-
7
-
8
-
9
-
10
-
11
-
12
-
13
-
14
-
15
-
16
-
17
-
18
-
19
-
20
-
21
-
22
-
23
-
24
-
25
-
26
-
27
-
28
-
29
-
30
-
31
-
32
-
33
-
34
-
35
-
36
-
37
-
38
-
39
-
40
-
41
-
42
-
43
-
44
-
45
-
46
-
47
-
48
-
49
-
50
-
51
-
52
-
53
-
54
-
55
-
56
-
57
-
58
-
59
-
60
-
61
-
62
-
63
-
64
-
65
-
66
-
67
-
68
-
69
-
70
-
71
-
72
-
73
-
74
-
 75
75 -
 76
76 -
 77
77 -
 78
78 -
 79
79 -
 80
80 -
 81
81 -
 82
82 -
 83
83 -
 84
84 -
 85
85 -
86
-
87
-
88
-
89
-
90
-
91
-
92
-
93
-
94
-
95
-
96
-
97
-
98
-
99
-
100
-
101
-
102
-
103
-
104
-
105
-
106
-
107
-
108
-
109
-
110
-
111
-
112
-
113
 |
 |