Epson Perfection V19 User Manual - Page 31
Starting a Scan from a Scanning Program, Displays, the EPSON Scan Setup Screen, Preview - windows 10
 |
View all Epson Perfection V19 manuals
Add to My Manuals
Save this manual to your list of manuals |
Page 31 highlights
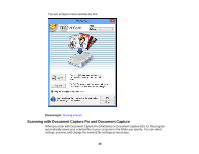
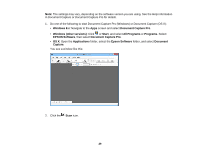
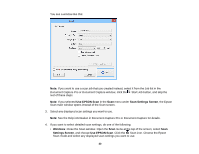
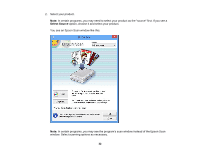
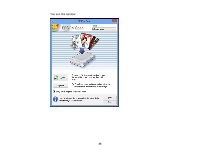
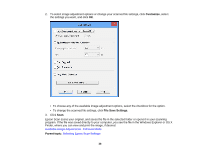
• OS X: Close the Scan window. Open the Scan menu at the top of the screen and select Displays the EPSON Scan Setup Screen. Click the Scan icon. Select any displayed scan settings you want to use and click OK. 5. If you selected detailed scan settings, click Preview. You see a preview of your scan in the Epson Scan window. 6. Click Scan. You see a preview of your scan in the Document Capture Pro (Windows) or Document Capture (OS X) window. Note: You may have to close the Epson Scan window to view your scan in the Document Capture Pro (Windows) or Document Capture (OS X) window. 7. If you would like to scan additional originals and add them to the current captured images, click the Add Page button, select Acquire from Scanner, and repeat steps 2 through 6. 8. Check the scanned images and edit them as necessary. 9. Click one of the Destination icons to choose where to send your scanned files. (If you cannot see all of the icons below, click the arrow next to the icons.) 10. Depending on the destination you chose, click OK or Send to complete the operation. Parent topic: Starting a Scan Starting a Scan from a Scanning Program You can start Epson Scan from a TWAIN-compliant scanning program to select scan settings, scan, and open the scanned image in the program. 1. Open your scanning program and select its scanning option. (See your scanning program help for instructions.) 31
-
 1
1 -
2
-
3
-
4
-
5
-
6
-
7
-
8
-
9
-
10
-
11
-
12
-
13
-
14
-
15
-
16
-
17
-
18
-
19
-
20
-
21
-
22
-
23
-
24
-
25
-
 26
26 -
 27
27 -
 28
28 -
 29
29 -
 30
30 -
 31
31 -
 32
32 -
 33
33 -
 34
34 -
 35
35 -
 36
36 -
37
-
38
-
39
-
40
-
41
-
42
-
43
-
44
-
45
-
46
-
47
-
48
-
49
-
50
-
51
-
52
-
53
-
54
-
55
-
56
-
57
-
58
-
59
-
60
-
61
-
62
-
63
-
64
-
65
-
66
-
67
-
68
-
69
-
70
-
71
-
72
-
73
-
74
-
75
-
76
-
77
-
78
-
79
-
80
-
81
-
82
-
83
-
84
-
85
-
86
-
87
-
88
-
89
-
90
-
91
-
92
-
93
-
94
-
95
-
96
-
97
-
98
-
99
-
100
-
101
-
102
-
103
-
104
-
105
-
106
-
107
-
108
-
109
-
110
-
111
-
112
-
113
 |
 |