Epson PictureMate Charm - PM 225 Basics - Page 25
Print From a Computer, Installing Software and Connecting PictureMate, Installing Software for Windows - buy
 |
View all Epson PictureMate Charm - PM 225 manuals
Add to My Manuals
Save this manual to your list of manuals |
Page 25 highlights
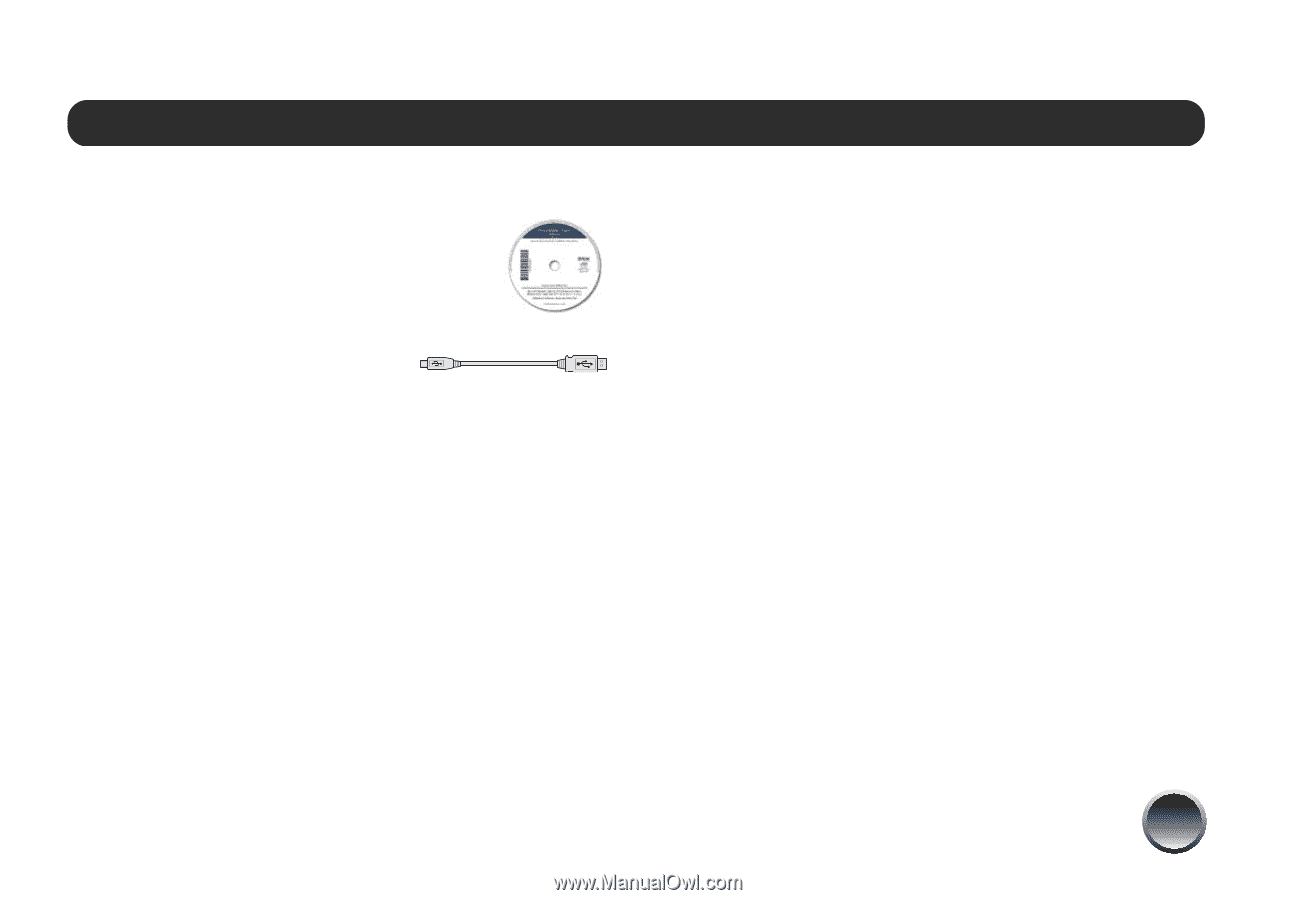
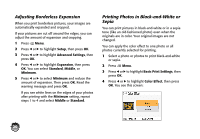
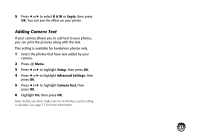
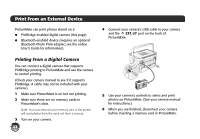
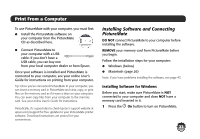
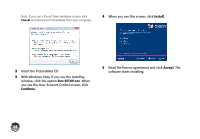
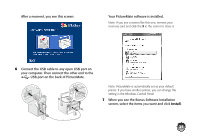
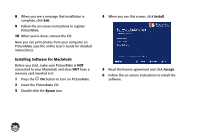
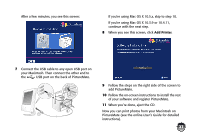
Print From a Computer To use PictureMate with your computer, you must first: ● Install the PictureMate software on your computer from the PictureMate CD as described here. ● Connect PictureMate to your computer with a USB cable. If you don't have a USB cable, you can buy one from your local computer dealer or from Epson. Once your software is installed and PictureMate is connected to your computer, see your online User's Guide for instructions on printing from your computer. Tip: Once you've connected PictureMate to your computer, you can insert a memory card in PictureMate and view, copy, or print files on the memory card as if it were a drive on your computer. You can even copy files from your computer to the memory card. See your online User's Guide for instructions. Periodically, it's a good idea to check Epson's support website at epson.com/support for free updates to your PictureMate printer software. Download instructions are posted for your convenience. Installing Software and Connecting PictureMate DO NOT connect PictureMate to your computer before installing the software. REMOVE your memory card from PictureMate before you begin. Follow the installation steps for your computer: ● Windows (below) ● Macintosh (page 26) Note: If you have problems installing the software, see page 43. Installing Software for Windows Before you start, make sure PictureMate is NOT connected to your computer and does NOT have a memory card inserted in it. 1 Press the P On button to turn on PictureMate. 23
-
 1
1 -
2
-
3
-
4
-
5
-
6
-
7
-
8
-
9
-
10
-
11
-
12
-
13
-
14
-
15
-
16
-
17
-
18
-
19
-
 20
20 -
 21
21 -
 22
22 -
 23
23 -
 24
24 -
 25
25 -
 26
26 -
 27
27 -
 28
28 -
 29
29 -
 30
30 -
31
-
32
-
33
-
34
-
35
-
36
-
37
-
38
-
39
-
40
-
41
-
42
-
43
-
44
-
45
-
46
-
47
-
48
-
49
-
50
-
51
-
52
-
53
-
54
-
55
-
56
-
57
-
58
-
59
-
60
-
61
-
62
-
63
-
64
-
65
-
66
 |
 |