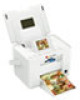
Epson PictureMate Charm - PM 225 Basics - Page 29
If you're using Mac OS X 10.3.9 or 10.4.11, Add Printer
 |
View all Epson PictureMate Charm - PM 225 manuals
Add to My Manuals
Save this manual to your list of manuals |
Page 29 highlights
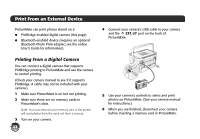
After a few minutes, you see this screen: If you're using Mac OS X 10.5.x, skip to step 10. If you're using Mac OS X 10.3.9 or 10.4.11, continue with the next step. 8 When you see this screen, click Add Printer. 7 Connect the USB cable to any open USB port on your Macintosh. Then connect the other end to the USB port on the back of PictureMate. 9 Follow the steps on the right side of the screen to add PictureMate. 10 Follow the on-screen instructions to install the rest of your software and register PictureMate. 11 When you're done, eject the CD. Now you can print photos from your Macintosh on PictureMate (see the online User's Guide for detailed instructions). 27
-
 1
1 -
2
-
3
-
4
-
5
-
6
-
7
-
8
-
9
-
10
-
11
-
12
-
13
-
14
-
15
-
16
-
17
-
18
-
19
-
20
-
21
-
22
-
23
-
 24
24 -
 25
25 -
 26
26 -
 27
27 -
 28
28 -
 29
29 -
 30
30 -
 31
31 -
 32
32 -
 33
33 -
 34
34 -
35
-
36
-
37
-
38
-
39
-
40
-
41
-
42
-
43
-
44
-
45
-
46
-
47
-
48
-
49
-
50
-
51
-
52
-
53
-
54
-
55
-
56
-
57
-
58
-
59
-
60
-
61
-
62
-
63
-
64
-
65
-
66
 |
 |

27
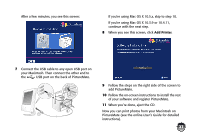
After a few minutes, you see this screen:
7
Connect the USB cable to any open USB port on
your Macintosh. Then connect the other end to
the
USB port on the back of PictureMate.
If you’re using Mac OS X 10.5.x, skip to step 10.
If you’re using Mac OS X 10.3.9 or 10.4.11,
continue with the next step.
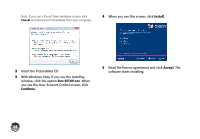
8
When you see this screen, click
Add Printer
.
9
Follow the steps on the right side of the screen to
add PictureMate.
10
Follow the on-screen instructions to install the rest
of your software and register PictureMate.
11
When you’re done, eject the CD.
Now you can print photos from your Macintosh on
PictureMate (see the online
User’s Guide
for detailed
instructions).