Epson PictureMate Charm - PM 225 Basics - Page 28
Installing Software for Macintosh, Epson, Install, Accept
 |
View all Epson PictureMate Charm - PM 225 manuals
Add to My Manuals
Save this manual to your list of manuals |
Page 28 highlights
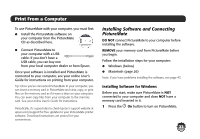
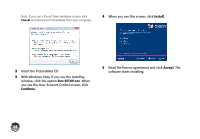
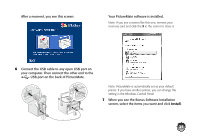
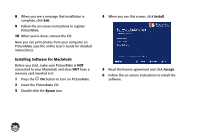
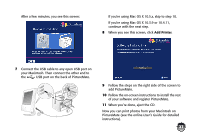
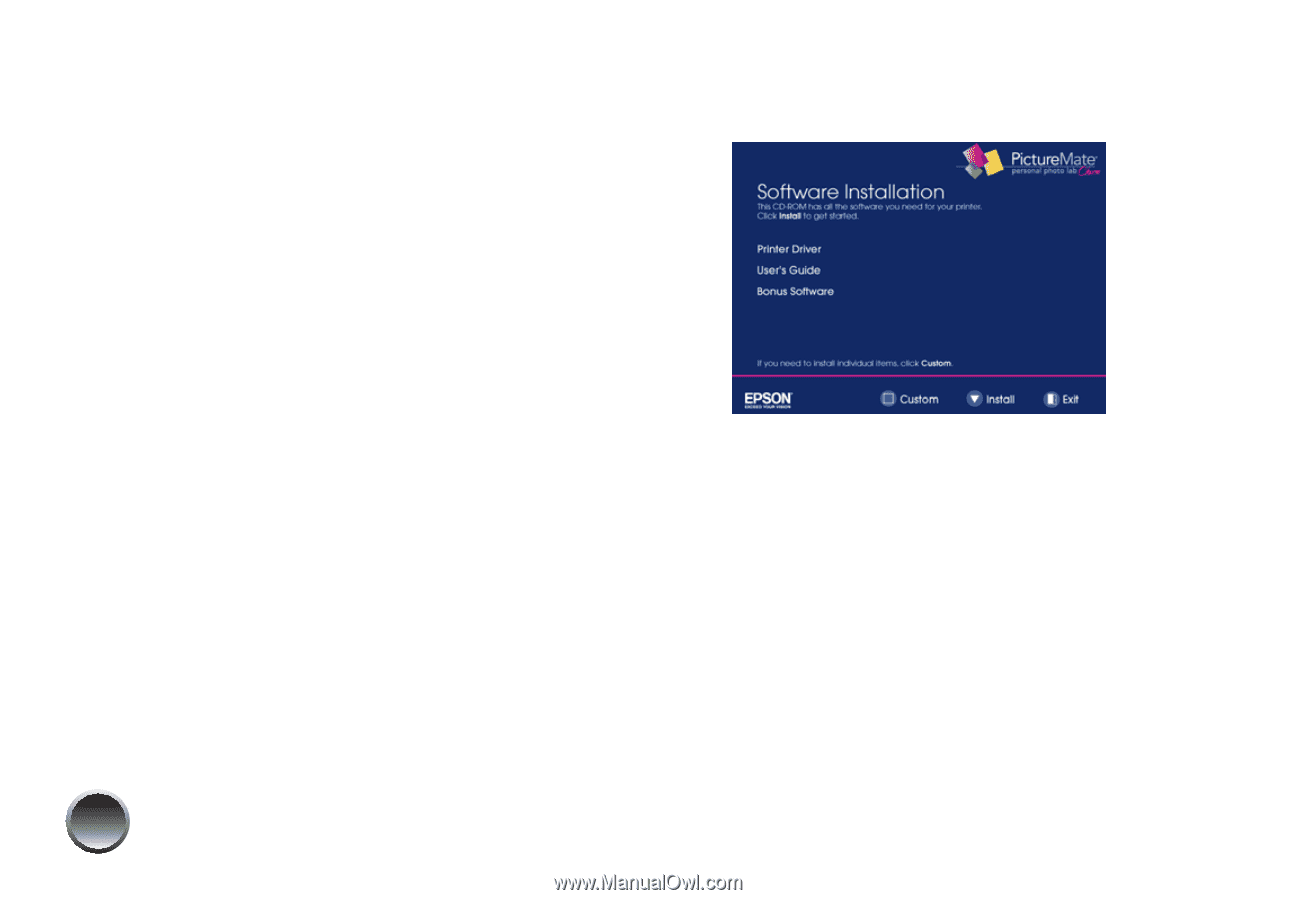
8 When you see a message that installation is complete, click Exit. 9 Follow the on-screen instructions to register PictureMate. 10 When you're done, remove the CD. Now you can print photos from your computer on PictureMate (see the online User's Guide for detailed instructions). Installing Software for Macintosh Before you start, make sure PictureMate is NOT connected to your Macintosh and does NOT have a memory card inserted in it. 1 Press the P On button to turn on PictureMate. 2 Insert the PictureMate CD. 3 Double-click the Epson icon. 4 When you see this screen, click Install. 5 Read the license agreement and click Accept. 6 Follow the on-screen instructions to install the software. 26
-
 1
1 -
2
-
3
-
4
-
5
-
6
-
7
-
8
-
9
-
10
-
11
-
12
-
13
-
14
-
15
-
16
-
17
-
18
-
19
-
20
-
21
-
22
-
 23
23 -
 24
24 -
 25
25 -
 26
26 -
 27
27 -
 28
28 -
 29
29 -
 30
30 -
 31
31 -
 32
32 -
 33
33 -
34
-
35
-
36
-
37
-
38
-
39
-
40
-
41
-
42
-
43
-
44
-
45
-
46
-
47
-
48
-
49
-
50
-
51
-
52
-
53
-
54
-
55
-
56
-
57
-
58
-
59
-
60
-
61
-
62
-
63
-
64
-
65
-
66
 |
 |
26
8
When you see a message that installation is
complete, click
Exit
.
9
Follow the on-screen instructions to register
PictureMate.
10
When you’re done, remove the CD.
Now you can print photos from your computer on
PictureMate (see the online
User’s Guide
for detailed
instructions).
Installing Software for Macintosh
Before you start, make sure PictureMate is
NOT
connected to your Macintosh and does
NOT
have a
memory card inserted in it.
1
Press the
P
On
button to turn on PictureMate.
2
Insert the PictureMate CD.
3
Double-click the
Epson
icon.
4
When you see this screen, click
Install
.
5
Read the license agreement and click
Accept
.
6
Follow the on-screen instructions to install the
software.