Epson PowerLite 1930 User Manual - Page 83
Automatically Correcting Image Shape With Screen Fit, Parent topic, Screen Fit
 |
View all Epson PowerLite 1930 manuals
Add to My Manuals
Save this manual to your list of manuals |
Page 83 highlights
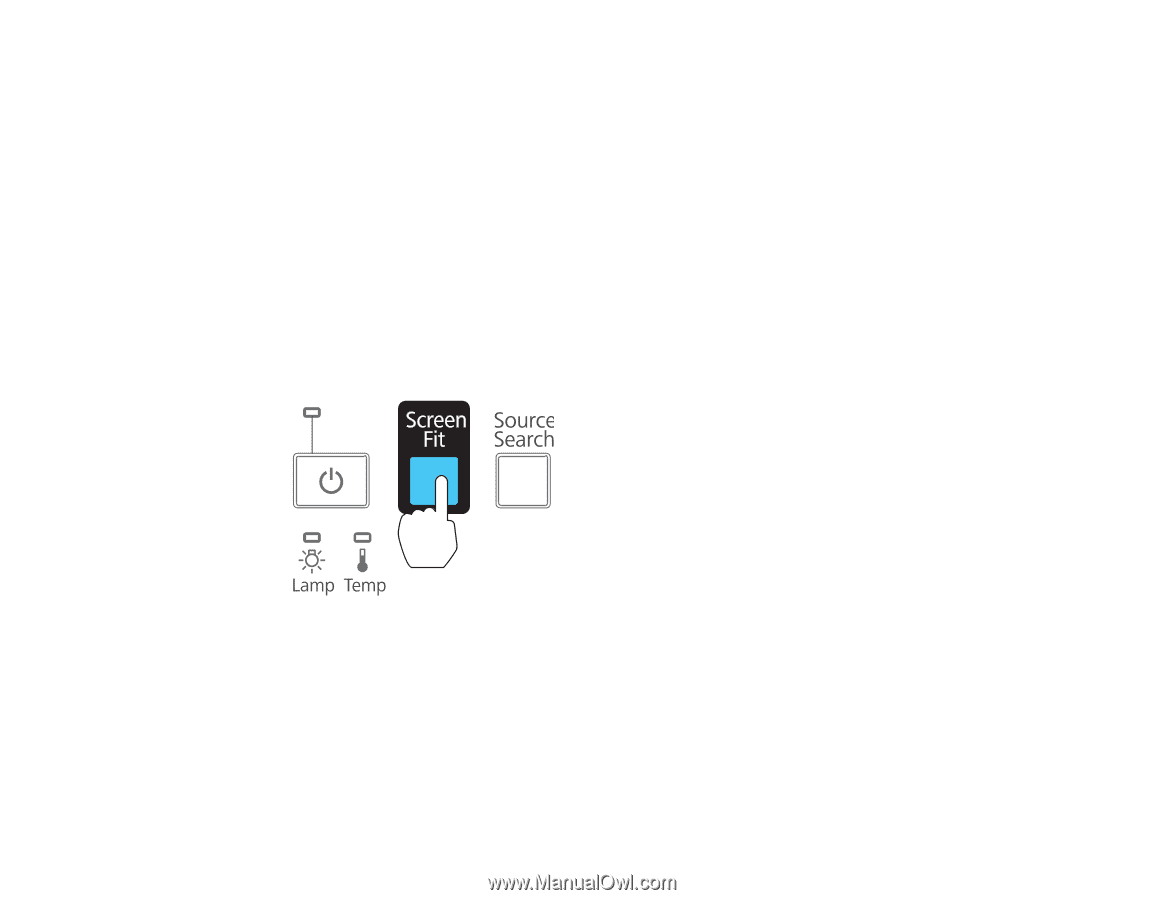
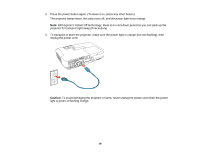
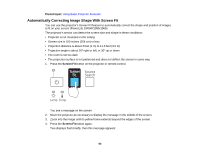
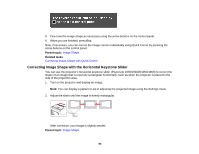
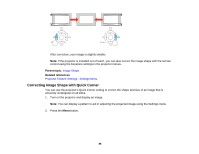
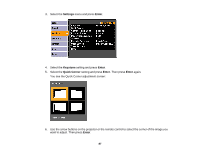
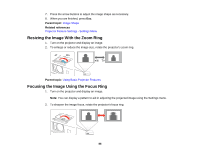
Parent topic: Using Basic Projector Features Automatically Correcting Image Shape With Screen Fit You can use the projector's Screen Fit feature to automatically correct the shape and position of images to fit on your screen (PowerLite 1945W/1955/1965). The projector's sensor can detect the screen size and shape in these conditions: • Projector is not mounted on the ceiling • Screen size is 100 inches (254 cm) or less • Projection distance is about 3 feet (1 m) to 11.5 feet (3.5 m) • Projection angle is about 20º right or left, or 30º up or down • The room is not too dark • The projection surface is not patterned and does not deflect the sensor in some way 1. Press the Screen Fit button on the projector or remote control. You see a message on the screen. 2. Move the projector as necessary to display the message in the middle of the screen. 3. Zoom into the image until its yellow frame extends beyond the edges of the screen. 4. Press the Screen Fit button again. Two displays flash briefly, then this message appears: 83
-
 1
1 -
2
-
3
-
4
-
5
-
6
-
7
-
8
-
9
-
10
-
11
-
12
-
13
-
14
-
15
-
16
-
17
-
18
-
19
-
20
-
21
-
22
-
23
-
24
-
25
-
26
-
27
-
28
-
29
-
30
-
31
-
32
-
33
-
34
-
35
-
36
-
37
-
38
-
39
-
40
-
41
-
42
-
43
-
44
-
45
-
46
-
47
-
48
-
49
-
50
-
51
-
52
-
53
-
54
-
55
-
56
-
57
-
58
-
59
-
60
-
61
-
62
-
63
-
64
-
65
-
66
-
67
-
68
-
69
-
70
-
71
-
72
-
73
-
74
-
75
-
76
-
77
-
 78
78 -
 79
79 -
 80
80 -
 81
81 -
 82
82 -
 83
83 -
 84
84 -
 85
85 -
 86
86 -
 87
87 -
 88
88 -
89
-
90
-
91
-
92
-
93
-
94
-
95
-
96
-
97
-
98
-
99
-
100
-
101
-
102
-
103
-
104
-
105
-
106
-
107
-
108
-
109
-
110
-
111
-
112
-
113
-
114
-
115
-
116
-
117
-
118
-
119
-
120
-
121
-
122
-
123
-
124
-
125
-
126
-
127
-
128
-
129
-
130
-
131
-
132
-
133
-
134
-
135
-
136
-
137
-
138
-
139
-
140
-
141
-
142
-
143
-
144
-
145
-
146
-
147
-
148
-
149
-
150
-
151
-
152
-
153
-
154
-
155
-
156
-
157
-
158
-
159
-
160
-
161
-
162
-
163
-
164
-
165
-
166
-
167
-
168
-
169
-
170
-
171
-
172
-
173
-
174
-
175
-
176
-
177
-
178
-
179
-
180
-
181
-
182
-
183
-
184
-
185
-
186
-
187
-
188
-
189
-
190
-
191
-
192
-
193
-
194
-
195
-
196
-
197
-
198
-
199
-
200
-
201
-
202
-
203
-
204
-
205
-
206
-
207
-
208
-
209
-
210
-
211
-
212
-
213
-
214
-
215
-
216
-
217
-
218
-
219
-
220
-
221
-
222
-
223
-
224
-
225
-
226
-
227
-
228
-
229
-
230
-
231
-
232
 |
 |