Epson Stylus Pro 7900 Proofing Edition Printer Guide - Page 123
Chap 4-Printing With Epson Drivers for Windows, White Photo mode.
 |
View all Epson Stylus Pro 7900 Proofing Edition manuals
Add to My Manuals
Save this manual to your list of manuals |
Page 123 highlights
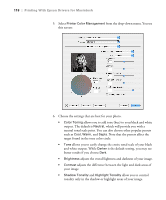
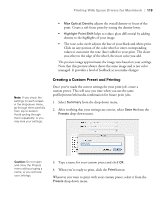
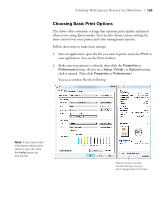
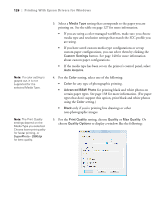
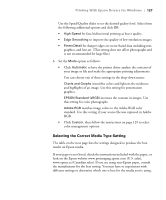
123 Chapter 4: Printing With Epson Drivers for Windows Your Epson Stylus Pro 7900 or Pro 9900 comes with drivers and utilities that let you print and manage print jobs. For the best black and white photography output, the Epson printer driver offers Advanced Black and White Photo mode. ICC profiles are included, so you can use the color management features in Adobe Photoshop or other applications, or in the driver itself. A color-managed workflow using Photoshop and a color-calibrated monitor will give you the most accurate colors and best output from your printer for color photos. See your on-screen User's Guide for instructions. You can create your own profiles if you have the required hardware and software, or you can have them created by a color specialist. Make sure any profiles you want to use are located in the standard folder for your operating system. When you install the Epson printer driver, the ready-made profiles are automatically copied to the right folder. Before you print, you need to set basic printing properties. Make sure you have installed the Epson driver and utilities from the CD-ROM. See page 52 for instructions. If you plan on printing borderless images on roll paper, check the guidelines on page 124 to size your image correctly. Tip: Check the Epson Pro Imaging website at www.proimaging.epson. com for updated drivers and utilities that may become available. This chapter includes the following information: • Sizing images for borderless printing on roll paper • Choosing basic print options • Choosing color management options • Choosing roll paper settings • Choosing cut sheet paper settings • Choosing page layout options • Choosing advanced black and white photo settings • Choosing paper configuration options • Saving, exporting, and importing groups of settings • Managing print jobs 123
-
 1
1 -
2
-
3
-
4
-
5
-
6
-
7
-
8
-
9
-
10
-
11
-
12
-
13
-
14
-
15
-
16
-
17
-
18
-
19
-
20
-
21
-
22
-
23
-
24
-
25
-
26
-
27
-
28
-
29
-
30
-
31
-
32
-
33
-
34
-
35
-
36
-
37
-
38
-
39
-
40
-
41
-
42
-
43
-
44
-
45
-
46
-
47
-
48
-
49
-
50
-
51
-
52
-
53
-
54
-
55
-
56
-
57
-
58
-
59
-
60
-
61
-
62
-
63
-
64
-
65
-
66
-
67
-
68
-
69
-
70
-
71
-
72
-
73
-
74
-
75
-
76
-
77
-
78
-
79
-
80
-
81
-
82
-
83
-
84
-
85
-
86
-
87
-
88
-
89
-
90
-
91
-
92
-
93
-
94
-
95
-
96
-
97
-
98
-
99
-
100
-
101
-
102
-
103
-
104
-
105
-
106
-
107
-
108
-
109
-
110
-
111
-
112
-
113
-
114
-
115
-
116
-
117
-
 118
118 -
 119
119 -
 120
120 -
 121
121 -
 122
122 -
 123
123 -
 124
124 -
 125
125 -
 126
126 -
 127
127 -
 128
128 -
129
-
130
-
131
-
132
-
133
-
134
-
135
-
136
-
137
-
138
-
139
-
140
-
141
-
142
-
143
-
144
-
145
-
146
-
147
-
148
-
149
-
150
-
151
-
152
-
153
-
154
-
155
-
156
-
157
-
158
-
159
-
160
-
161
-
162
-
163
-
164
-
165
-
166
-
167
-
168
-
169
-
170
-
171
-
172
-
173
-
174
-
175
-
176
-
177
-
178
-
179
-
180
-
181
-
182
-
183
-
184
-
185
-
186
-
187
-
188
-
189
-
190
-
191
-
192
-
193
-
194
-
195
-
196
-
197
-
198
-
199
-
200
-
201
-
202
-
203
-
204
-
205
-
206
-
207
-
208
 |
 |