Epson Stylus Pro 7900 Proofing Edition Printer Guide - Page 132
Choosing Roll Paper Options, as the Source setting.
 |
View all Epson Stylus Pro 7900 Proofing Edition manuals
Add to My Manuals
Save this manual to your list of manuals |
Page 132 highlights
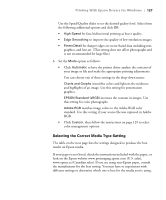
132 | Printing With Epson Drivers for Windows Note: Many application settings override settings in the printer driver. Always verify settings to get the results you expect. Tip: Creating a user-defined paper size generally lets you make the best use of your roll paper. Choosing Roll Paper Options Follow the steps in this section to print on roll paper and select settings for borderless printing and automatic cutting. (If you're printing on cut sheets, see page 135). 1. On the Properties or Preferences window, make sure the Main tab is selected. 2. For the Source setting, select Roll Paper or Roll Paper (Banner). The Roll Paper (Banner) setting allows you to print a series of continuous images without any space between them. This option is not available with all applications, and is mostly for tiling an image. Save Roll Paper saves paper by not feeding the blank portion of the last page of your document. Available only if you've selected Roll Paper (Banner) as the Source setting. 3. For the Size setting, select the size of your image or output paper. To make the best use of your roll paper, creating a custom paper size is recommended. Select User Defined. You see this window: Type a name for your custom size, then enter the size in hundredths of an inch (or centimeters) and click Save. Then click OK. 4. If you want to reduce or enlarge your image, click the Page Layout tab. See page 137 for more information. 132
-
 1
1 -
2
-
3
-
4
-
5
-
6
-
7
-
8
-
9
-
10
-
11
-
12
-
13
-
14
-
15
-
16
-
17
-
18
-
19
-
20
-
21
-
22
-
23
-
24
-
25
-
26
-
27
-
28
-
29
-
30
-
31
-
32
-
33
-
34
-
35
-
36
-
37
-
38
-
39
-
40
-
41
-
42
-
43
-
44
-
45
-
46
-
47
-
48
-
49
-
50
-
51
-
52
-
53
-
54
-
55
-
56
-
57
-
58
-
59
-
60
-
61
-
62
-
63
-
64
-
65
-
66
-
67
-
68
-
69
-
70
-
71
-
72
-
73
-
74
-
75
-
76
-
77
-
78
-
79
-
80
-
81
-
82
-
83
-
84
-
85
-
86
-
87
-
88
-
89
-
90
-
91
-
92
-
93
-
94
-
95
-
96
-
97
-
98
-
99
-
100
-
101
-
102
-
103
-
104
-
105
-
106
-
107
-
108
-
109
-
110
-
111
-
112
-
113
-
114
-
115
-
116
-
117
-
118
-
119
-
120
-
121
-
122
-
123
-
124
-
125
-
126
-
 127
127 -
 128
128 -
 129
129 -
 130
130 -
 131
131 -
 132
132 -
 133
133 -
 134
134 -
 135
135 -
 136
136 -
 137
137 -
138
-
139
-
140
-
141
-
142
-
143
-
144
-
145
-
146
-
147
-
148
-
149
-
150
-
151
-
152
-
153
-
154
-
155
-
156
-
157
-
158
-
159
-
160
-
161
-
162
-
163
-
164
-
165
-
166
-
167
-
168
-
169
-
170
-
171
-
172
-
173
-
174
-
175
-
176
-
177
-
178
-
179
-
180
-
181
-
182
-
183
-
184
-
185
-
186
-
187
-
188
-
189
-
190
-
191
-
192
-
193
-
194
-
195
-
196
-
197
-
198
-
199
-
200
-
201
-
202
-
203
-
204
-
205
-
206
-
207
-
208
 |
 |
