Epson XP-300 User Guide - Page 136
Caution, Ink Cartridge Replacement, Lower the scanner unit. - printer ink cartridges
 |
View all Epson XP-300 manuals
Add to My Manuals
Save this manual to your list of manuals |
Page 136 highlights
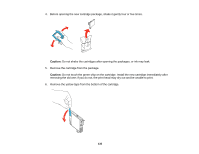
Caution: Do not remove any other labels or seals, or ink will leak. 7. Insert the new cartridge into the holder and push it down until it clicks into place. 8. Press the OK button. 9. Lower the scanner unit. The print head moves to its home position and the printer starts charging the ink. This takes about 4 minutes. When you see the Ink Cartridge Replacement screen, ink charging is finished. Caution: Never turn off the product while the power light is flashing or you will waste ink. 136
-
 1
1 -
2
-
3
-
4
-
5
-
6
-
7
-
8
-
9
-
10
-
11
-
12
-
13
-
14
-
15
-
16
-
17
-
18
-
19
-
20
-
21
-
22
-
23
-
24
-
25
-
26
-
27
-
28
-
29
-
30
-
31
-
32
-
33
-
34
-
35
-
36
-
37
-
38
-
39
-
40
-
41
-
42
-
43
-
44
-
45
-
46
-
47
-
48
-
49
-
50
-
51
-
52
-
53
-
54
-
55
-
56
-
57
-
58
-
59
-
60
-
61
-
62
-
63
-
64
-
65
-
66
-
67
-
68
-
69
-
70
-
71
-
72
-
73
-
74
-
75
-
76
-
77
-
78
-
79
-
80
-
81
-
82
-
83
-
84
-
85
-
86
-
87
-
88
-
89
-
90
-
91
-
92
-
93
-
94
-
95
-
96
-
97
-
98
-
99
-
100
-
101
-
102
-
103
-
104
-
105
-
106
-
107
-
108
-
109
-
110
-
111
-
112
-
113
-
114
-
115
-
116
-
117
-
118
-
119
-
120
-
121
-
122
-
123
-
124
-
125
-
126
-
127
-
128
-
129
-
130
-
 131
131 -
 132
132 -
 133
133 -
 134
134 -
 135
135 -
 136
136 -
 137
137 -
 138
138 -
 139
139 -
 140
140 -
 141
141 -
142
-
143
-
144
-
145
-
146
-
147
-
148
-
149
-
150
-
151
-
152
-
153
-
154
-
155
-
156
-
157
-
158
-
159
-
160
-
161
-
162
-
163
-
164
-
165
-
166
-
167
-
168
-
169
-
170
-
171
-
172
-
173
-
174
-
175
-
176
-
177
-
178
-
179
-
180
-
181
-
182
-
183
-
184
-
185
-
186
-
187
-
188
-
189
-
190
-
191
-
192
-
193
-
194
-
195
-
196
-
197
-
198
-
199
-
200
-
201
-
202
-
203
-
204
-
205
-
206
-
207
-
208
-
209
-
210
-
211
-
212
 |
 |
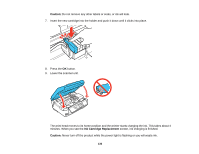
Caution:
Do not remove any other labels or seals, or ink will leak.
7.
Insert the new cartridge into the holder and push it down until it clicks into place.
8.
Press the
OK
button.
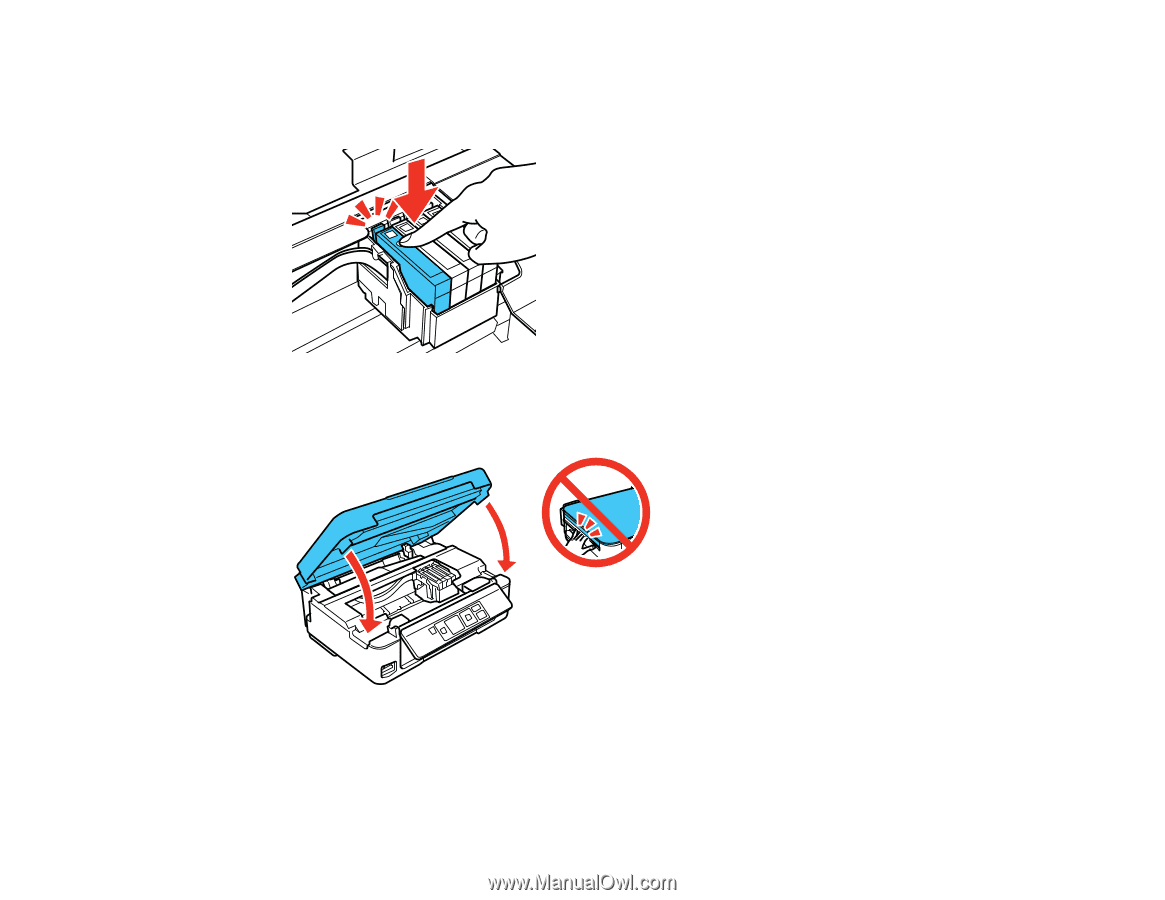
9.
Lower the scanner unit.
The print head moves to its home position and the printer starts charging the ink. This takes about 4
minutes. When you see the
Ink Cartridge Replacement
screen, ink charging is finished.
Caution:
Never turn off the product while the power light is flashing or you will waste ink.
136