Gateway E-9422R Gateway E-9422R Server User Guide - Page 18
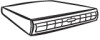
Setting Up Your Server, install one locking screw through the each back server rail.
 |
View all Gateway E-9422R manuals
Add to My Manuals
Save this manual to your list of manuals |
Page 18 highlights
CHAPTER 2: Setting Up Your Server 2 Align the locking screw holes in the rails with the threaded screw holes in the server, then install one locking screw through the each front server rail. 3 Align the slots in the back server rails with the studs on the side of the server, then engage the slots with the studs and slide the rail forward until it stops. Locking screw (installed) Back server rail Stud (installed) Stud 4 Align the locking screw holes in the rails with the threaded screw holes in the server, then install one locking screw through the each back server rail. 5 Attach mounting nuts to the two front cabinet posts where you plan to install the server. Front cabinet post Mounting nut 12
-
 1
1 -
2
-
3
-
4
-
5
-
6
-
7
-
8
-
9
-
10
-
11
-
12
-
 13
13 -
 14
14 -
 15
15 -
 16
16 -
 17
17 -
 18
18 -
 19
19 -
 20
20 -
 21
21 -
 22
22 -
 23
23 -
24
-
25
-
26
-
27
-
28
-
29
-
30
-
31
-
32
-
33
-
34
-
35
-
36
-
37
-
38
-
39
-
40
-
41
-
42
-
43
-
44
-
45
-
46
-
47
-
48
-
49
-
50
-
51
-
52
-
53
-
54
-
55
-
56
-
57
-
58
-
59
-
60
-
61
-
62
-
63
-
64
-
65
-
66
-
67
-
68
-
69
-
70
-
71
-
72
-
73
-
74
-
75
-
76
-
77
-
78
-
79
-
80
-
81
-
82
-
83
-
84
-
85
-
86
-
87
-
88
-
89
-
90
-
91
-
92
-
93
-
94
-
95
-
96
-
97
-
98
-
99
-
100
-
101
-
102
-
103
-
104
-
105
-
106
-
107
-
108
-
109
-
110
-
111
-
112
-
113
-
114
-
115
-
116
 |
 |

CHAPTER 2: Setting Up Your Server
12
2
Align the locking screw holes in the rails with the threaded screw holes in the server, then
install one locking screw through the each front server rail.
3
Align the slots in the back server rails with the studs on the side of the server, then engage
the slots with the studs and slide the rail forward until it stops.
4
Align the locking screw holes in the rails with the threaded screw holes in the server, then
install one locking screw through the each back server rail.
5
Attach mounting nuts to the two front cabinet posts where you plan to install the server.
Stud
Stud
Locking screw (installed)
Back server rail
(installed)
Front cabinet post
Mounting nut