Gateway E-9422R Gateway E-9422R Server User Guide - Page 54
Replacing the power distribution board
 |
View all Gateway E-9422R manuals
Add to My Manuals
Save this manual to your list of manuals |
Page 54 highlights
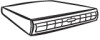
CHAPTER 4: Installing Components Replacing the power distribution board To replace the power distribution board: 1 Follow the instructions in "Preventing static electricity discharge" on page 28. Make sure that you turn off the server, then unplug the power cord(s) and all other cables connected to the server. 2 Follow the instructions in "Opening the server case" on page 29. 3 Remove the power supply modules by following the instructions in "Replacing a power supply module" on page 46. 4 Remove the power board cover (1) by pulling it out of the chassis. 5 Disconnect the main power, CPU power, backplane power, I2C power, and midplane power cables. See "System board" on page 4 for the location of the connectors on the system board. 6 Remove the screw (2) holding the power board into the chassis, then press down the tab (3) and move the power board (4) away from the side of the chassis to disengage the locking tabs and lift it out of the chassis (5). 7 Align the new power board with the stand-off and locking tabs on the chassis, then place it on the stand-offs and slide it toward the side of the chassis until the tab clicks into place. 8 Replace the screw you previously removed. 9 Reconnect the power cables. See "System board" on page 4 for the location of the connectors on the system board. 10 Reinstall the power supply modules by following the instructions in "Replacing a power supply module" on page 46. 11 Follow the instructions in "Closing the server case" on page 30. 48
-
 1
1 -
2
-
3
-
4
-
5
-
6
-
7
-
8
-
9
-
10
-
11
-
12
-
13
-
14
-
15
-
16
-
17
-
18
-
19
-
20
-
21
-
22
-
23
-
24
-
25
-
26
-
27
-
28
-
29
-
30
-
31
-
32
-
33
-
34
-
35
-
36
-
37
-
38
-
39
-
40
-
41
-
42
-
43
-
44
-
45
-
46
-
47
-
48
-
 49
49 -
 50
50 -
 51
51 -
 52
52 -
 53
53 -
 54
54 -
 55
55 -
 56
56 -
 57
57 -
 58
58 -
 59
59 -
60
-
61
-
62
-
63
-
64
-
65
-
66
-
67
-
68
-
69
-
70
-
71
-
72
-
73
-
74
-
75
-
76
-
77
-
78
-
79
-
80
-
81
-
82
-
83
-
84
-
85
-
86
-
87
-
88
-
89
-
90
-
91
-
92
-
93
-
94
-
95
-
96
-
97
-
98
-
99
-
100
-
101
-
102
-
103
-
104
-
105
-
106
-
107
-
108
-
109
-
110
-
111
-
112
-
113
-
114
-
115
-
116
 |
 |
