Haier QFD15ESSNWW Installation Instructions - Page 24
Installation Instructions, Before You Begin, Stacking The Washer And Dryer If Desired
 |
View all Haier QFD15ESSNWW manuals
Add to My Manuals
Save this manual to your list of manuals |
Page 24 highlights
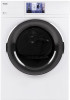
ENGLISH INSTALLATION INSTRUCTIONS STACKING THE WASHER AND DRYER (if desired) If you are planning to stack the washer and dryer, order Stacking Kit number GFA24KITL to be used for this dryer. Kit sold separately. BEFORE YOU BEGIN Read these instructions completely and carefully. • IMPORTANT - Save these instructions for local electrical inspector's use. • IMPORTANT - Observe all governing codes and ordinances. • Note to Installer - Be sure to leave these instructions with the Consumer. • Note to Consumer - Keep these instructions for future reference. • Service must be performed by a qualified installer. • Do not allow children on or in the appliance. Close supervision of children is necessary when the appliance is used near children. • Proper installation is the responsibility of the installer. HAIER APPLIANCES STACK KIT Visit our website at haierappliances.com/parts or in Canada visit haiercanada.ca/parts. Part Number GFA24KITL Accessory Complete Stack Kit KIT CONTENTS (HAIER APPLIANCES KIT # GFA24KITL) Screws (2) Long For dryer attachment Bracketstack (L) Bracketstack (R) Screws (6) Short For washer attachment TOOLS YOU WILL NEED ʄ Phillips screwdriver ʄ Level ʄ Gloves REQUIREMENTS FOR ALCOVE OR CLOSET INSTALLATION WARNING - Explosion Hazard Keep flammable materials and vapors, such as gasoline, away from dryer. Place dryer at least 18" (46 cm) above the floor for a garage installation. Failure to do so can result in death, explosion, or fire. • The dryer MUST be vented to the outdoors. • Minimum clearance between dryer cabinet and adjacent walls or other surfaces is: 0" either side 1" front and rear 1" top • The rear of the dryer should face a wall. • Consideration must be given to provide adequate clearance for installation and service. • Closet doors must be louvered or otherwise ventilated and have at least 60 square inches of open area. If the closet contains both a washer and a dryer, doors must contain a minimum of 120 square inches of open area. NOTE: WHEN THE EXHAUST DUCT IS LOCATED AT THE REAR OF THE DRYER, THE CONFIGURATION OF THE DUCTING MAY REQUIRE GREATER THAN 3" OF REAR CLEARANCE. MINIMUM CLEARANCE OTHER THAN ALCOVE OR CLOSET INSTALLATION Minimum clearance to combustible surfaces and for air opening are: 0" both sides, 1" rear and 1" top. The rear of the dryer should face a wall. Consideration must be given to provide adequate clearance for installation and service. INSTALLATION PREPARATION Remove the packaging. Flatten the product carton to use as a pad to lay the dryer down on its side. Continue using the carton to protect the finished floor in front of the installation location. 24 49-3000195
-
 1
1 -
2
-
3
-
4
-
5
-
6
-
7
-
8
-
9
-
10
-
11
-
12
-
13
-
14
-
15
-
16
-
17
-
18
-
 19
19 -
 20
20 -
 21
21 -
 22
22 -
 23
23 -
 24
24 -
 25
25 -
 26
26 -
 27
27 -
 28
28 -
 29
29 -
30
-
31
-
32
-
33
-
34
-
35
-
36
-
37
-
38
-
39
-
40
-
41
-
42
-
43
-
44
-
45
-
46
-
47
-
48
-
49
-
50
-
51
-
52
-
53
-
54
-
55
-
56
-
57
-
58
-
59
-
60
-
61
-
62
-
63
-
64
-
65
-
66
-
67
-
68
-
69
-
70
-
71
-
72
-
73
-
74
-
75
-
76
-
77
-
78
-
79
-
80
-
81
-
82
-
83
-
84
-
85
-
86
-
87
-
88
-
89
-
90
-
91
-
92
-
93
-
94
-
95
-
96
-
97
-
98
-
99
-
100
 |
 |
