HP 4500 HP Color LaserJet 4500 DN Printer - Getting Started Guide, not orderab - Page 18
To load Tray 2
 |
View all HP 4500 manuals
Add to My Manuals
Save this manual to your list of manuals |
Page 18 highlights
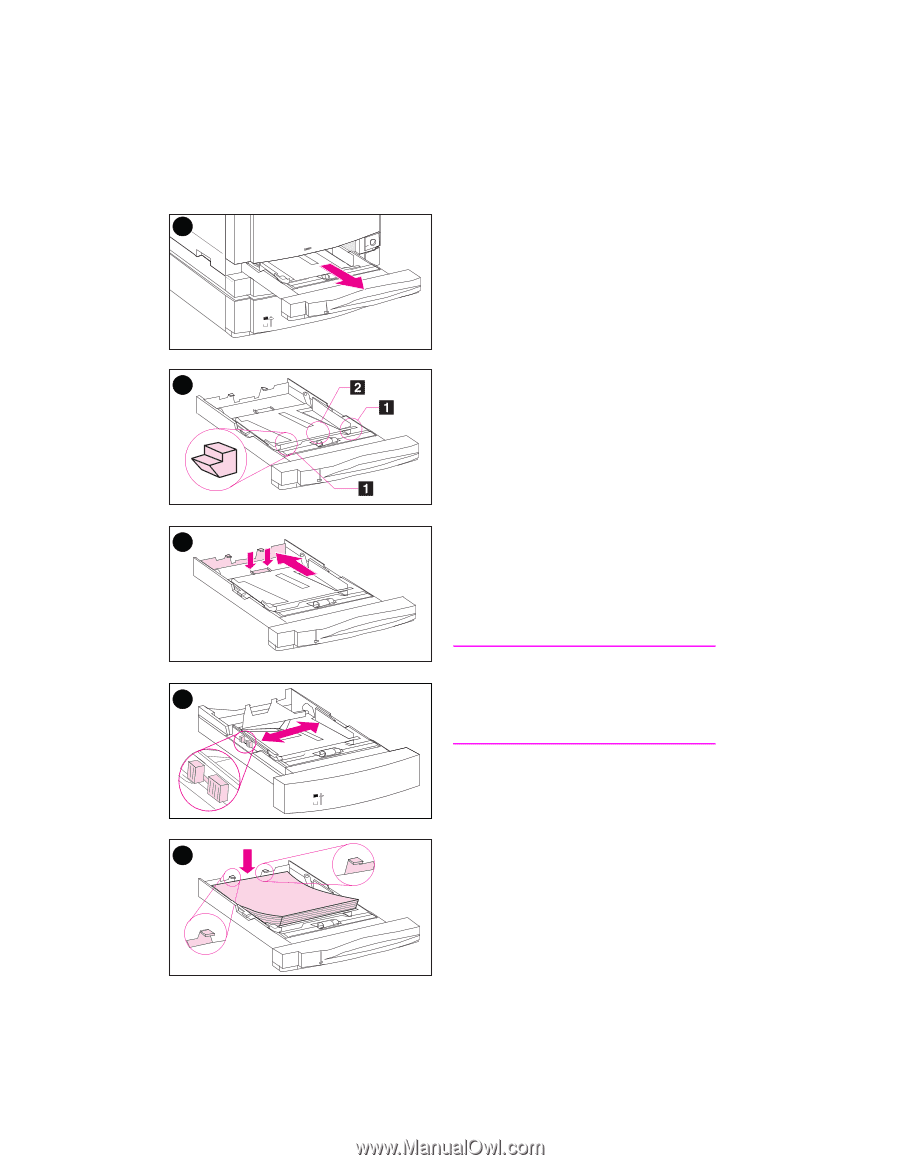
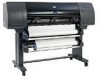
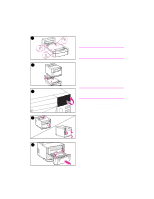
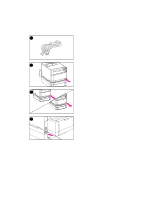
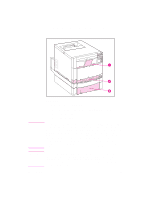
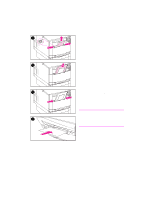
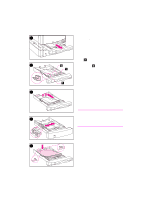
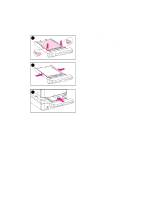
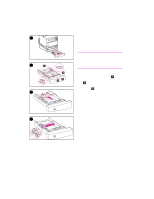
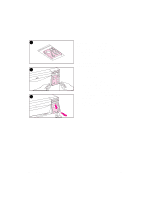
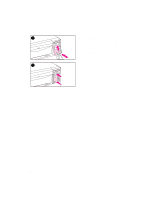
1 2 3 4 5 18 - Task 4 To load Tray 2: 1 Remove Tray 2 from the printer and place it on a flat surface. Remove the packing tape from the tray. 2 Slide out the orange packing spacers from both sides of Tray 2 ( [1] ). Then press the bottom plate and remove the middle packing spacer ( [2] ). 3 Set the rear media-length guide by squeezing the guide adjustment latch and sliding the back of the tray to the length of the media you are loading. 4 Slide the media-width guides all the way open. 5 Load media into Tray 2 with the print side facing down. Load up to 250 sheets of 75 g/m2 (20-lb) stock. Media capacity may vary with other media types. CAUTION Place the media under the Fill tabs. Do not load paper above the Fill tabs. (Fill tabs are displayed and circled in illustration 5.) EN
-
 1
1 -
2
-
3
-
4
-
5
-
6
-
7
-
8
-
9
-
10
-
11
-
12
-
 13
13 -
 14
14 -
 15
15 -
 16
16 -
 17
17 -
 18
18 -
 19
19 -
 20
20 -
 21
21 -
 22
22 -
 23
23 -
24
-
25
-
26
-
27
-
28
-
29
-
30
-
31
-
32
-
33
-
34
-
35
-
36
-
37
-
38
-
39
-
40
-
41
-
42
-
43
-
44
-
45
-
46
-
47
-
48
-
49
-
50
-
51
-
52
-
53
-
54
-
55
-
56
-
57
-
58
-
59
-
60
-
61
-
62
 |
 |