HP 4500 HP Color LaserJet 4500 DN Printer - Getting Started Guide, not orderab - Page 30
Task 7, Install the Imaging Drum
 |
View all HP 4500 manuals
Add to My Manuals
Save this manual to your list of manuals |
Page 30 highlights
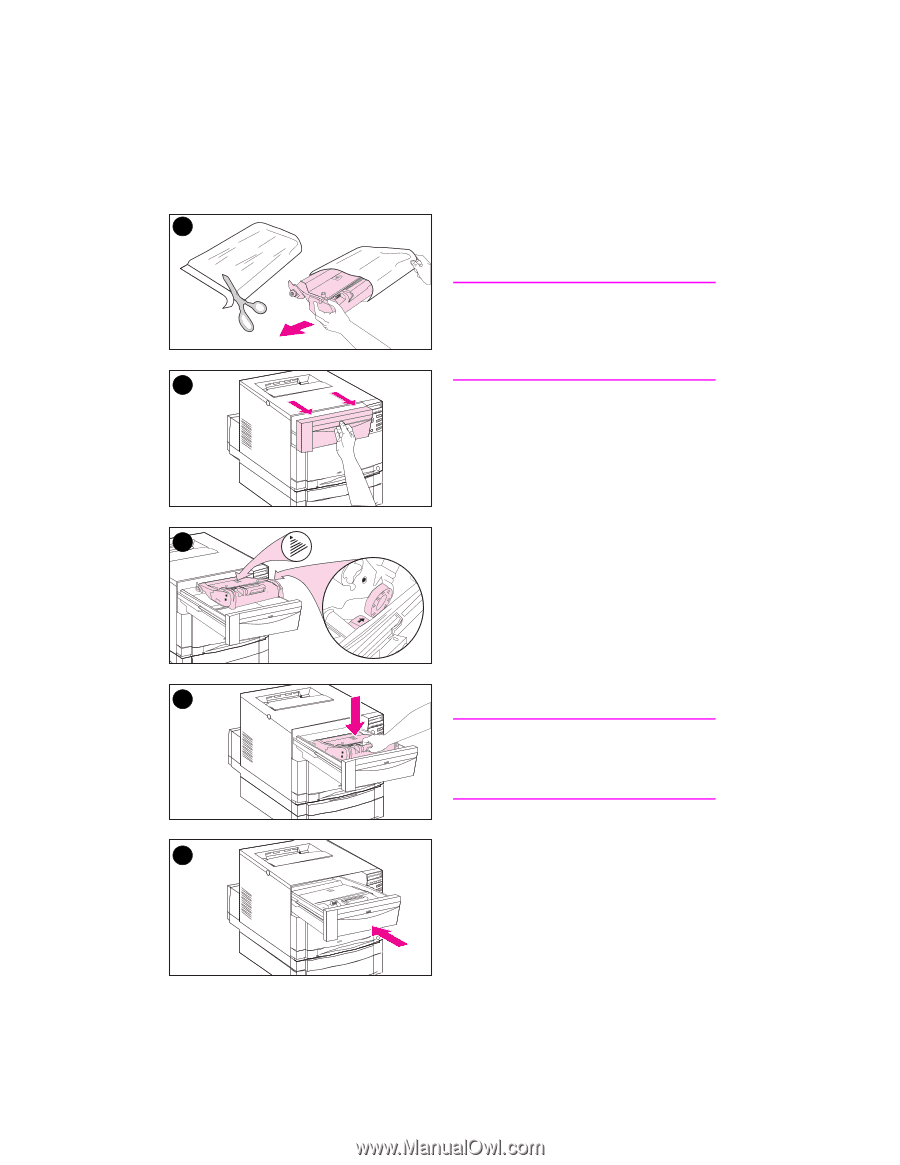
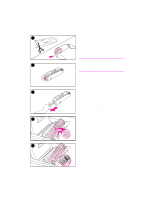
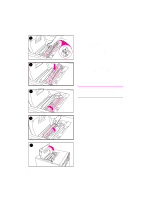
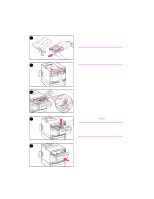
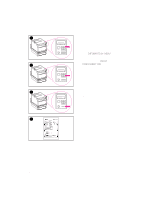
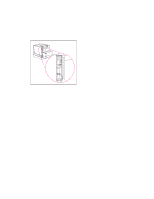
Task 7 Install the Imaging Drum 1 1 Locate the imaging drum package that came with the printer. Remove the imaging drum from the bag. CAUTION Avoid exposing the imaging drum to direct light. Exposure to light for more than 15 seconds can seriously damage the imaging drum. 2 2 On the printer, pull open the front upper drawer until it stops. 3 Align the imaging drum over the open drawer so that the arrow on top points to the rear of the printer, and the blue end cap on the side slides into the slot identified with the blue 3 arrow. 4 Slide the imaging drum down into place. 5 Push the front upper drawer shut. Wait while the printer runs an internal color calibration. The calibration takes a few minutes. When the printer is ready, the control 4 panel displays READY. CAUTION If you need to ship the printer in the future, remove the toner cartridges and imaging drum before shipping. 5 30 - Task 7 EN
-
 1
1 -
2
-
3
-
4
-
5
-
6
-
7
-
8
-
9
-
10
-
11
-
12
-
13
-
14
-
15
-
16
-
17
-
18
-
19
-
20
-
21
-
22
-
23
-
24
-
 25
25 -
 26
26 -
 27
27 -
 28
28 -
 29
29 -
 30
30 -
 31
31 -
 32
32 -
 33
33 -
 34
34 -
 35
35 -
36
-
37
-
38
-
39
-
40
-
41
-
42
-
43
-
44
-
45
-
46
-
47
-
48
-
49
-
50
-
51
-
52
-
53
-
54
-
55
-
56
-
57
-
58
-
59
-
60
-
61
-
62
 |
 |