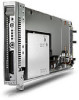
HP BladeSystem bc2800 HP BladeSystem PC Blade Switch Installation Guide - Page 30
Boot Image Download, This command will reset the whole system and disconnect your current session.
 |
View all HP BladeSystem bc2800 manuals
Add to My Manuals
Save this manual to your list of manuals |
Page 30 highlights
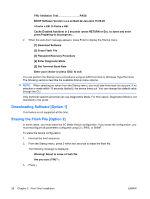
When the new image is downloaded, it is saved in the area allocated for the "not active" system image (image-2, as given in the example). The following is an example of the information that is displayed: console# copy tftp://176.215.31.3/file1.ros image Copy took 00:01:11 [hh:mm:ss] NOTE: Exclamation points indicate that a copying process is in progress. Each symbol (!) corresponds to 512 bytes transferred successfully. A period indicates that the copying process timed out. Many periods in a row indicate that the copying process failed. 6. Type boot system image-2 to select the image to use during next boot. (image-2, as given in the example). The following is an example of the information that is displayed: console# boot system image-2 console# 7. Type reload. The following message is displayed: console# reload This command will reset the whole system and disconnect your current session. Do you want to continue (y/n) [n]? 8. Type y to reboot the PC Blade Switch. The device reboots. Boot Image Download Loading a new boot image from the TFTP server and programming it into the flash updates the boot image. The boot image is loaded when the device is powered on. To download a boot image to a TFTP server: 1. Ensure that an IP address is configured on one of the PC Blade Switch VLANs and the TFTP server can be pinged. 2. Ensure that the Boot Image file (rfb file) to download is saved on the TFTP server. 3. Type show version to verify which software version is currently running on the device. The following is an example of the information that is displayed: console# show version SW version 1.0.0.42 (date 22-Jul-2005 time 13:42:41) Boot version 1.0.0.18 (date 01-Jun-2005 time 15:12:20) HW version 00.00.01 (date 01-May-2005 time 12:12:20) 24 Chapter 2 First Time Installation ENWW
-
 1
1 -
2
-
3
-
4
-
5
-
6
-
7
-
8
-
9
-
10
-
11
-
12
-
13
-
14
-
15
-
16
-
17
-
18
-
19
-
20
-
21
-
22
-
23
-
24
-
 25
25 -
 26
26 -
 27
27 -
 28
28 -
 29
29 -
 30
30 -
 31
31 -
 32
32 -
 33
33 -
 34
34 -
 35
35 -
36
-
37
-
38
-
39
 |
 |