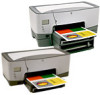
HP Color Inkjet cp1160 HP Color Inkjet Printer CP1160 - (English) User Guide f - Page 92
printing posters, panel, setting, Paper, Quality, Paper Type, Print Quality, Layout
 |
View all HP Color Inkjet cp1160 manuals
Add to My Manuals
Save this manual to your list of manuals |
Page 92 highlights
printing posters 1. If necessary, open the Page Setup dialog box and set the page size, scaling, or orientation. 2. Open the Print dialog box, then select the following settings: panel Paper Type/ Quality Layout setting • Paper Type: Automatic or Plain Paper • Print Quality: Normal • Multiple Page Per Sheet Menu: Tiling • Tiling Size: 2×2, 3×3, or 4×4 3. Select any other desired print settings. 4. After selecting the print settings, click OK. 5. After the poster has printed, trim the edges on the sheets then tape the sheets together. For basic printing instructions, see printing a document. If you encounter a problem while printing, see troubleshooting. 84
-
 1
1 -
2
-
3
-
4
-
5
-
6
-
7
-
8
-
9
-
10
-
11
-
12
-
13
-
14
-
15
-
16
-
17
-
18
-
19
-
20
-
21
-
22
-
23
-
24
-
25
-
26
-
27
-
28
-
29
-
30
-
31
-
32
-
33
-
34
-
35
-
36
-
37
-
38
-
39
-
40
-
41
-
42
-
43
-
44
-
45
-
46
-
47
-
48
-
49
-
50
-
51
-
52
-
53
-
54
-
55
-
56
-
57
-
58
-
59
-
60
-
61
-
62
-
63
-
64
-
65
-
66
-
67
-
68
-
69
-
70
-
71
-
72
-
73
-
74
-
75
-
76
-
77
-
78
-
79
-
80
-
81
-
82
-
83
-
84
-
85
-
86
-
 87
87 -
 88
88 -
 89
89 -
 90
90 -
 91
91 -
 92
92 -
 93
93 -
 94
94 -
 95
95 -
 96
96 -
 97
97 -
98
-
99
-
100
-
101
-
102
-
103
-
104
-
105
-
106
-
107
-
108
-
109
-
110
-
111
-
112
-
113
-
114
-
115
-
116
-
117
-
118
-
119
-
120
-
121
-
122
-
123
-
124
-
125
-
126
-
127
-
128
-
129
-
130
-
131
-
132
-
133
-
134
-
135
-
136
-
137
-
138
-
139
-
140
-
141
-
142
-
143
-
144
-
145
-
146
-
147
-
148
-
149
-
150
-
151
-
152
-
153
-
154
-
155
-
156
-
157
-
158
-
159
-
160
-
161
-
162
-
163
-
164
-
165
-
166
-
167
-
168
-
169
-
170
-
171
-
172
-
173
-
174
-
175
-
176
-
177
-
178
-
179
-
180
-
181
-
182
-
183
-
184
-
185
-
186
-
187
-
188
-
189
-
190
-
191
-
192
-
193
-
194
-
195
-
196
-
197
-
198
-
199
-
200
-
201
-
202
-
203
-
204
-
205
-
206
-
207
-
208
-
209
-
210
-
211
-
212
-
213
-
214
-
215
-
216
 |
 |

84
1.
If necessary, open the Page Setup dialog box and set the page size,
scaling, or orientation.
2.
Open the Print dialog box, then select the following settings:
3.
Select any other desired print settings.
4.
After selecting the print settings, click
OK
.
5.
After the poster has printed, trim the edges on the sheets then tape the
sheets together.
For basic printing instructions, see
printing a document
.
If you encounter a problem while printing, see
troubleshooting
.
printing posters
panel
setting
Paper
Type/
Quality
•
Paper Type
:
Automatic
or
Plain Paper
•
Print Quality
:
Normal
Layout
•
Multiple Page Per Sheet Menu
:
Tiling
•
Tiling Size
:
2×2
,
3×3
, or
4×4