HP Cp1700 Service Manual - Page 72
guidelines for maintaining printheads, identifying the expiration dates
 |
View all HP Cp1700 manuals
Add to My Manuals
Save this manual to your list of manuals |
Page 72 highlights
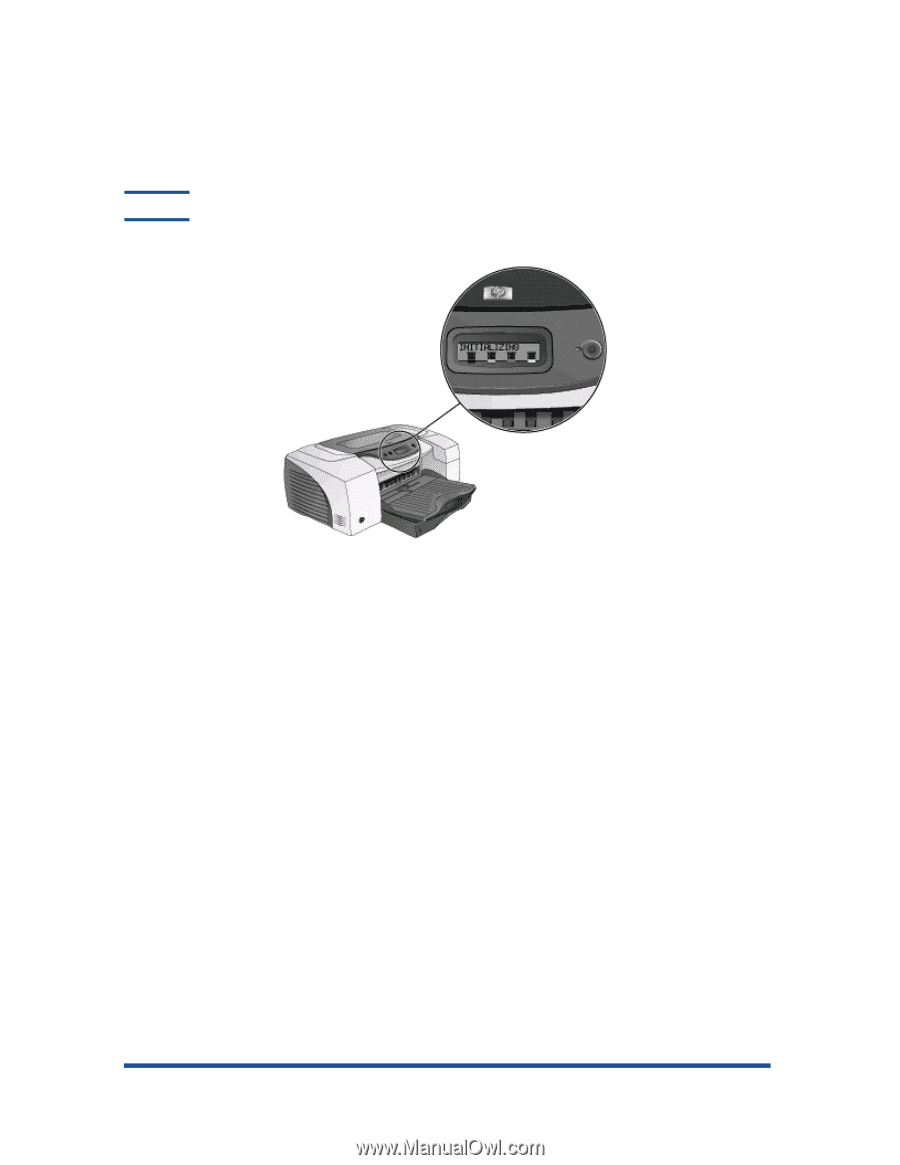
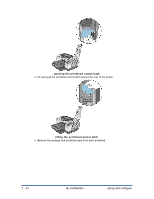
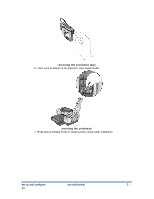
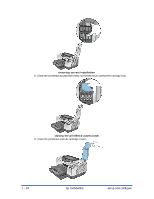
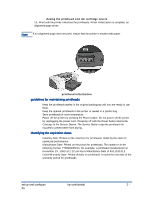
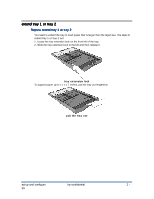
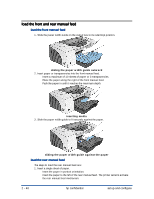
closing the printhead and ink cartridge covers 10. Wait until the printer initializes the printheads. When initialization is complete, an alignment page prints. Note If an alignment page does not print, ensure that the printer is loaded with paper. printhead initialization guidelines for maintaining printheads •=Keep the printheads sealed in the original packaging until you are ready to use them. •=Keep the opened printheads in the printer or sealed in a plastic bag. •=Store printheads at room temperature. •=Power off the printer by pressing the Power button. Do not power off the printer by unplugging the power cord. Powering off with the Power button returns the Carriage to the Service Station. The Service Station caps the printhead ink nozzles to prevent them from drying. identifying the expiration dates •=Install-by Date: Printed on the retail box for printheads. Install by this date for optimized performance. •=Manufacture Date: Printed on the pouch for printheads. The number is in the following format: YYMMDDhhmm. For example, a printhead manufactured on November 19, 1999 at 1:12 pm has a Manufacture Date of 9911191312. •=End-of-Warranty Date: Printed directly on printheads. It marks the end date of the warranty period for printheads set up and configure hp confidential 2 - 35
-
 1
1 -
2
-
3
-
4
-
5
-
6
-
7
-
8
-
9
-
10
-
11
-
12
-
13
-
14
-
15
-
16
-
17
-
18
-
19
-
20
-
21
-
22
-
23
-
24
-
25
-
26
-
27
-
28
-
29
-
30
-
31
-
32
-
33
-
34
-
35
-
36
-
37
-
38
-
39
-
40
-
41
-
42
-
43
-
44
-
45
-
46
-
47
-
48
-
49
-
50
-
51
-
52
-
53
-
54
-
55
-
56
-
57
-
58
-
59
-
60
-
61
-
62
-
63
-
64
-
65
-
66
-
 67
67 -
 68
68 -
 69
69 -
 70
70 -
 71
71 -
 72
72 -
 73
73 -
 74
74 -
 75
75 -
 76
76 -
 77
77 -
78
-
79
-
80
-
81
-
82
-
83
-
84
-
85
-
86
-
87
-
88
-
89
-
90
-
91
-
92
-
93
-
94
-
95
-
96
-
97
-
98
-
99
-
100
-
101
-
102
-
103
-
104
-
105
-
106
-
107
-
108
-
109
-
110
-
111
-
112
-
113
-
114
-
115
-
116
-
117
-
118
-
119
-
120
-
121
-
122
-
123
-
124
-
125
-
126
-
127
-
128
-
129
-
130
-
131
-
132
-
133
-
134
-
135
-
136
-
137
-
138
-
139
-
140
-
141
-
142
-
143
-
144
-
145
-
146
-
147
-
148
-
149
-
150
-
151
-
152
-
153
-
154
-
155
-
156
-
157
-
158
-
159
-
160
-
161
-
162
-
163
-
164
-
165
-
166
-
167
-
168
-
169
-
170
-
171
-
172
-
173
-
174
-
175
-
176
-
177
-
178
-
179
-
180
-
181
-
182
-
183
-
184
-
185
-
186
-
187
-
188
-
189
-
190
-
191
-
192
-
193
-
194
-
195
-
196
-
197
-
198
-
199
-
200
-
201
-
202
-
203
-
204
-
205
-
206
-
207
-
208
-
209
-
210
-
211
-
212
-
213
-
214
-
215
-
216
-
217
-
218
-
219
-
220
-
221
-
222
-
223
-
224
-
225
-
226
-
227
-
228
-
229
-
230
-
231
-
232
-
233
-
234
-
235
-
236
-
237
-
238
-
239
-
240
-
241
-
242
-
243
-
244
-
245
-
246
-
247
-
248
-
249
-
250
-
251
-
252
-
253
-
254
-
255
-
256
-
257
-
258
-
259
-
260
-
261
-
262
-
263
-
264
-
265
-
266
-
267
-
268
-
269
-
270
-
271
-
272
-
273
-
274
-
275
-
276
-
277
-
278
-
279
-
280
-
281
-
282
-
283
-
284
-
285
-
286
-
287
-
288
-
289
-
290
 |
 |